This tutorial is a community contribution and is not supported by the Open WebUI team. It serves only as a demonstration on how to customize Open WebUI for your specific use case. Want to contribute? Check out the contributing tutorial.
🪣 Switching to S3 Storage
This guide provides instructions on how to switch the default local storage in Open WebUI config to Amazon S3.
Prerequisites
In order to follow this tutorial, you must have the following:
- An active AWS account
- An active AWS Access Key and Secret Key
- IAM permissions in AWS to create and put objects in S3
- Docker installed on your system
What is Amazon S3
Direct from AWS' website:
"Amazon S3 is an object storage service that offers industry-leading scalability, data availability, security, and performance. Store and protect any amount of data for a range of use cases, such as data lakes, websites, cloud-native applications, backups, archive, machine learning, and analytics. Amazon S3 is designed for 99.999999999% (11 9's) of durability, and stores data for millions of customers all around the world."
To learn more about S3, visit: Amazon S3's Official Page
How to Set-Up
1. Required environment variables
In order to configure this option, you need to gather the following environment variables:
| Open-WebUI Environment Variable | Example Value |
|---|---|
S3_ACCESS_KEY_ID | ABC123 |
S3_SECRET_ACCESS_KEY | SuperSecret |
S3_ENDPOINT_URL | https://s3.us-east-1.amazonaws.com |
S3_REGION_NAME | us-east-1 |
S3_BUCKET_NAME | my-awesome-bucket-name |
- S3_ACCESS_KEY_ID: This is an identifier for your AWS account's access key. You get this from the AWS Management Console or AWS CLI when creating an access key.
- S3_SECRET_ACCESS_KEY: This is the secret part of your AWS access key pair. It's provided when you create an access key in AWS and should be stored securely.
- S3_ENDPOINT_URL: This URL directs to your S3 service endpoint and can typically be found in AWS service documentation or account settings.
- S3_REGION_NAME: This is the AWS region where your S3 bucket resides, like "us-east-1". You can identify this from the AWS Management Console under your S3 bucket details.
- S3_BUCKET_NAME: This is the unique name of your S3 bucket, which you specified when creating the bucket in AWS.
For a complete list of the available S3 endpoint URLs, see: Amazon S3 Regular Endpoints
See all the Cloud Storage configuration options in the Open-WebUI Cloud Storage Config documentation.
2. Run Open-WebUI
Before we launch our instance of Open-WebUI, there is one final environment variable called STORAGE_PROVIDER we need to set. This variable tells Open-WebUI which provider you want to use. By default, STORAGE_PROVIDER is empty which means Open-WebUI uses local storage.
| Storage Provider | Type | Description | Default |
|---|---|---|---|
local | str | Defaults to local storage if an empty string (' ') is provided | Yes |
s3 | str | Uses S3 client library and related environment variables mentioned in Amazon S3 Storage | No |
gcs | str | Uses GCS client library and related environment variables mentioned in Google Cloud Storage | No |
To use Amazon S3, we need to set STORAGE_PROVIDER to "S3" along with all the environment variables we gathered in Step 1 (S3_ACCESS_KEY_ID, S3_SECRET_ACCESS_KEY, S3_ENDPOINT_URL, S3_REGION_NAME, S3_BUCKET_NAME).
Here, I'm also setting the ENV to "dev", which will allow us to see the Open-WebUI Swagger docs so we can further test and confirm the S3 storage set-up is working as expected.
docker run -d \
  -p 3000:8080 \
  -v open-webui:/app/backend/data \
  -e STORAGE_PROVIDER="s3" \
  -e S3_ACCESS_KEY_ID="ABC123" \
  -e S3_SECRET_ACCESS_KEY="SuperSecret" \
  -e S3_ENDPOINT_URL="https://s3.us-east-1.amazonaws.com" \
  -e S3_REGION_NAME="us-east-1" \
  -e S3_BUCKET_NAME="my-awesome-bucket-name" \
  -e ENV="dev" \
  --name open-webui \
  ghcr.io/open-webui/open-webui:main
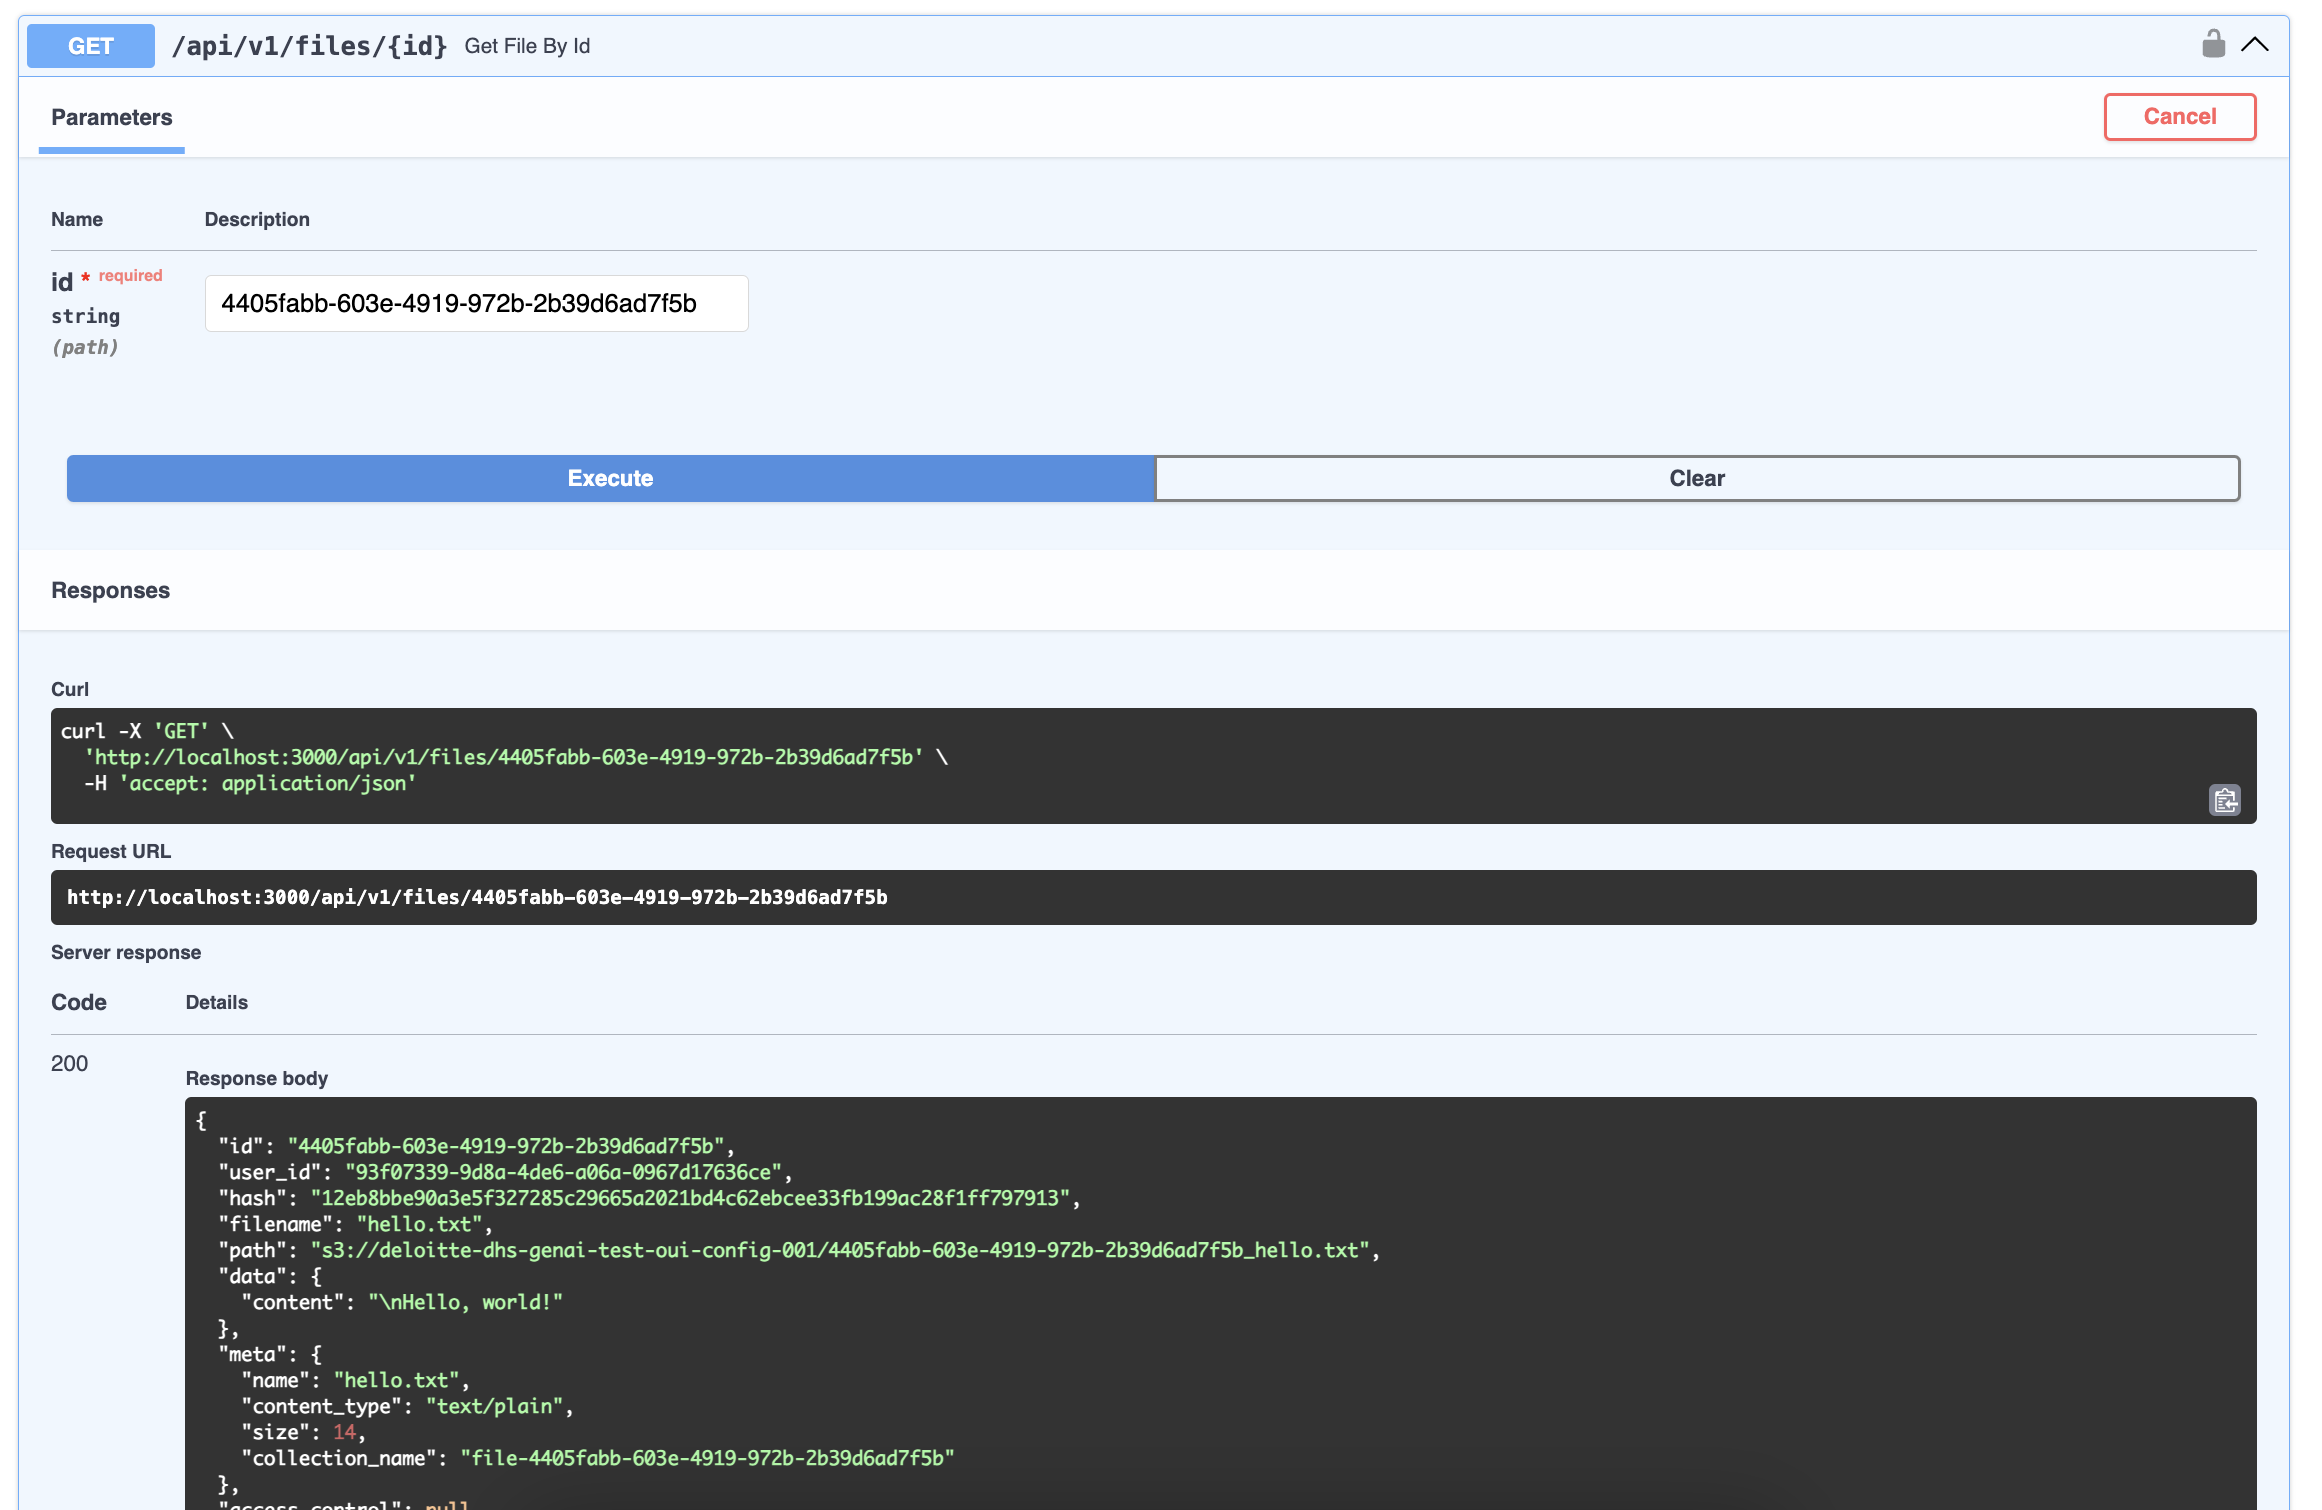
3. Test the set-up
Now that we have Open-WebUI running, let's upload a simple Hello, World text file and test our set-up.
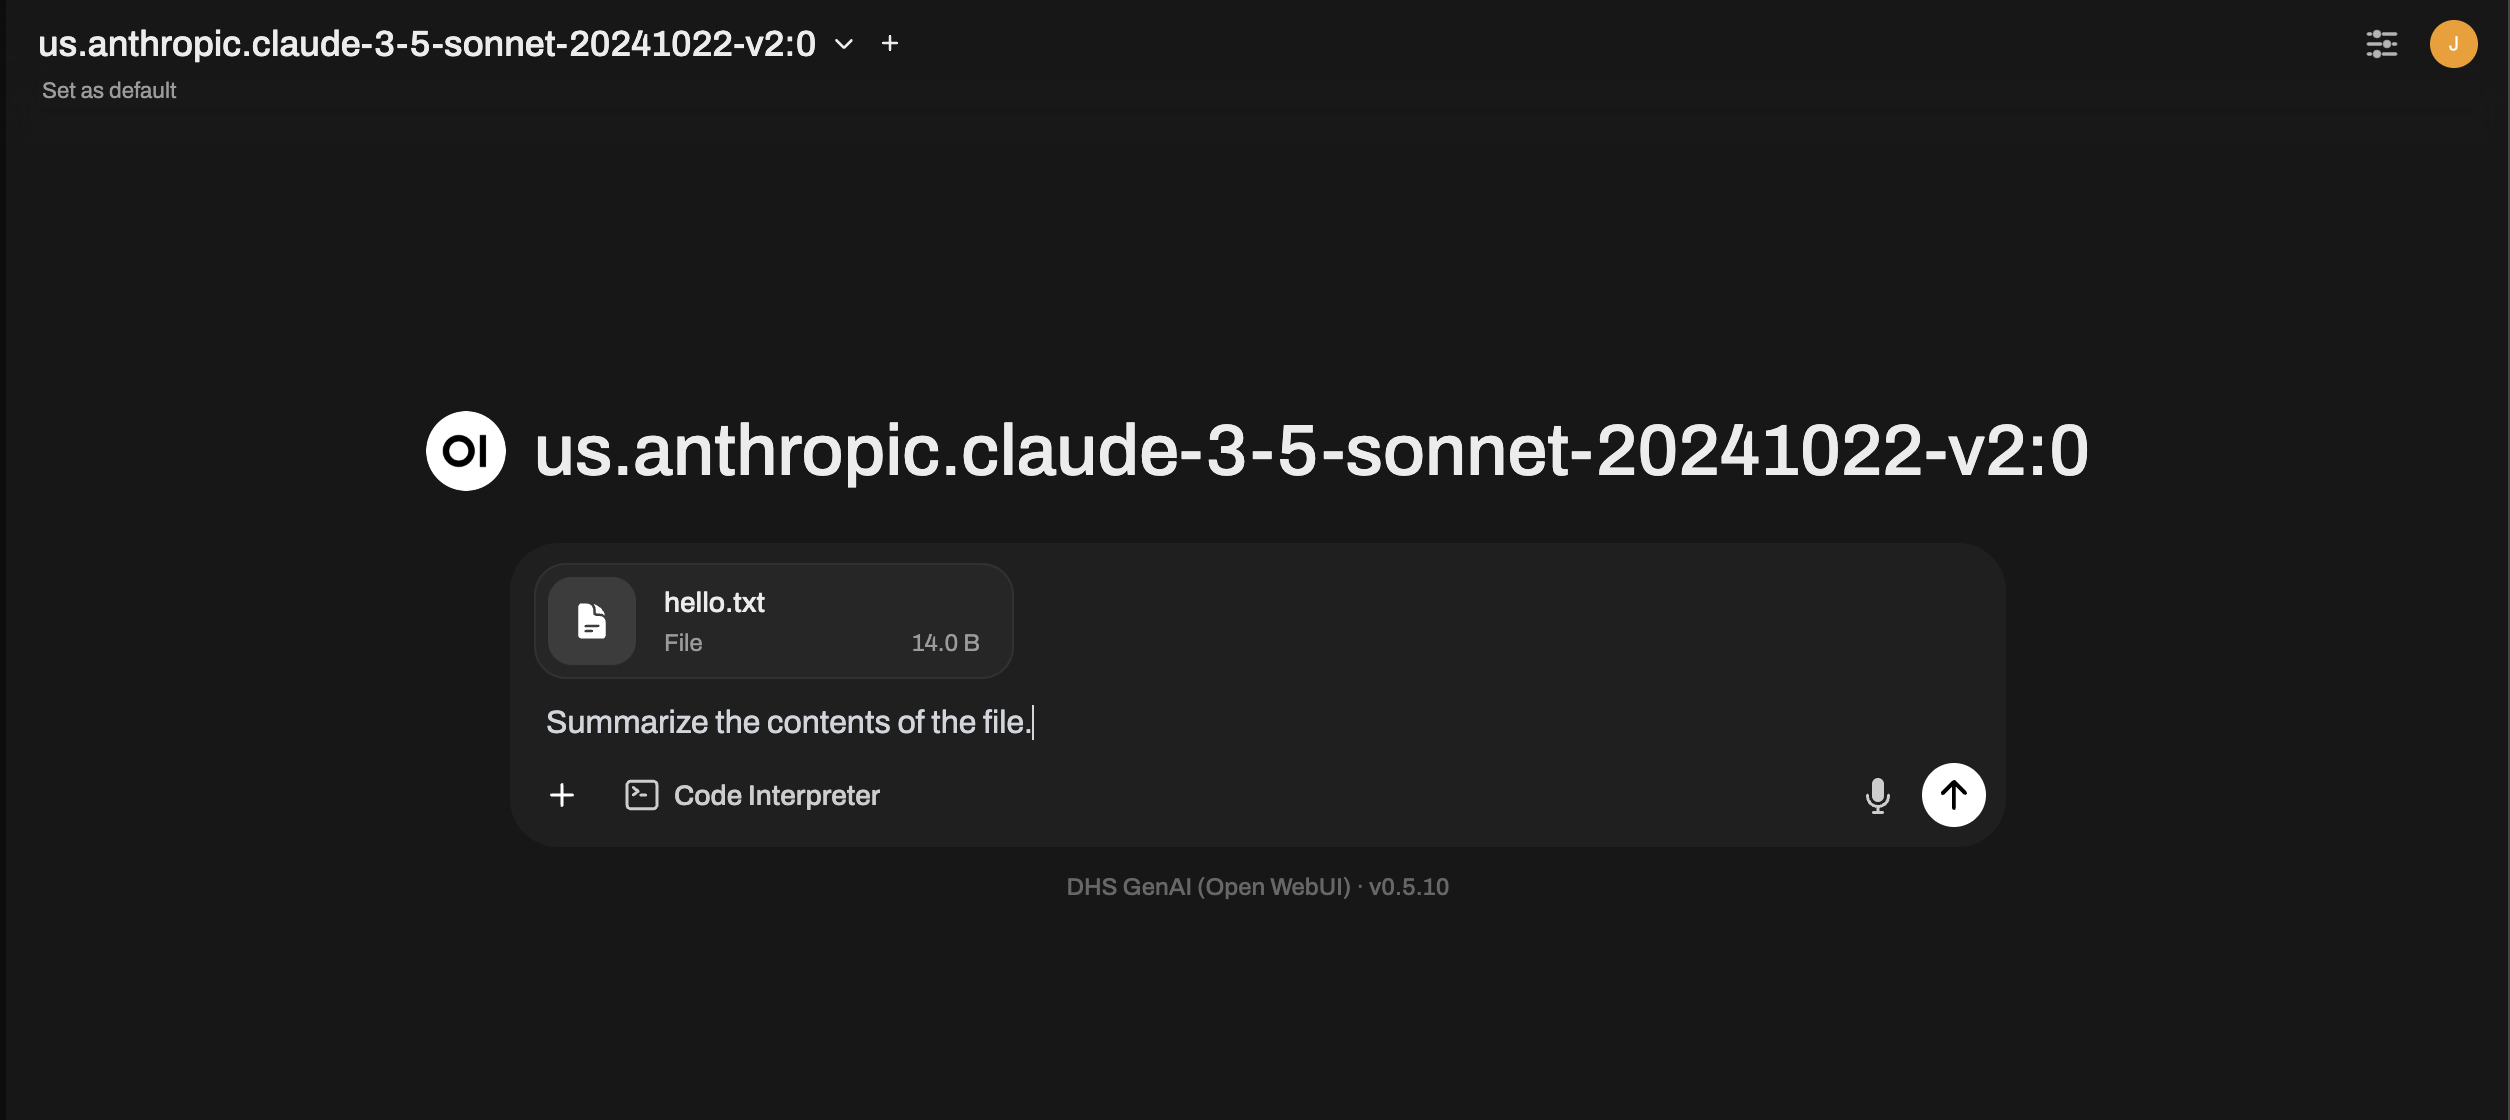
And confirm that we're getting a response from the selected LLM.

Great! Looks like everything is worked as expected in Open-WebUI. Now let's verify that the text file was indeed uploaded and stored in the specified S3 bucket. Using the AWS Management Console, we can see that there is now a file in the S3 bucket. In addition to the name of the file we uploaded (hello.txt) you can see the object's name was appended with a unique ID. This is how Open-WebUI tracks all the files uploaded.

Using Open-WebUI's swagger docs, we can get all the information related to this file using the /api/v1/files/{id} endpoint and passing in the unique ID (4405fabb-603e-4919-972b-2b39d6ad7f5b).