Starting With OpenAI
Overview
Open WebUI makes it easy to connect and use OpenAI and other OpenAI-compatible APIs. This guide will walk you through adding your API key, setting the correct endpoint, and selecting models — so you can start chatting right away.
Important: Protocols, Not Providers
Open WebUI is a protocol-centric platform. While we provide first-class support for OpenAI models, we do so exclusively through the OpenAI Chat Completions API protocol.
We do not support proprietary, non-standard APIs such as OpenAI’s new stateful Responses API. Instead, Open WebUI focuses on universal standards that are shared across dozens of providers. This approach keeps Open WebUI fast, stable, and truly open-sourced.
Step 1: Get Your OpenAI API Key
To use OpenAI models (such as GPT-4 or o3-mini), you need an API key from a supported provider.
You can use:
- OpenAI directly (https://platform.openai.com/account/api-keys)
- Azure OpenAI
- Anthropic (via their OpenAI-compatible endpoint)
- Google Gemini (via their OpenAI-compatible endpoint)
- DeepSeek (https://platform.deepseek.com/)
- MiniMax (https://platform.minimax.io/)
- Proxies & Aggregators: OpenRouter, LiteLLM, Helicone.
- Local Servers: Ollama, Llama.cpp, LM Studio, vLLM, LocalAI.
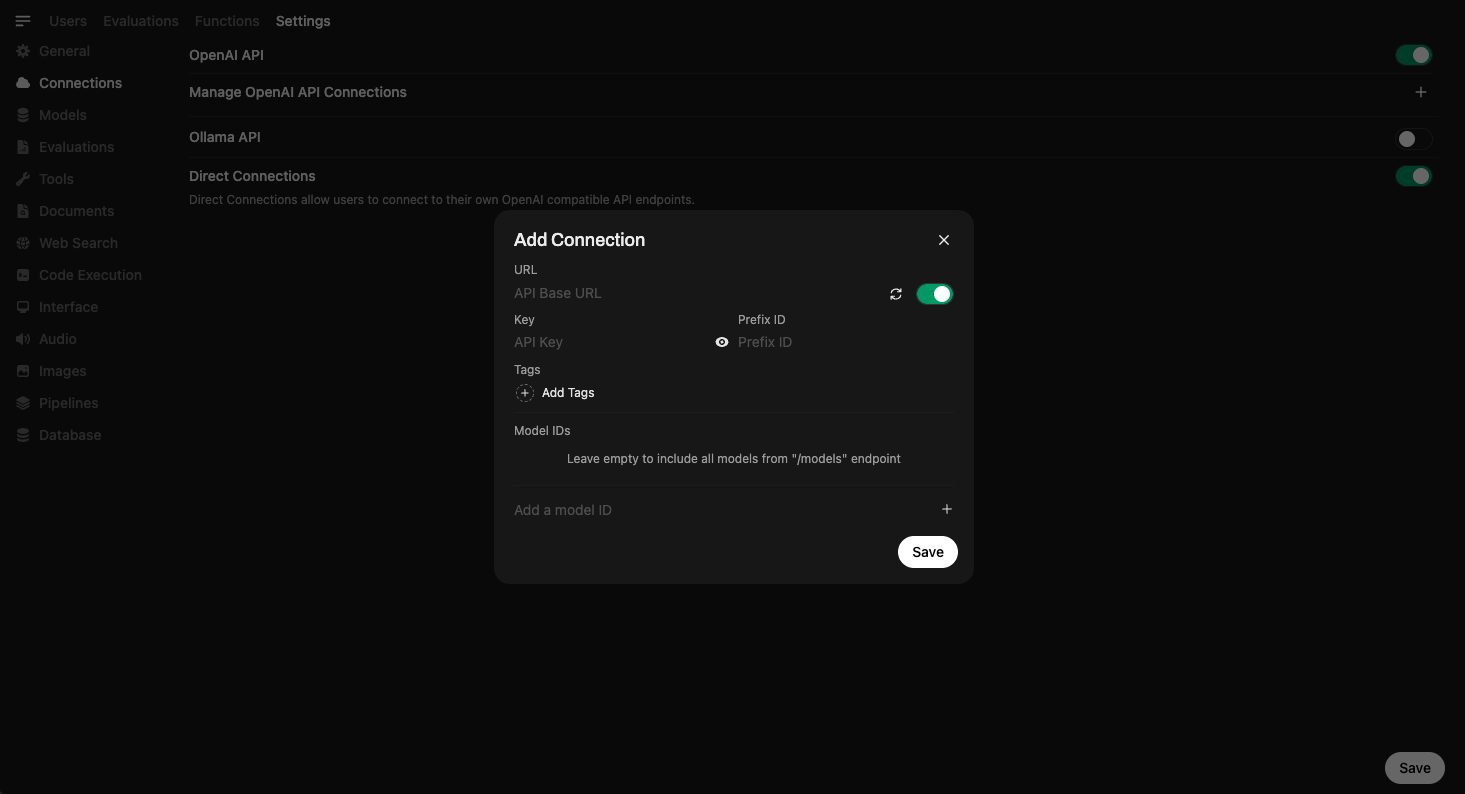
Step 2: Add the API Connection in Open WebUI
Once Open WebUI is running:
- Go to the ⚙️ Admin Settings.
- Navigate to Connections > OpenAI > Manage (look for the wrench icon).
- Click ➕ Add New Connection.
- Standard / Compatible
- Azure OpenAI
Use this for OpenAI, DeepSeek, MiniMax, OpenRouter, LocalAI, FastChat, Helicone, LiteLLM, etc.
- Connection Type: External
- URL:
https://api.openai.com/v1(or your provider's endpoint) - API Key: Your secret key (usually starts with
sk-...)
For Microsoft Azure OpenAI deployments.
- Find Provider Type and click the button labeled OpenAI to switch it to Azure OpenAI.
- URL: Your Azure Endpoint (e.g.,
https://my-resource.openai.azure.com). - API Version: e.g.,
2024-02-15-preview. - API Key: Your Azure API Key.
- Model IDs (Deployments): You must add your specific Deployment Names here (e.g.,
my-gpt4-deployment).
Advanced Configuration
-
Model IDs (Filter):
- Default (Empty): Auto-detects all available models from the provider.
- Set: Acts as an Allowlist. Only the specific model IDs you enter here will be visible to users. Use this to hide older or expensive models.
OpenRouter RecommendationWhen using OpenRouter, we highly recommend:
- Use an allowlist (add specific Model IDs). OpenRouter exposes thousands of models, which can clutter your model selector and slow down the admin panel if not filtered.
- Enable Model Caching (
Settings > Connections > Cache Base Model ListorENABLE_BASE_MODELS_CACHE=True). Without caching, page loads can take 10-15+ seconds on first visit due to querying a large number of models. See the Performance Guide for more details.
MiniMax WhitelistingSome providers, like MiniMax, do not expose their models via a
/modelsendpoint. For these providers, you must manually add the Model ID (e.g.,MiniMax-M2.1) to the Model IDs (Filter) list for them to appear in the UI. -
Prefix ID:
- If you connect multiple providers that have models with the same name (e.g., two providers both offering
llama3), add a prefix here (e.g.,groq/) to distinguish them. The model will appear asgroq/llama3.
- If you connect multiple providers that have models with the same name (e.g., two providers both offering
- Click Save ✅.
This securely stores your credentials.
If your API provider is slow to respond or you're experiencing timeout issues, you can adjust the model list fetch timeout:
# Increase timeout for slow networks (default is 10 seconds)
AIOHTTP_CLIENT_TIMEOUT_MODEL_LIST=15
If you've saved an unreachable URL and the UI becomes unresponsive, see the Model List Loading Issues troubleshooting guide for recovery options.
Step 3: Start Using Models
Once your connection is saved, you can start using models right inside Open WebUI.
🧠 You don’t need to download any models — just select one from the Model Selector and start chatting. If a model is supported by your provider, you’ll be able to use it instantly via their API.
Here’s what model selection looks like:
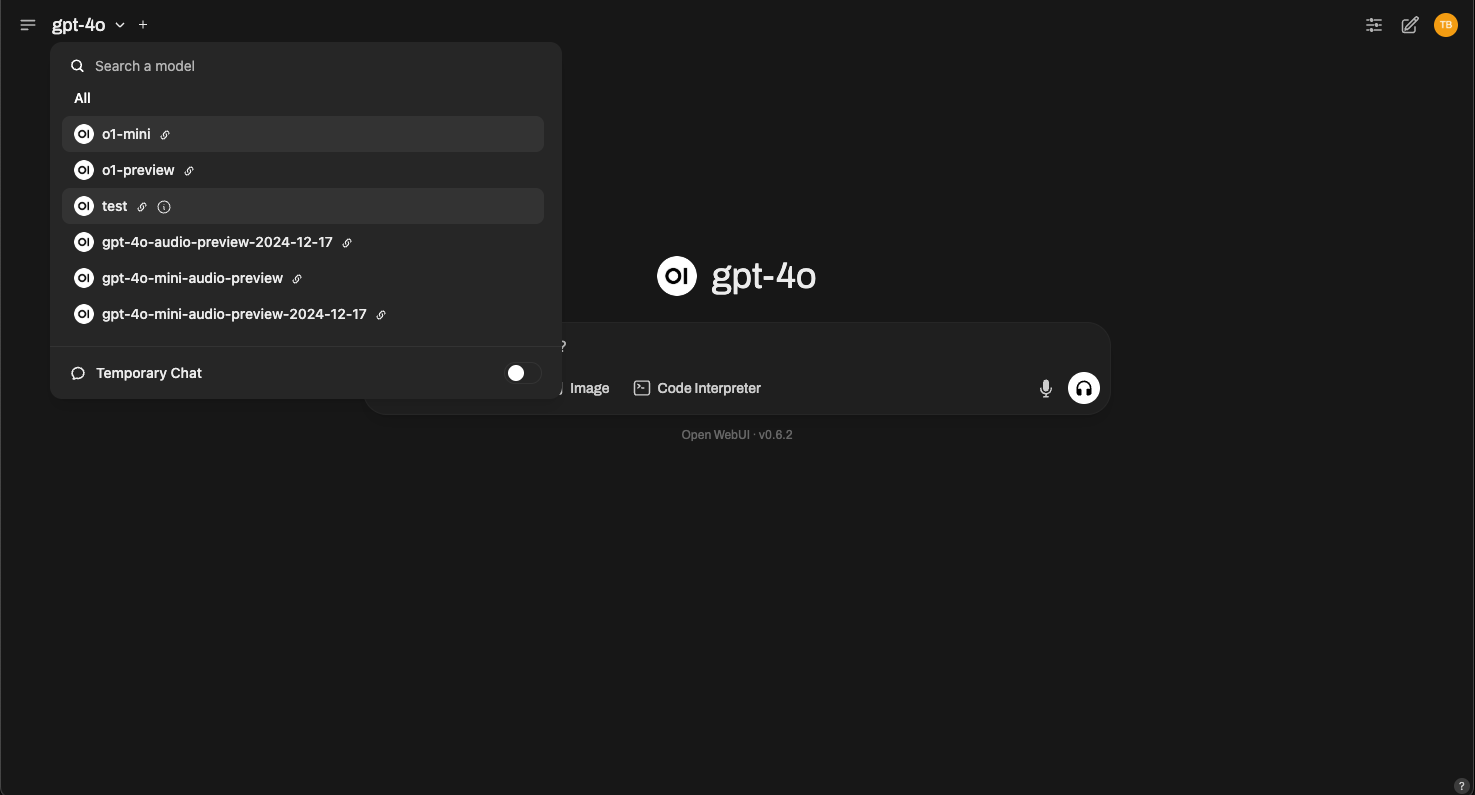
Simply choose GPT-4, o3-mini, or any compatible model offered by your provider.
All Set!
That’s it! Your OpenAI-compatible API connection is ready to use.
With Open WebUI and OpenAI, you get powerful language models, an intuitive interface, and instant access to chat capabilities — no setup headaches.
If you run into issues or need additional support, visit our help section.
Happy prompting! 🎉