Starting With Ollama
Overview
Open WebUI makes it easy to connect and manage your Ollama instance. This guide will walk you through setting up the connection, managing models, and getting started.
Protocol-Oriented Design
Open WebUI is designed to be Protocol-Oriented. This means that when we refer to "Ollama", we are specifically referring to the Ollama API Protocol (typically running on port 11434).
While some tools may offer basic compatibility, this connection type is optimized for the unique features of the Ollama service, such as native model management and pulling directly through the Admin UI.
If your backend is primarily based on the OpenAI standard (like LocalAI or Docker Model Runner), we recommend using the OpenAI-Compatible Server Guide for the best experience.
Step 1: Setting Up the Ollama Connection
Once Open WebUI is installed and running, it will automatically attempt to connect to your Ollama instance. If everything goes smoothly, you’ll be ready to manage and use models right away.
However, if you encounter connection issues, the most common cause is a network misconfiguration. You can refer to our connection troubleshooting guide for help resolving these problems.
Step 2: Managing Your Ollama Instance
To manage your Ollama instance in Open WebUI, follow these steps:
- Go to Admin Settings in Open WebUI.
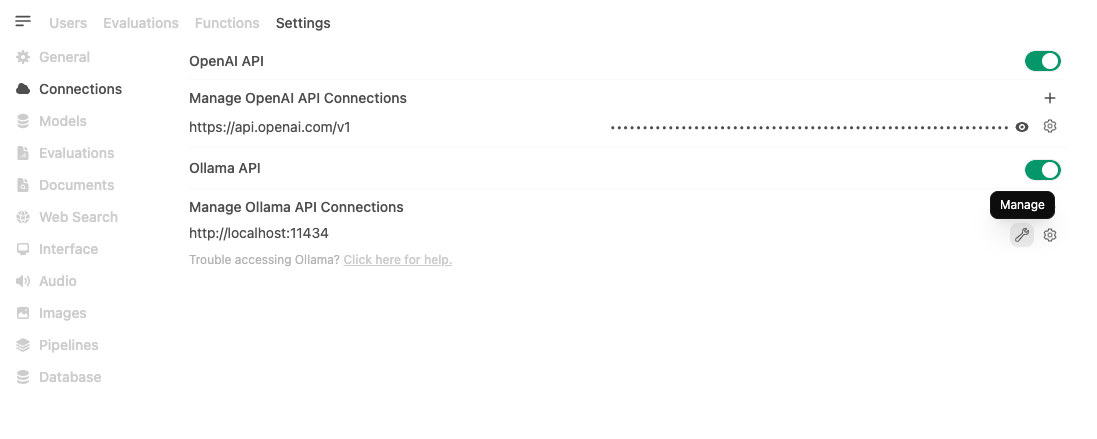
- Navigate to Connections > Ollama > Manage (click the wrench icon). From here, you can download models, configure settings, and manage your connection to Ollama.
Connection Tips
- Docker Users: If Ollama is running on your host machine, use
http://host.docker.internal:11434as the URL. - Load Balancing: You can add multiple Ollama instances. Open WebUI will distribute requests between them using a random selection strategy, providing basic load balancing for concurrent users.
- Note: To enable this, ensure the Model IDs match exactly across instances. If you use Prefix IDs, they must be identical (or empty) for the models to merge into a single entry.
Advanced Configuration
- Prefix ID: If you have multiple Ollama instances serving the same model names, use a prefix (e.g.,
remote/) to distinguish them. - Model IDs (Filter): Make specific models visible by listing them here (whitelist). Leave empty to show all.
When using multiple Ollama instances (especially across networks), connection delays can occur if an endpoint is unreachable. You can adjust the timeout using:
# Lower the timeout (default is 10 seconds) for faster failover
AIOHTTP_CLIENT_TIMEOUT_MODEL_LIST=3
If you've saved an unreachable URL and can't access Settings to fix it, see the Model List Loading Issues troubleshooting guide.
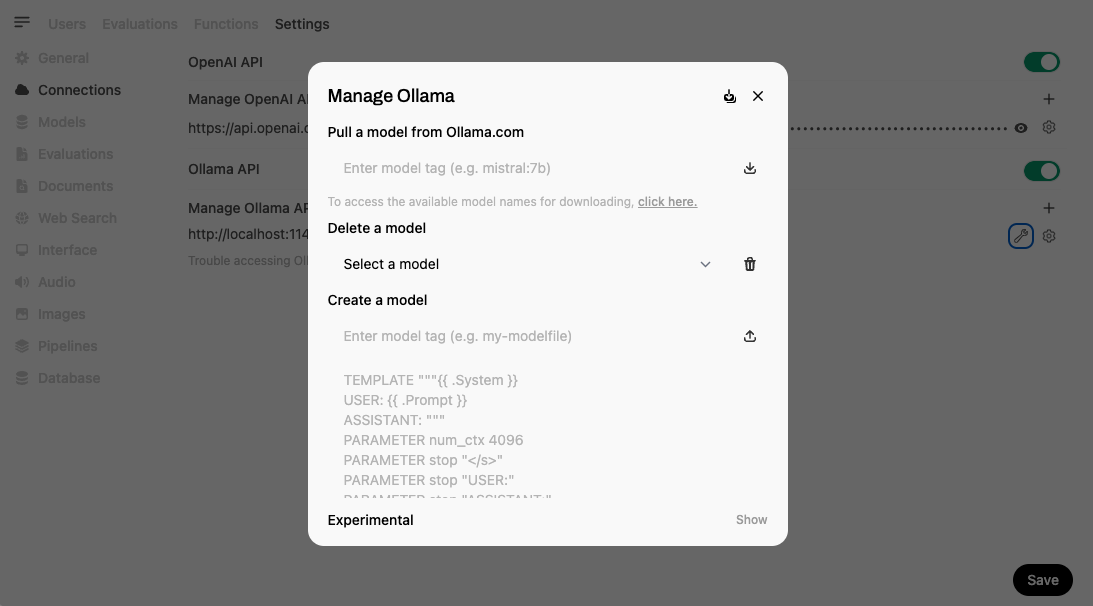
Here’s what the management screen looks like:


A Quick and Efficient Way to Download Models
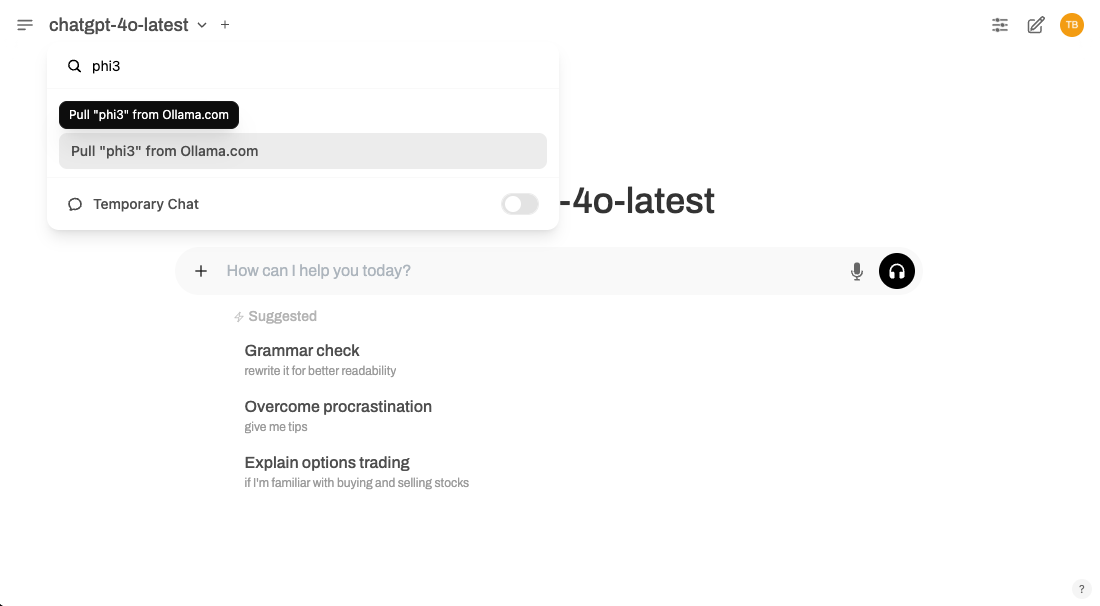
If you’re looking for a faster option to get started, you can download models directly from the Model Selector. Simply type the name of the model you want, and if it’s not already available, Open WebUI will prompt you to download it from Ollama.
Here’s an example of how it works:

This method is perfect if you want to skip navigating through the Admin Settings menu and get right to using your models.
Using Reasoning / Thinking Models
If you're using reasoning models like DeepSeek-R1 or Qwen3 that output thinking/reasoning content in <think>...</think> tags, you'll need to configure Ollama with a reasoning parser for proper display.
Configure the Reasoning Parser
Start Ollama with the --reasoning-parser flag:
ollama serve --reasoning-parser deepseek_r1
This ensures that thinking blocks are properly separated from the final answer and displayed in a collapsible section in Open WebUI.
The deepseek_r1 parser works for most reasoning models, including Qwen3. If you encounter issues, see our Reasoning & Thinking Models Guide for alternative parsers and detailed troubleshooting steps.
All Set!
That’s it! Once your connection is configured and your models are downloaded, you’re ready to start using Ollama with Open WebUI. Whether you’re exploring new models or running your existing ones, Open WebUI makes everything simple and efficient.
If you run into any issues or need more guidance, check out our help section for detailed solutions. Enjoy using Ollama! 🎉