Functions
Overview
Pipe Functions are Python plugins that appear as selectable models in your chat sidebar. Behind the scenes, they can do anything Python can do: integrate a proprietary AI provider, control your smart home with natural language, query a database, run a search engine, build a multi-step agent, generate charts, automate workflows, or serve as a calculator. No LLM is even required. If you can write the logic in Python, it becomes a "model" users can chat with.
This guide walks you through importing and enabling your first Pipe Function, using the Anthropic Pipe as an example.
If your provider supports the OpenAI Chat Completions API protocol (OpenAI, Google Gemini, Mistral, Groq, DeepSeek, and many more), you don't need a Function. Just add a connection. Anthropic also has native support via their OpenAI-compatible endpoint; see the Anthropic guide. Functions are for everything else: proprietary APIs, custom agents, or entirely novel interfaces.
Step 1: Find a Function
- Go to the Community Function Library.
- Browse or search for the function you need. There are thousands of community-contributed functions for AI providers, search tools, home automation, productivity utilities, content filters, and more.
- Click Get on the function you want to import.
Importing directly from the community library requires a registered account at openwebui.com.
Step 2: Import to Open WebUI
A modal will appear:
- Enter your Open WebUI instance URL (e.g.,
http://localhost:3000). - Click Import to Open WebUI.
You'll be redirected to the Function Editor within your running instance.

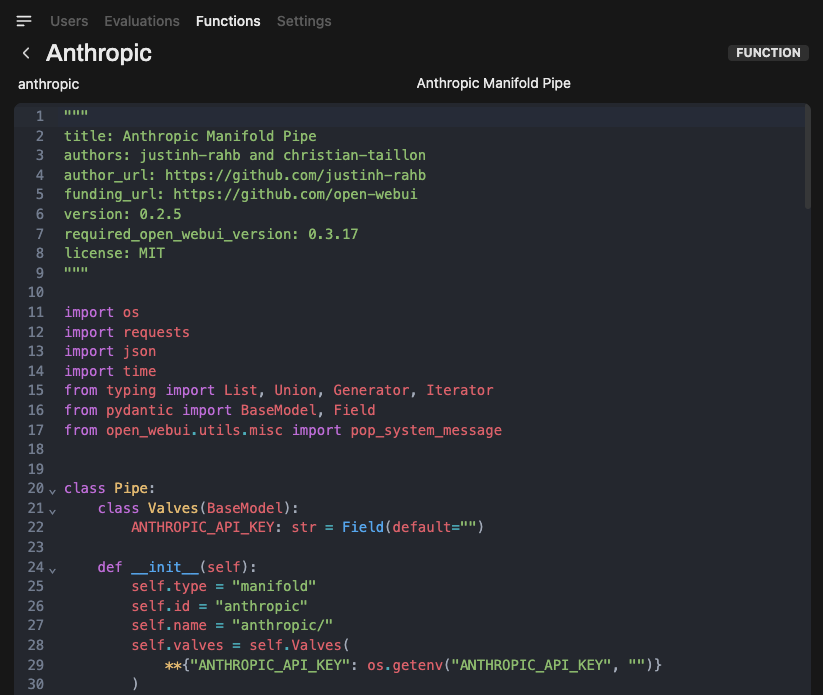
Step 3: Review & Save
Review the Python source code in the editor. Functions execute arbitrary code on your server, so only install from sources you trust.
Click Save to add the function to your instance.
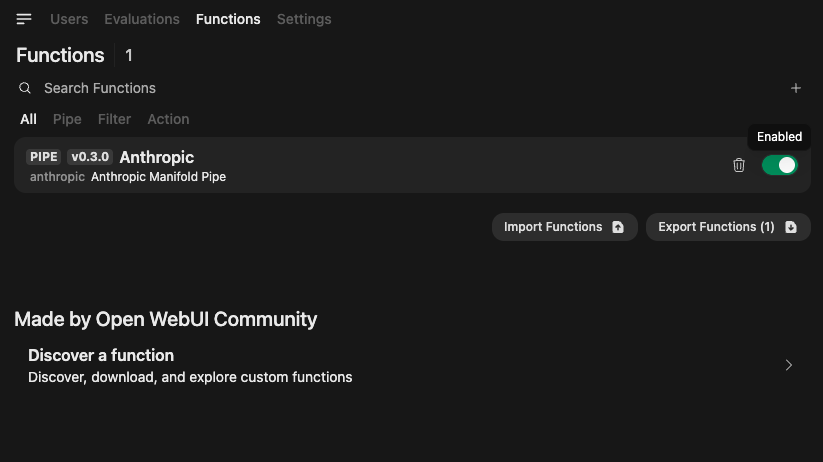
Step 4: Enable the Function
New functions are disabled by default. Toggle the switch to enable it.
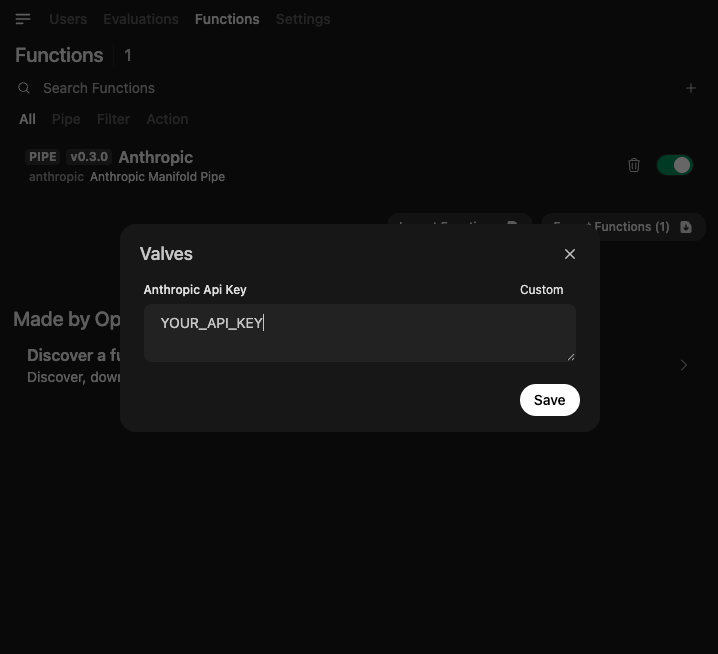
Step 5: Configure Valves
Many functions require configuration, such as API keys or endpoint URLs:
- Click the ⚙️ gear icon next to the toggle switch.
- Enter the required values (e.g., your Anthropic API key).
- Save.
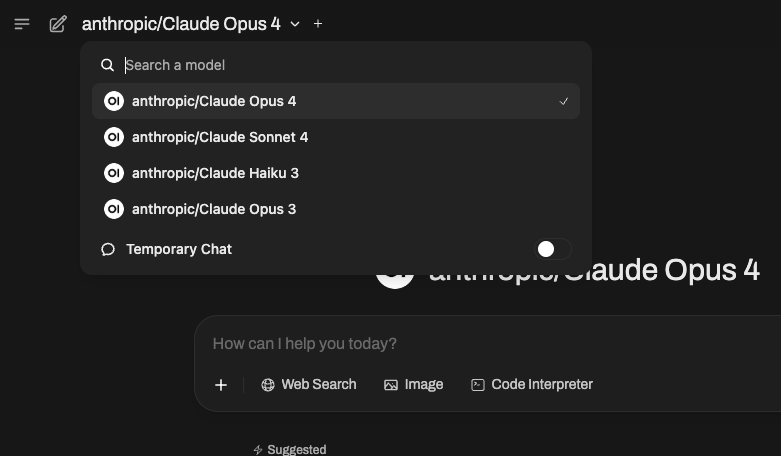
Step 6: Start Chatting
The function now appears as a selectable model in the chat sidebar. Select it and start chatting.
Functions run arbitrary Python on your server. Always review code before enabling, and only import from trusted sources. For details, see the Plugin Security Warning.
Learn More
- Functions Overview: Architecture, types, and the full range of possibilities.
- Pipe Function Guide: Build custom models, agents, and non-LLM interfaces.
- Filter Function Guide: Intercept, translate, moderate, and log messages.
- Action Function Guide: Add interactive buttons for export, workflows, and more.
- Community Library: Browse thousands of community functions.