Getting Started with Functions
Overview
Did you know Open WebUI can connect to almost anything—not just OpenAI-compatible APIs?
Thanks to Pipe Functions, you can bring in services that don’t support the OpenAI API (like Anthropic, Home Assistant, Google Search, or any Python codebase). No restrictions on LLMs or AI models: if you can automate it in Python, you can turn it into a plugin for Open WebUI!
This guide walks you through setting up your first Pipe Function, using the Anthropic Pipe plugin as an example.
What are Pipe Functions?
Pipe Functions are “bring-your-own-model (or tool)” plugins:
- Act like models: They show up as selectable models in your Open WebUI sidebar.
- Flexible: Integrate with any backend, API, or workflow—no OpenAI compatibility required.
- No LLM required: You can build plugins for search, home automation, weather, databases, or whatever you like.
- Pure Python: All logic is Python code that runs directly inside your WebUI (so be cautious with what you enable!).
Step 1: Find a Pipe Function to Try
Functions are powerful tools, and the community has created thousands of them! You can browse, search, and import them directly from our community hub.
To search and import functions directly from Open WebUI Community, you must be logged in with a registered community account.
- Go to Open WebUI Community Search.
- Explore the library! You can find functions for:
- New Providers: Anthropic, Google Gemini, Groq.
- Tools: Web Search, Calculator, Home Assistant control.
- Utilities: Auto-tagging, content filtering, and more.
- Pro Tip: Even if you don't find exactly what you need, you can use existing functions as templates to build your own!
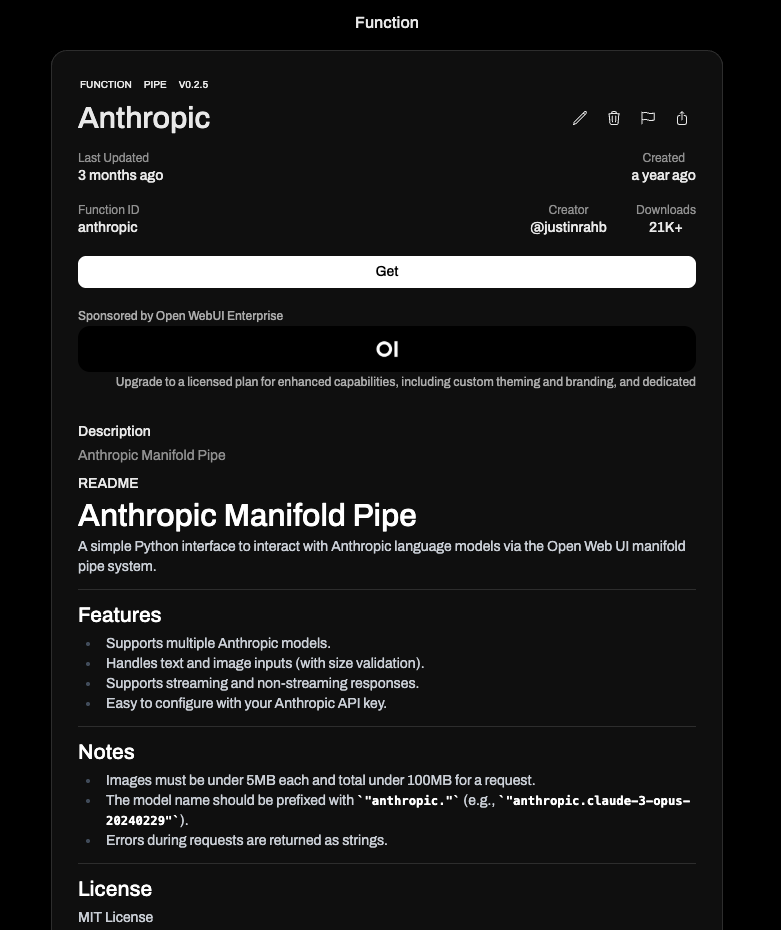
For this guide, let's try integrating Anthropic (Claude models):
- Locate the Anthropic Pipe function.
- Click Get.
Step 2: Import the Function to Open WebUI
A modal will appear:
- Enter your Open WebUI URL (e.g.,
http://localhost:3000) in the prompt. - Click Import to Open WebUI.

You’ll be redirected directly to the Functions Editor within your running instance of Open WebUI.
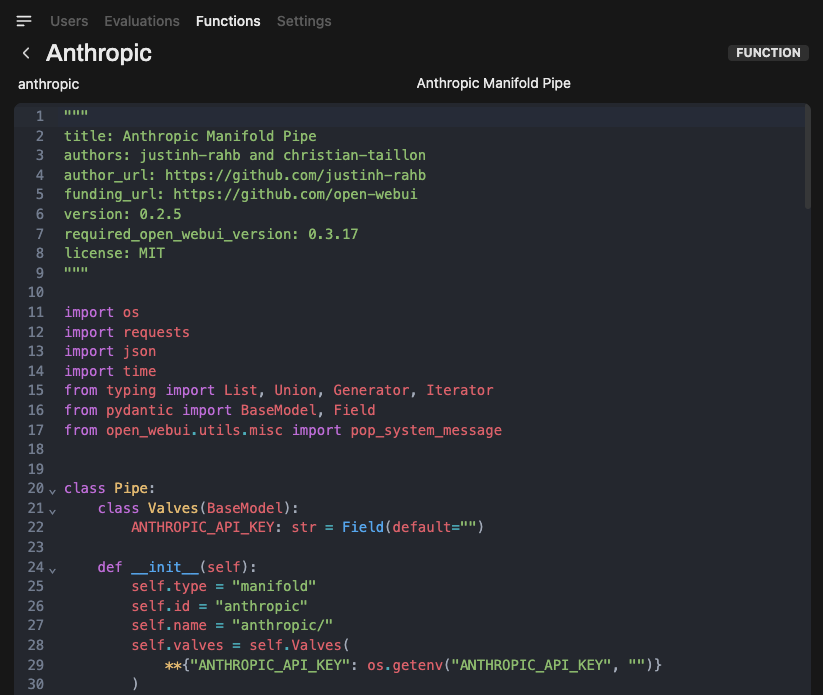
Step 3: Review & Save
- You’ll see all of the Pipe Function’s Python code and configuration.
- Important: Functions run arbitrary Python! Review the code for safety, and only install from sources you trust.
- If you’re happy with the code, click Save to add it to your instance.
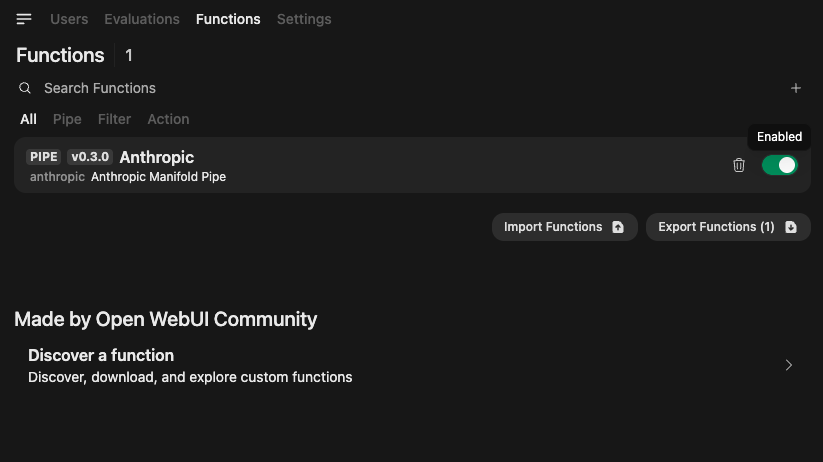
Step 4: Enable the Function
Your new Pipe Function is now available, but must be enabled:
- Switch the toggler to enable the function.
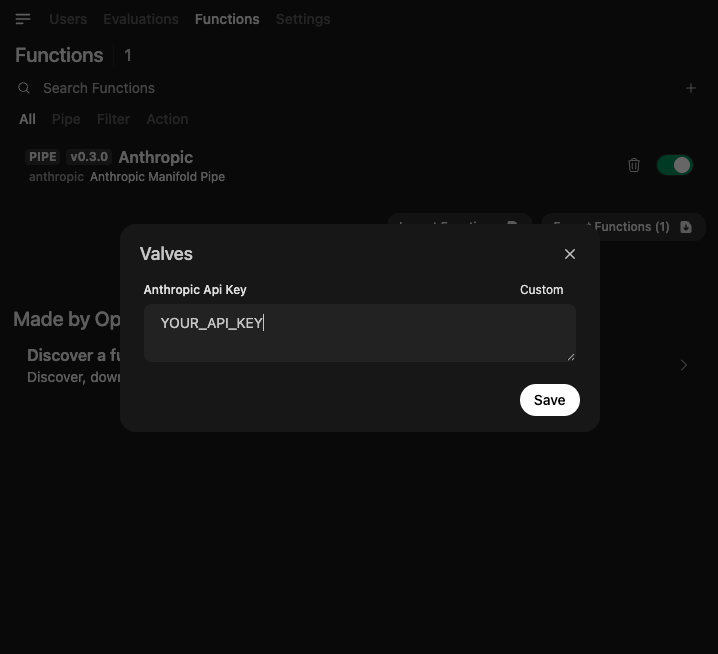
Step 5: Enter any Required API Keys via Valves
Some functions need credentials (like Anthropic’s API key):
-
Click on the Gear icon next to the switch to open the Valves configuration.
-
Input your required API key(s) for the Pipe Function.
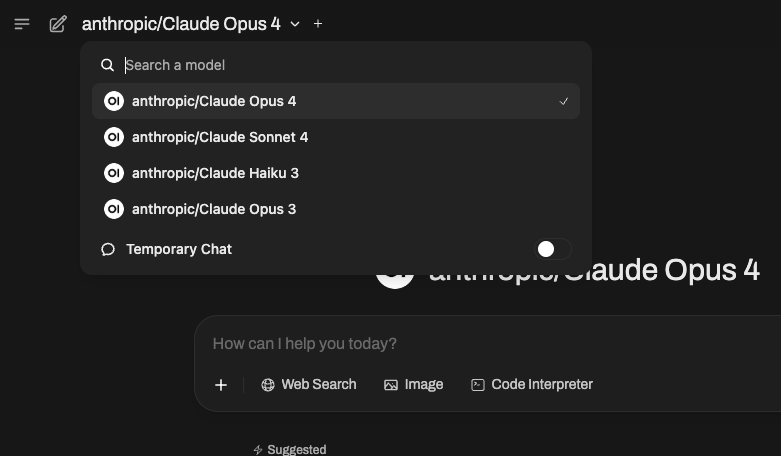
Step 6: Start Using Your New Plugin!
- The new function now appears as a selectable “model” in the chat interface.
- Select
Anthropic(or whatever you installed), and start chatting!
🎉 That’s It—You’re Plugged Into Anything!
- Pipe Functions open Open WebUI to any API, model, or automation—not just OpenAI-compatible endpoints.
- Think beyond LLMs: Integrate tools, APIs, local scripts, or your entire smart home.
⚠️ Security Notes
- Always review function code before enabling.
- Only use plugins from trusted sources.
- You have the power to enhance (or break!) your WebUI—use responsibly.
Next Steps & Learn More
Ready to build your own? Check out our detailed development guides:
-
Functions Overview: Learn the basics of the Functions system.
-
Pipes Guide: Create custom model providers and logic pipelines.
-
Filters Guide: Intercept and modify messages (Input/Output guards).
-
Actions Guide: Add buttons/actions to messages.
-
Tools Guide: Build tools for LLMs to use (RAG, APIs).
-
Community Registry: Browse hundreds of community-made functions.
🚀 With Pipe Functions, your Open WebUI is limited only by your imagination!