This tutorial is a community contribution and is not supported by the Open WebUI team. It serves only as a demonstration on how to customize Open WebUI for your specific use case. Want to contribute? Check out the contributing tutorial.
Helicone Integration with Open WebUI
Helicone is an open-source LLM observability platform for developers to monitor, debug, and improve production-ready applications, including your Open WebUI deployment.
By enabling Helicone, you can log LLM requests, evaluate and experiment with prompts, and get instant insights that helps you push changes to production with confidence.
- Real-time monitoring with consolidated view across model types: Monitor both local Ollama models and cloud APIs through a single interface
- Request visualization and replay: See exactly what prompts were sent to each model in Open WebUI and the outputs generated by the LLMs for evaluation
- Local LLM performance tracking: Measure response times and throughput of your self-hosted models
- Usage analytics by model: Compare usage patterns between different models in your Open WebUI setup
- User analytics to understand interaction patterns
- Debug capabilities to troubleshoot issues with model responses
- Cost tracking for your LLM usage across providers
How to integrate Helicone with OpenWebUI
Step 1: Create a Helicone account and generate your API key
Create a Helicone account and log in to generate an API key.
— Make sure to generate a write only API key. This ensures you only allow logging data to Helicone without read access to your private data.
Step 2: Create an OpenAI account and generate your API key
Create an OpenAI account and log into OpenAI's Developer Portal to generate an API key.
Step 3: Run your Open WebUI application using Helicone's base URL
To launch your first Open WebUI application, use the command from Open WebUI docs and include Helicone's API BASE URL so you can query and monitor automatically.
   # Set your environment variables
   export HELICONE_API_KEY=<YOUR_API_KEY>
   export OPENAI_API_KEY=<YOUR_OPENAI_API_KEY>

   # Run Open WebUI with Helicone integration
   docker run -d -p 3000:8080 \
     -e OPENAI_API_BASE_URL="https://oai.helicone.ai/v1/$HELICONE_API_KEY" \
     -e OPENAI_API_KEY="$OPENAI_API_KEY" \
     --name open-webui \
     ghcr.io/open-webui/open-webui
If you already have a Open WebUI application deployed, go to the Admin Panel > Settings > Connections and click on the + sign for "Managing OpenAI API Connections". Update the following properties:
- Your
API Base URLwould behttps://oai.helicone.ai/v1/<YOUR_HELICONE_API_KEY> - The
API KEYwould be your OpenAI API key.
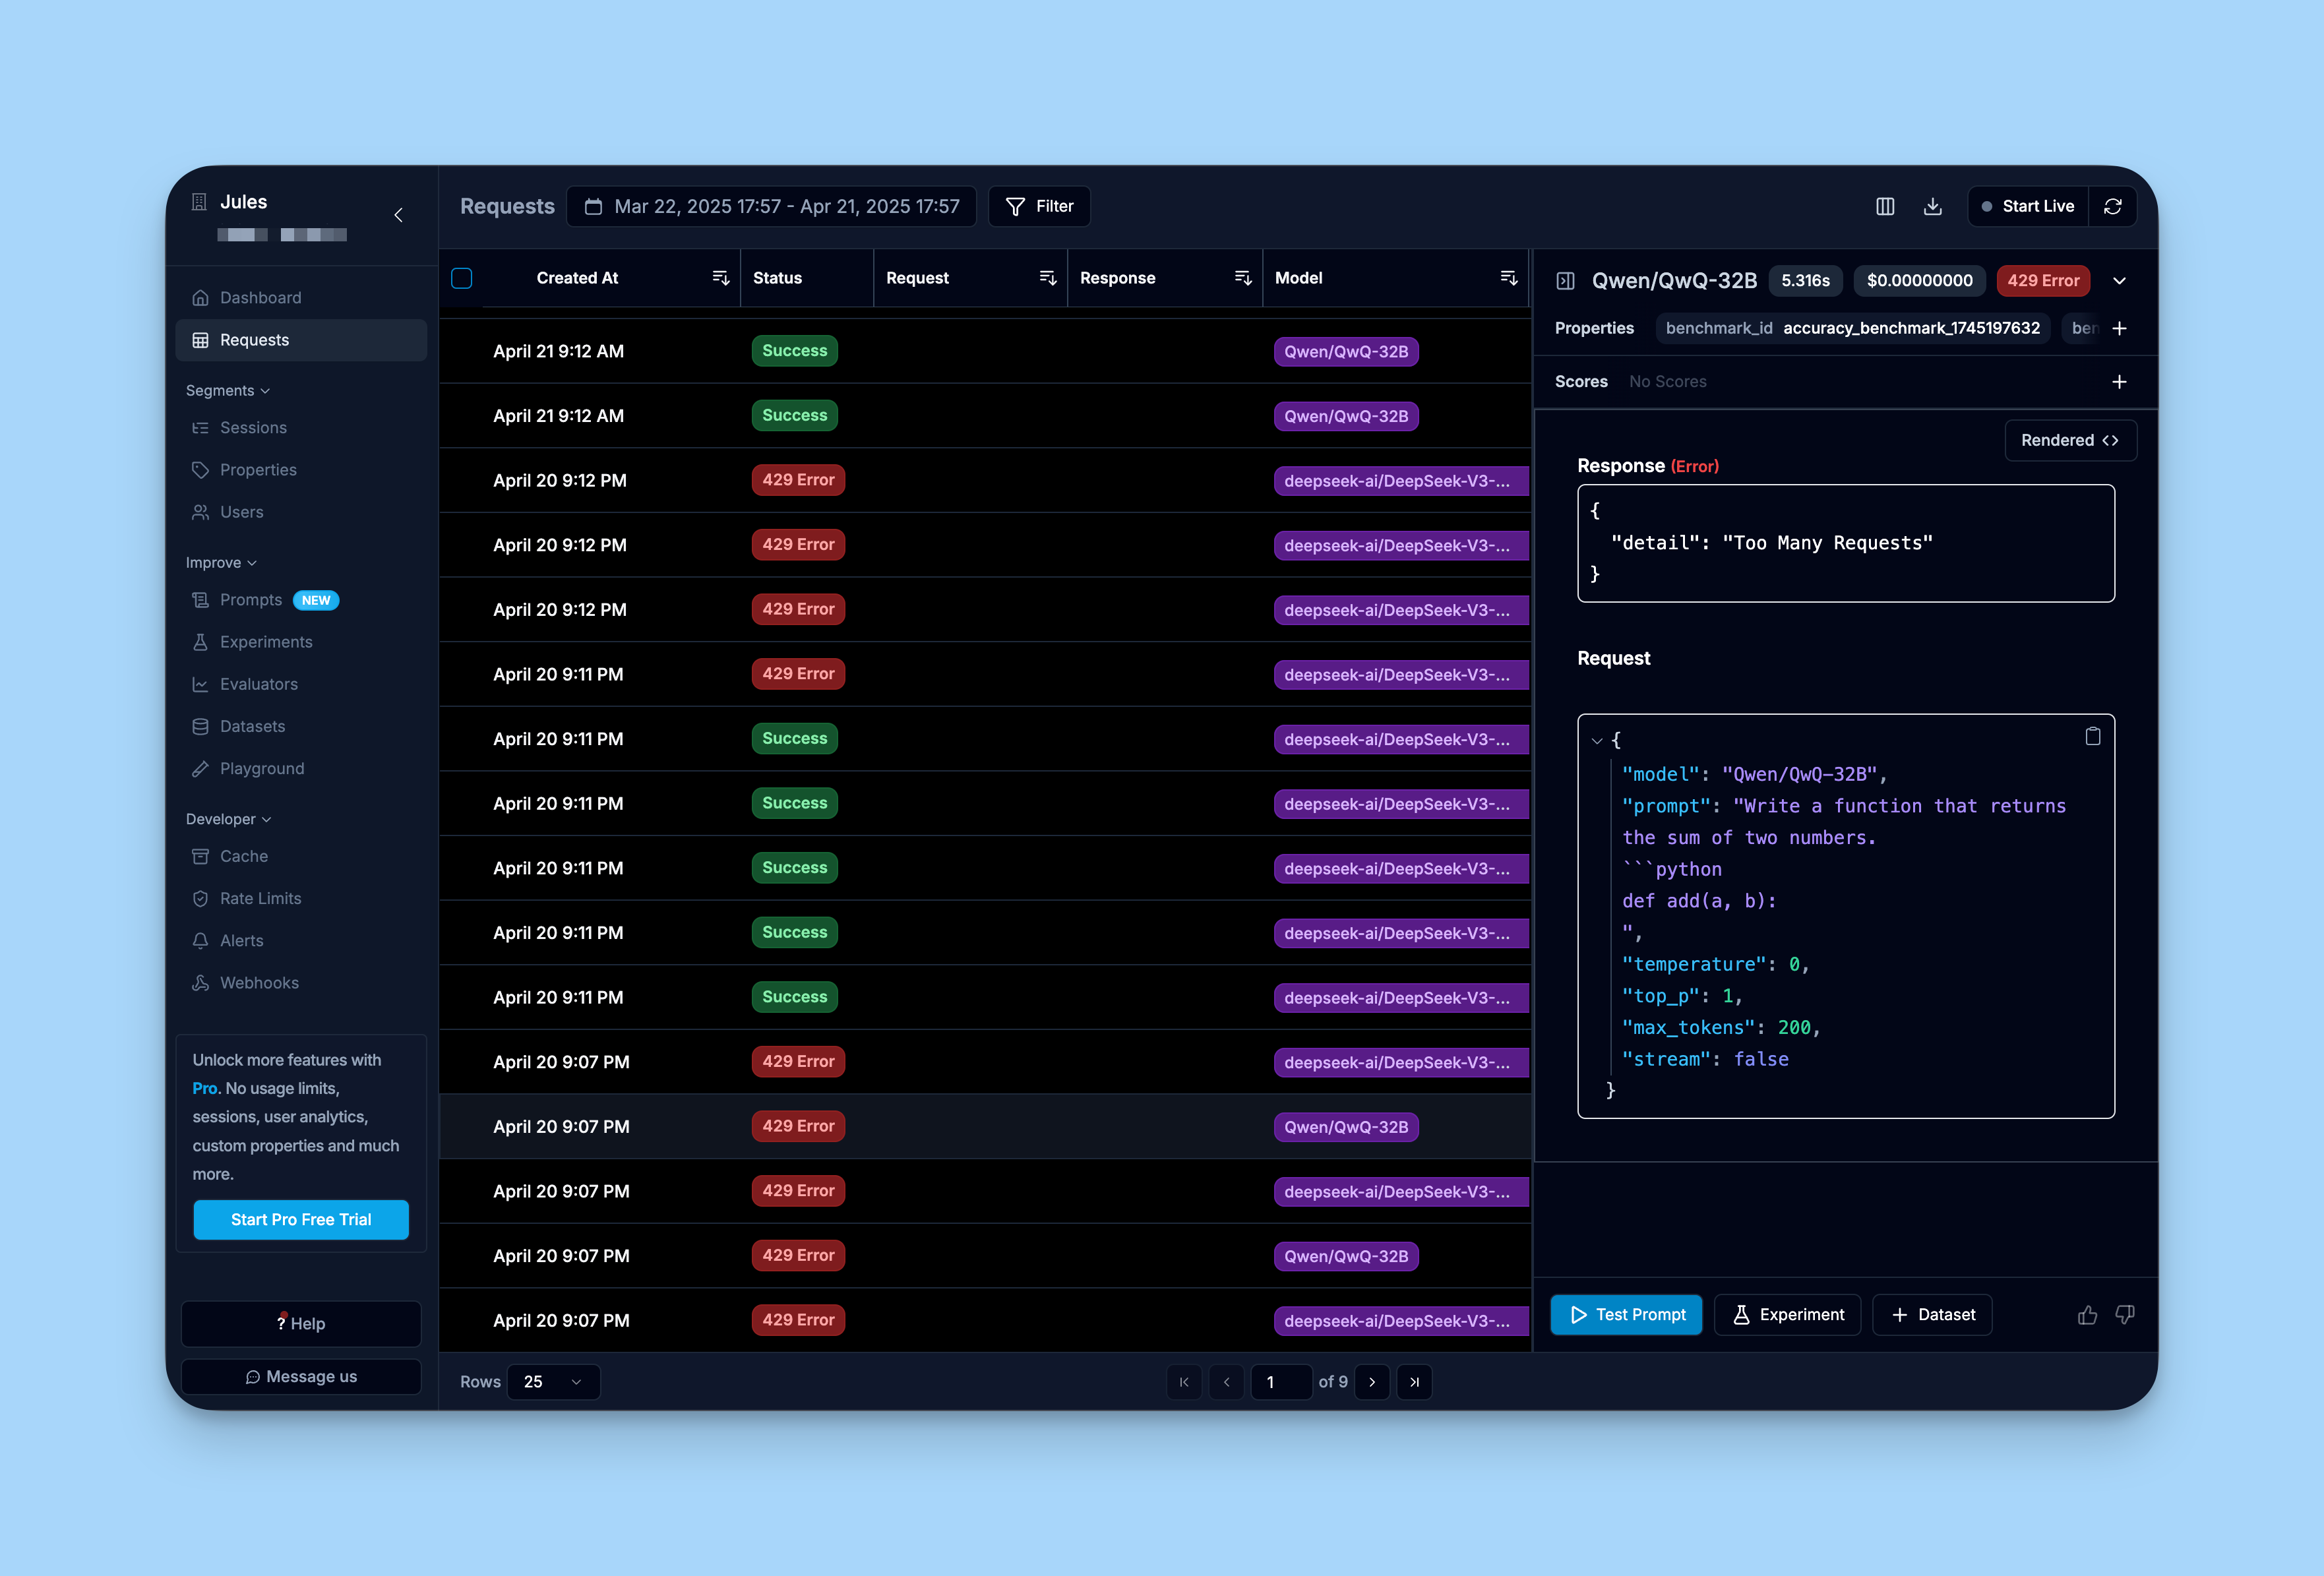
Step 4: Make sure monitoring is working
To make sure your integration is working, log into Helicone's dashboard and review the "Requests" tab.
You should see the requests you have made through your Open WebUI interface already being logged into Helicone.
Learn more
For a comprehensive guide on Helicone, you can check out Helicone's documentation.