Integrate with MiniMax M2.1
This tutorial is a community contribution and is not supported by the Open WebUI team. It serves only as a demonstration on how to customize Open WebUI for your specific use case.
Integrating Open WebUI with MiniMax M2.1
MiniMax is a leading AI company providing high-performance coding-focused models. Their latest model, MiniMax M2.1, is specifically optimized for coding, reasoning, and multi-turn dialogue. This guide covers how to set up MiniMax via their cost-effective Coding Plan and integrate it into Open WebUI.
Step 1: Subscribe to a MiniMax Coding Plan
MiniMax offers a "Coding Plan" subscription which is significantly more cost-effective for high-frequency programming than standard pay-as-you-go models.
- Visit the MiniMax Coding Plan Subscription page.
- Choose a plan that fits your needs (e.g., the Starter plan for $10/month).
- Complete the subscription process.
The Starter plan provides 100 "prompts" every 5 hours. One prompt is roughly equivalent to 15 requests, offering substantial value compared to token-based billing.
Source: MiniMax Coding Plan Official Documentation
Step 2: Obtain Your Coding Plan API Key
Once subscribed, you need your specialized API Key.
- Navigate to the Account/Coding Plan page.
- Click on Reset & Copy to generate and copy your API Key.
- Safely store this key in a password manager.
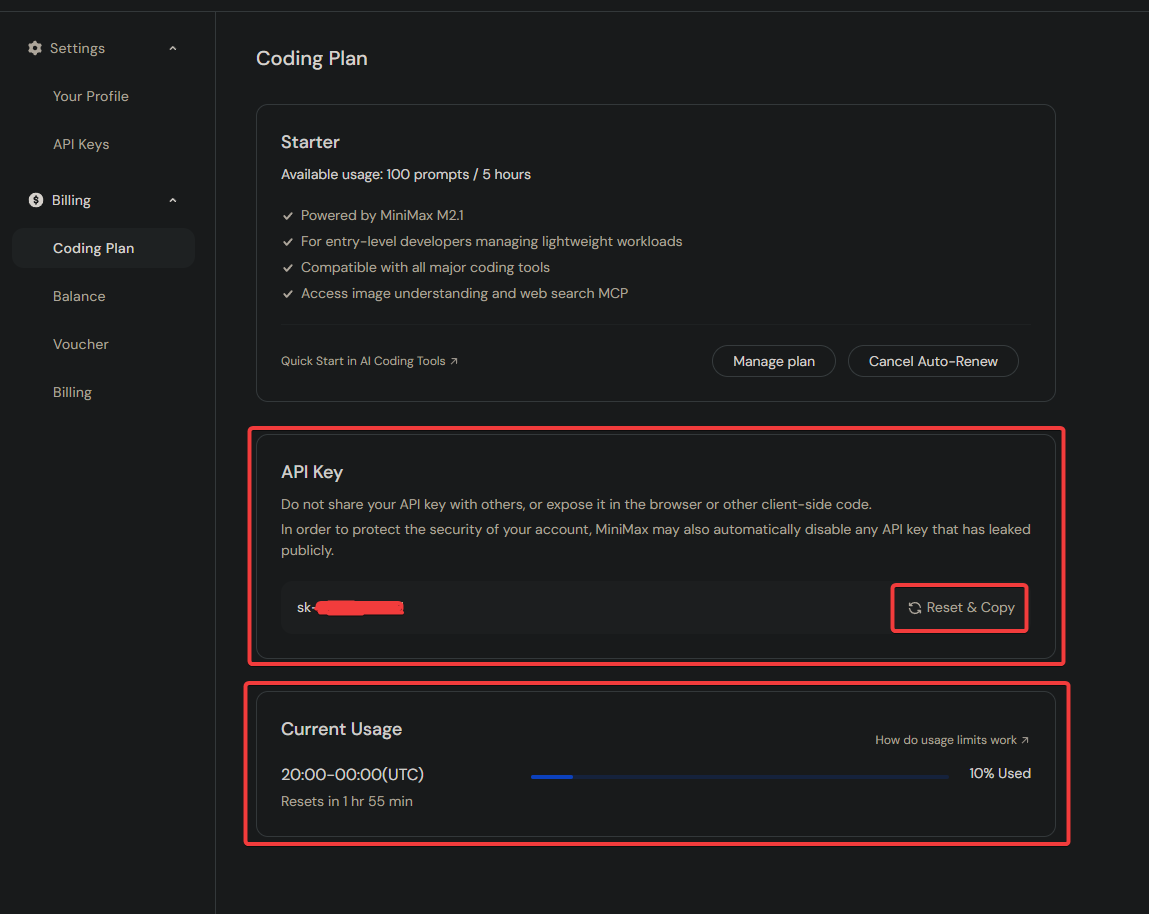
This API Key is exclusive to the Coding Plan and is not interchangeable with standard pay-as-you-go API Keys.
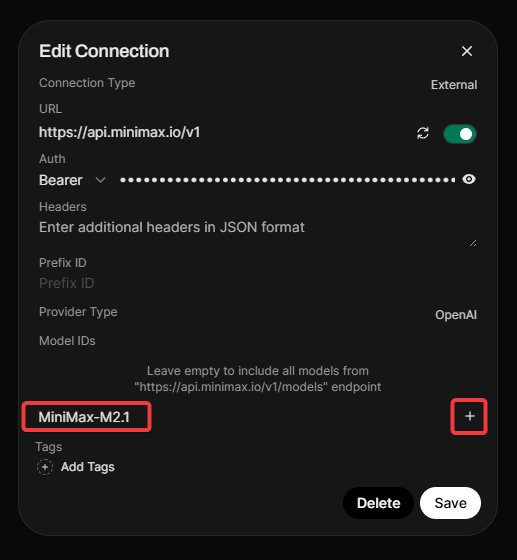
Step 3: Configure Connection in Open WebUI
Now, link MiniMax to your Open WebUI instance.
- Open Open WebUI and navigate to the Admin Panel > Settings > Connections.
- Click the + (plus) icon under the OpenAI API section.
- Enter the following details:
- API Base URL:
https://api.minimax.io/v1 - API Key:
YOUR_CODING_PLAN_API_KEY
- API Base URL:
- Important: MiniMax does not expose models via a
/modelsendpoint, so you must whitelist the model manually. - In the Model Whitelist, type
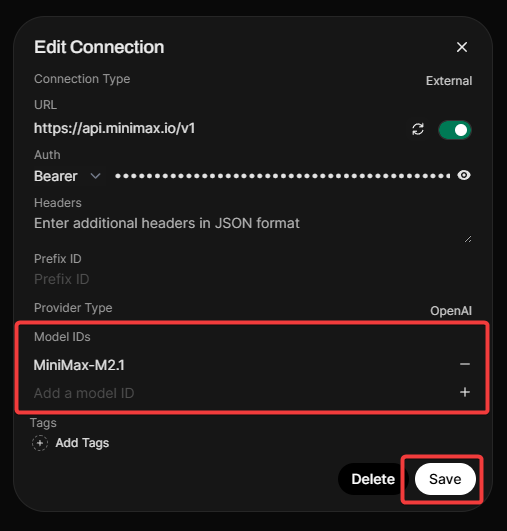
MiniMax-M2.1and click the + icon. - Click Verify Connection (you should see a success alert).
- Click Save on the connection popup, then scroll down and click Save on the main Connections page.
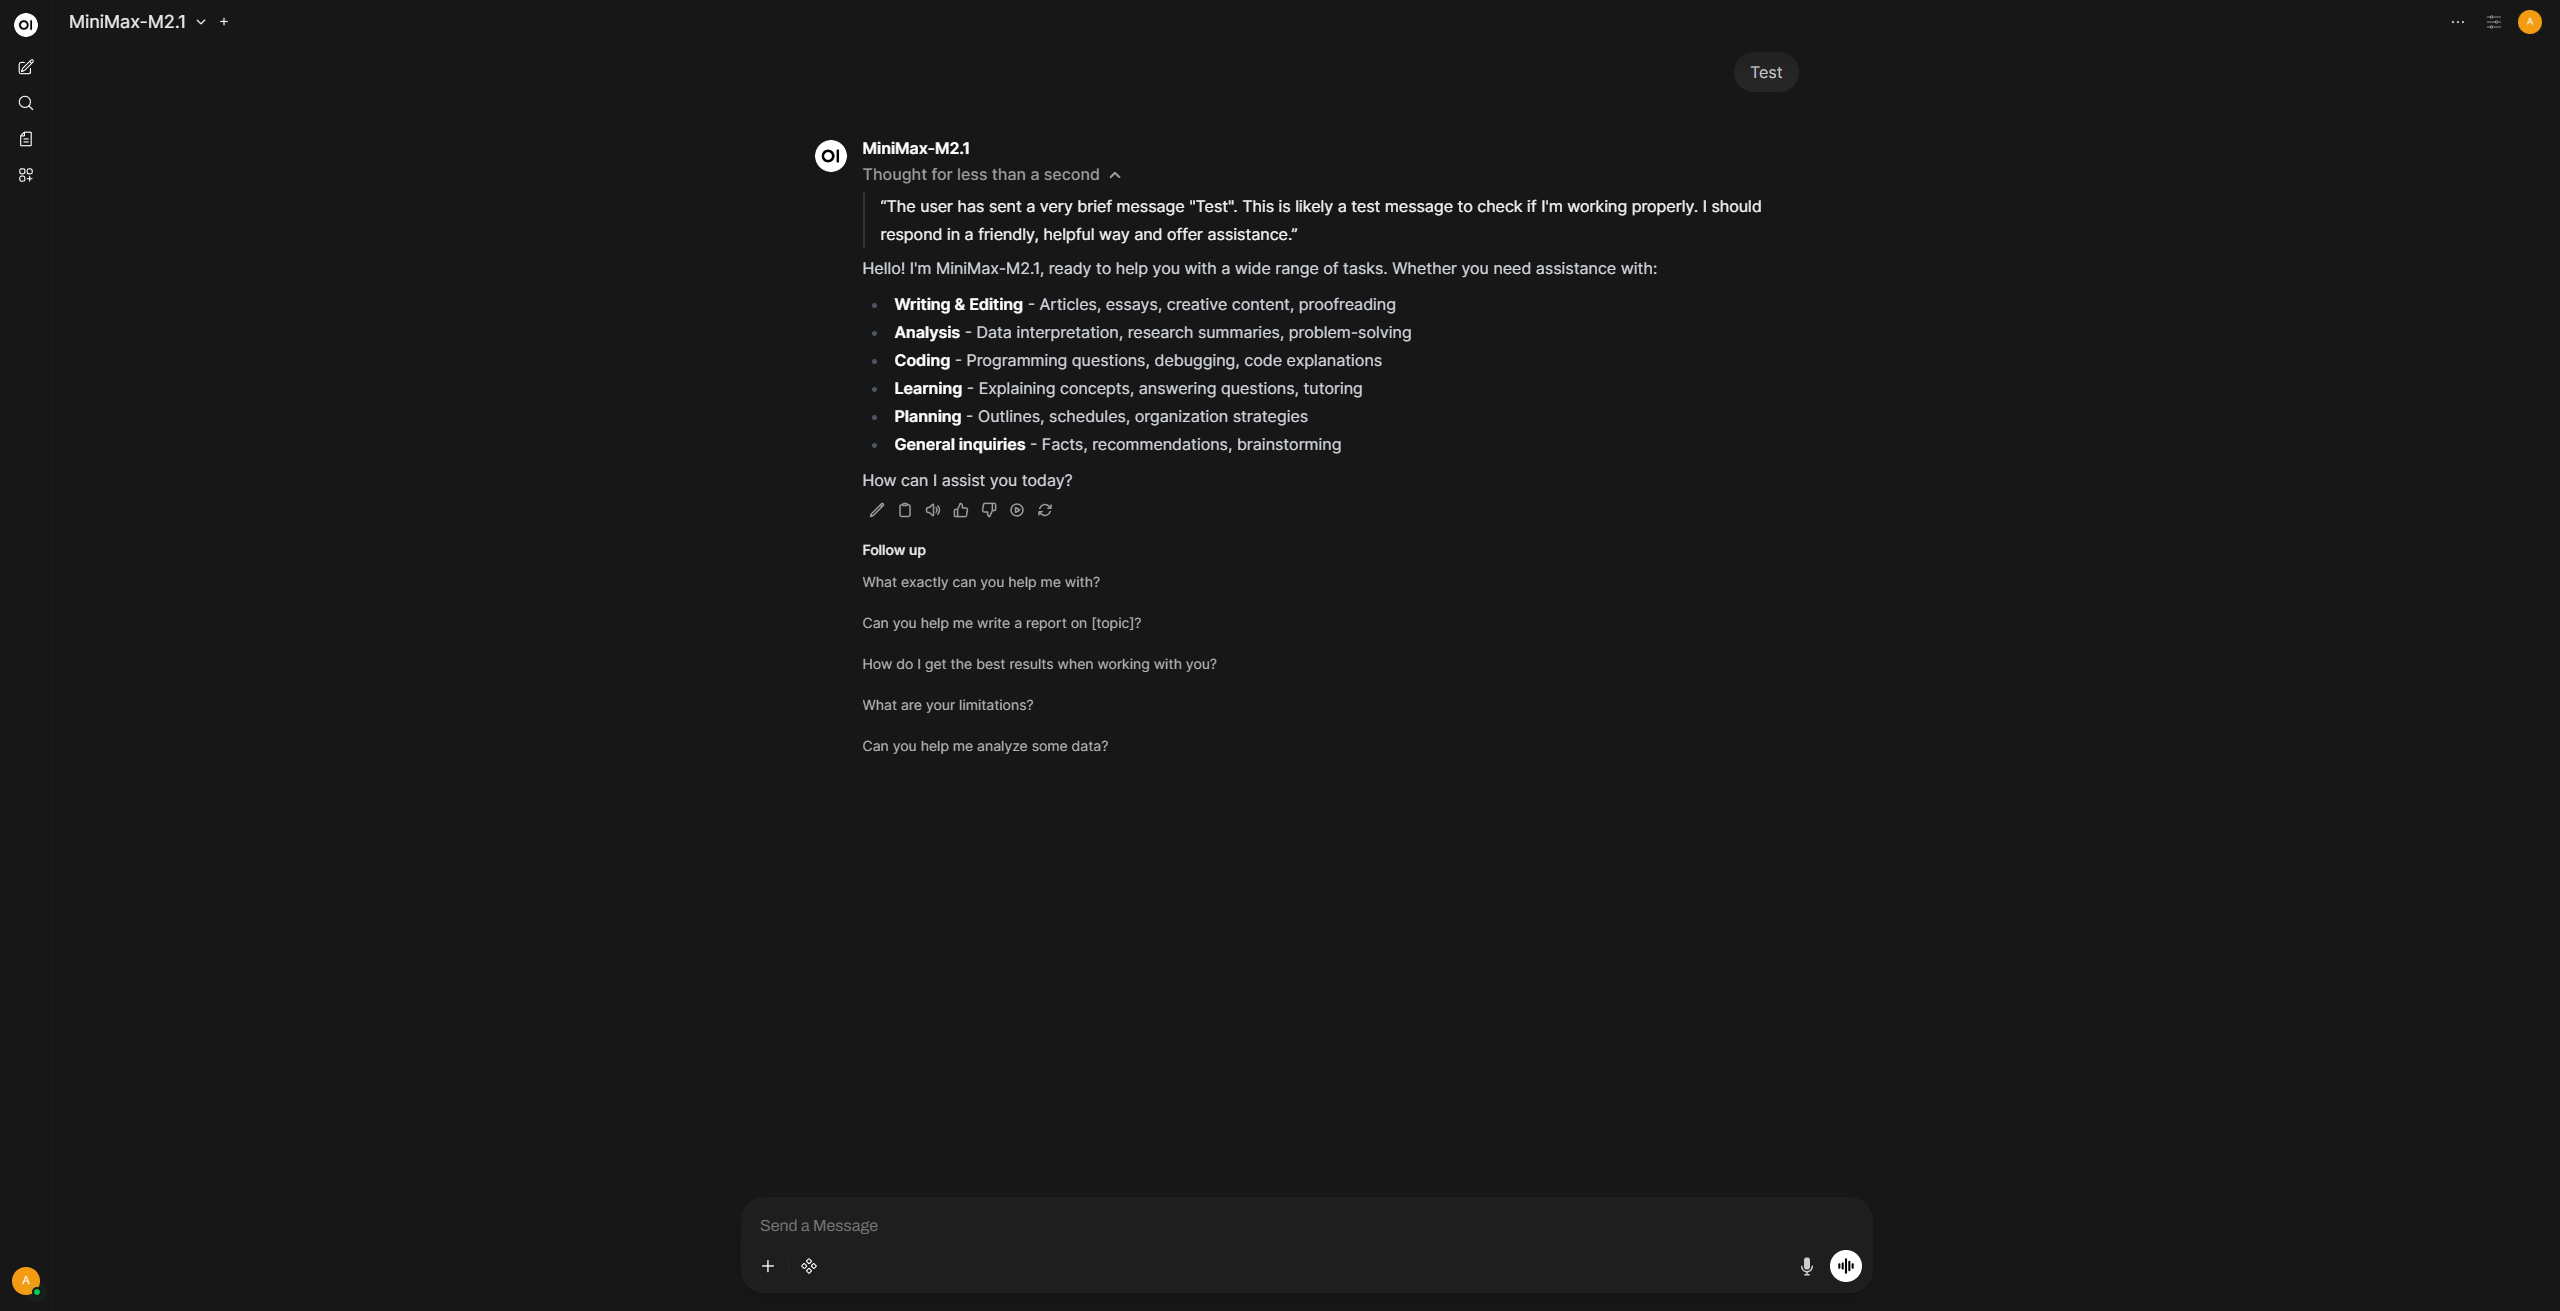
Step 4: Start Chatting
You are now ready to use MiniMax M2.1!
- Start a new chat.
- Select MiniMax-M2.1 from the model dropdown menu.
- Send a message. Reasoning and thinking work by default without any additional configuration.
Enjoy using one of the best and most affordable coding-focused models! 🚀