ComfyUI
This tutorial is a community contribution and is not supported by the Open WebUI team. It serves only as a demonstration on how to customize Open WebUI for your specific use case. Want to contribute? Check out the contributing tutorial.
ComfyUI is a powerful and modular node-based GUI for Stable Diffusion. It gives users a high degree of control over the image generation process. Learn more or download it from its GitHub page.
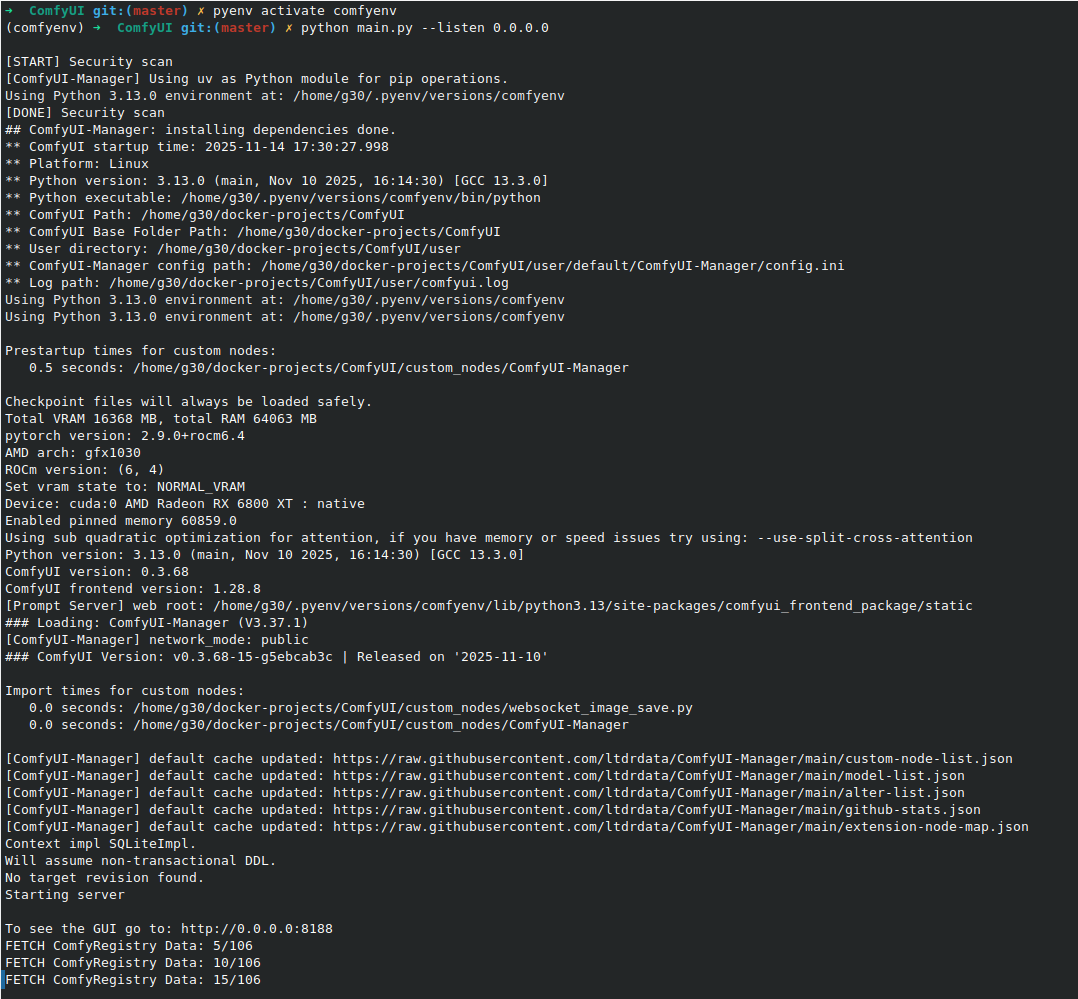
To run ComfyUI and make it accessible to Open WebUI, you must start it with the --listen flag to bind to 0.0.0.0. This allows it to accept connections from other computers on your network.
Once running, the ComfyUI interface will be available at http://<your_comfyui_ip>:8188.
Connecting ComfyUI to Open WebUI
Since Open WebUI typically runs inside Docker, you must ensure the container can reach the host-based ComfyUI application via host.docker.internal.
-
Host Binding Check: Ensure ComfyUI is running with the
--listen 0.0.0.0flag (Step 5). -
Firewall Check: If the host firewall (UFW) is active, ensure port 8188 is allowed (
sudo ufw allow 8188/tcp). -
Docker Run Command (Linux Native Docker): For Linux users not running Docker Desktop, you must explicitly map the host gateway when running the Open WebUI container.
docker run -d -p 3000:8080 \
  --add-host=host.docker.internal:host-gateway \
  -e COMFYUI_BASE_URL=http://host.docker.internal:8188/ \
  -e ENABLE_IMAGE_GENERATION=True \
  -v open-webui:/app/backend/data \
  --name open-webui \
  --restart always \
  ghcr.io/open-webui/open-webui:main
Once you have ComfyUI installed and running, you can connect it to Open WebUI from the admin settings.
Image Prompt Generation
This feature uses a language model to automatically generate more detailed and creative prompts based on your initial input, which can lead to better image results.
The Image Prompt Generation toggle is located in Admin Panel > Settings > Images under the "Image Generation" section, before selecting the image generation engine.
To customize the prompt template used for generation, go to Admin Panel > Settings > Interface > Tasks.
Create Image (Image Generation)
-
Navigate to Image Settings: In Open WebUI, go to the Admin Panel > Settings > Images.
-
Enable and Configure ComfyUI:
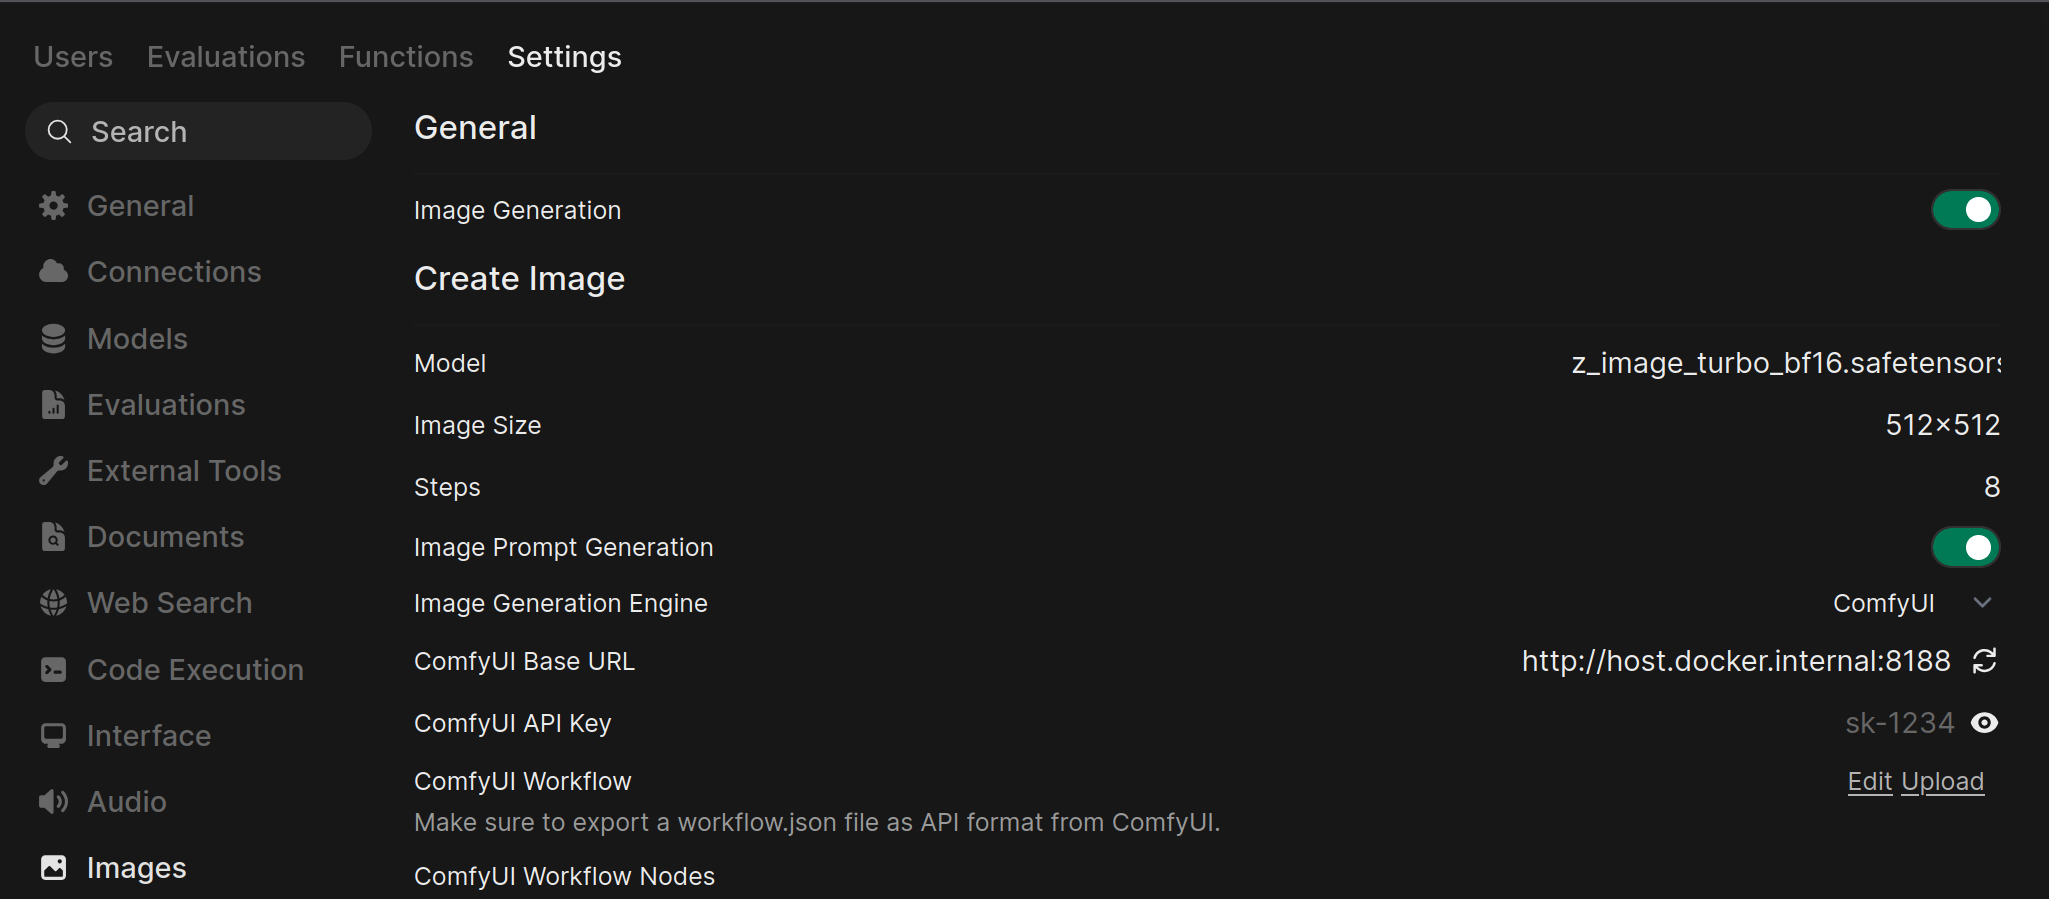
- Ensure the Image Generation toggle at the top of the page is enabled.
- Under the Create Image section, set the Image Generation Engine to
ComfyUI. - Model: Select the base model to be used for generating the image.
- Image Size: Defines the resolution of the generated image (e.g., 512x512, 1024x1024).
- Steps: The number of sampling steps; higher values can improve image quality but take longer to process.
- In the ComfyUI Base URL field, enter the address of your running ComfyUI instance (e.g.,
http://host.docker.internal:8188/). - Click the refresh icon (🔄) next to the URL field to verify the connection. A success message should appear.
- If your ComfyUI instance requires an API key, enter it in the ComfyUI API Key field.
-
Upload Your ComfyUI Workflow:
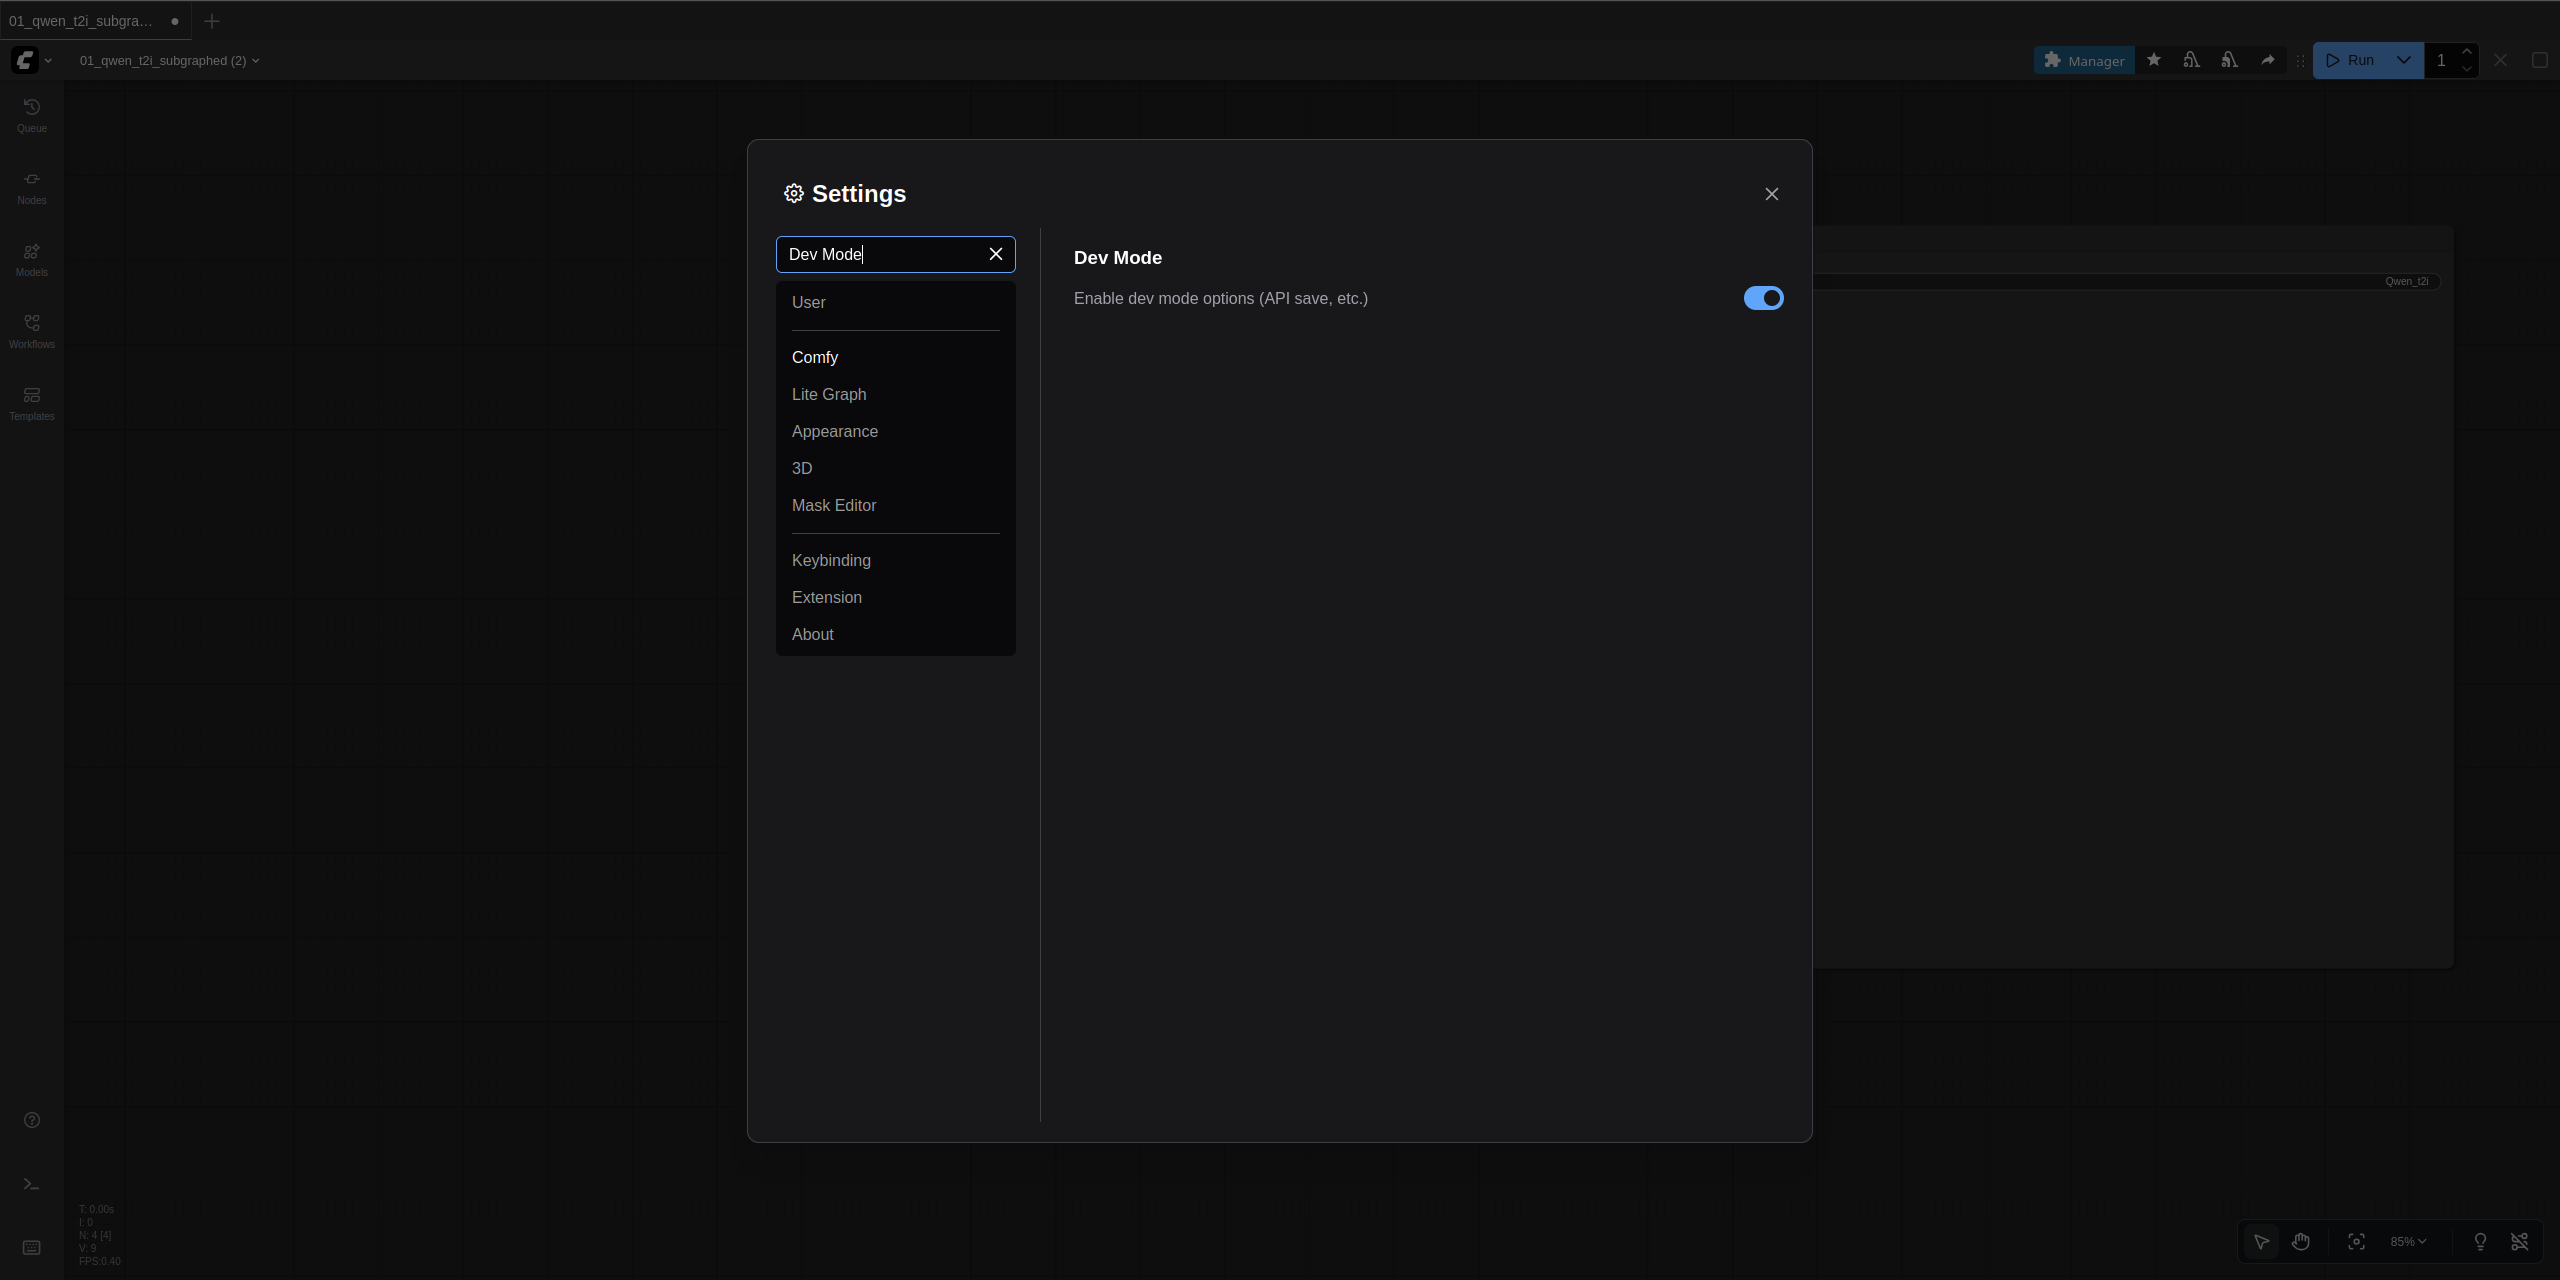
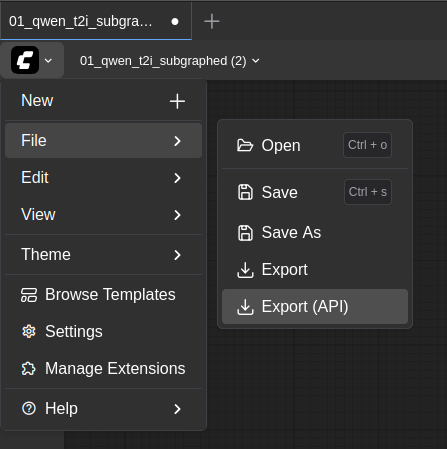
- First, you need to export a workflow from ComfyUI in the correct format. In the ComfyUI interface, click the ComfyUI logo at the top left and click Settings. Then search for and toggle on the "Dev Mode" option with a description that states "Enable dev mode options (API save, etc.)".
- While still in ComfyUI, load the image generation workflow you want to use, and then click the "Export (API)" button found in the File sub-menu after clicking on the ComfyUI logo. This will prompt you to name the file. Name it something memorable and download it.
- Back in Open WebUI, under the ComfyUI Workflow section, click Upload. Select the JSON workflow file you just downloaded.

-
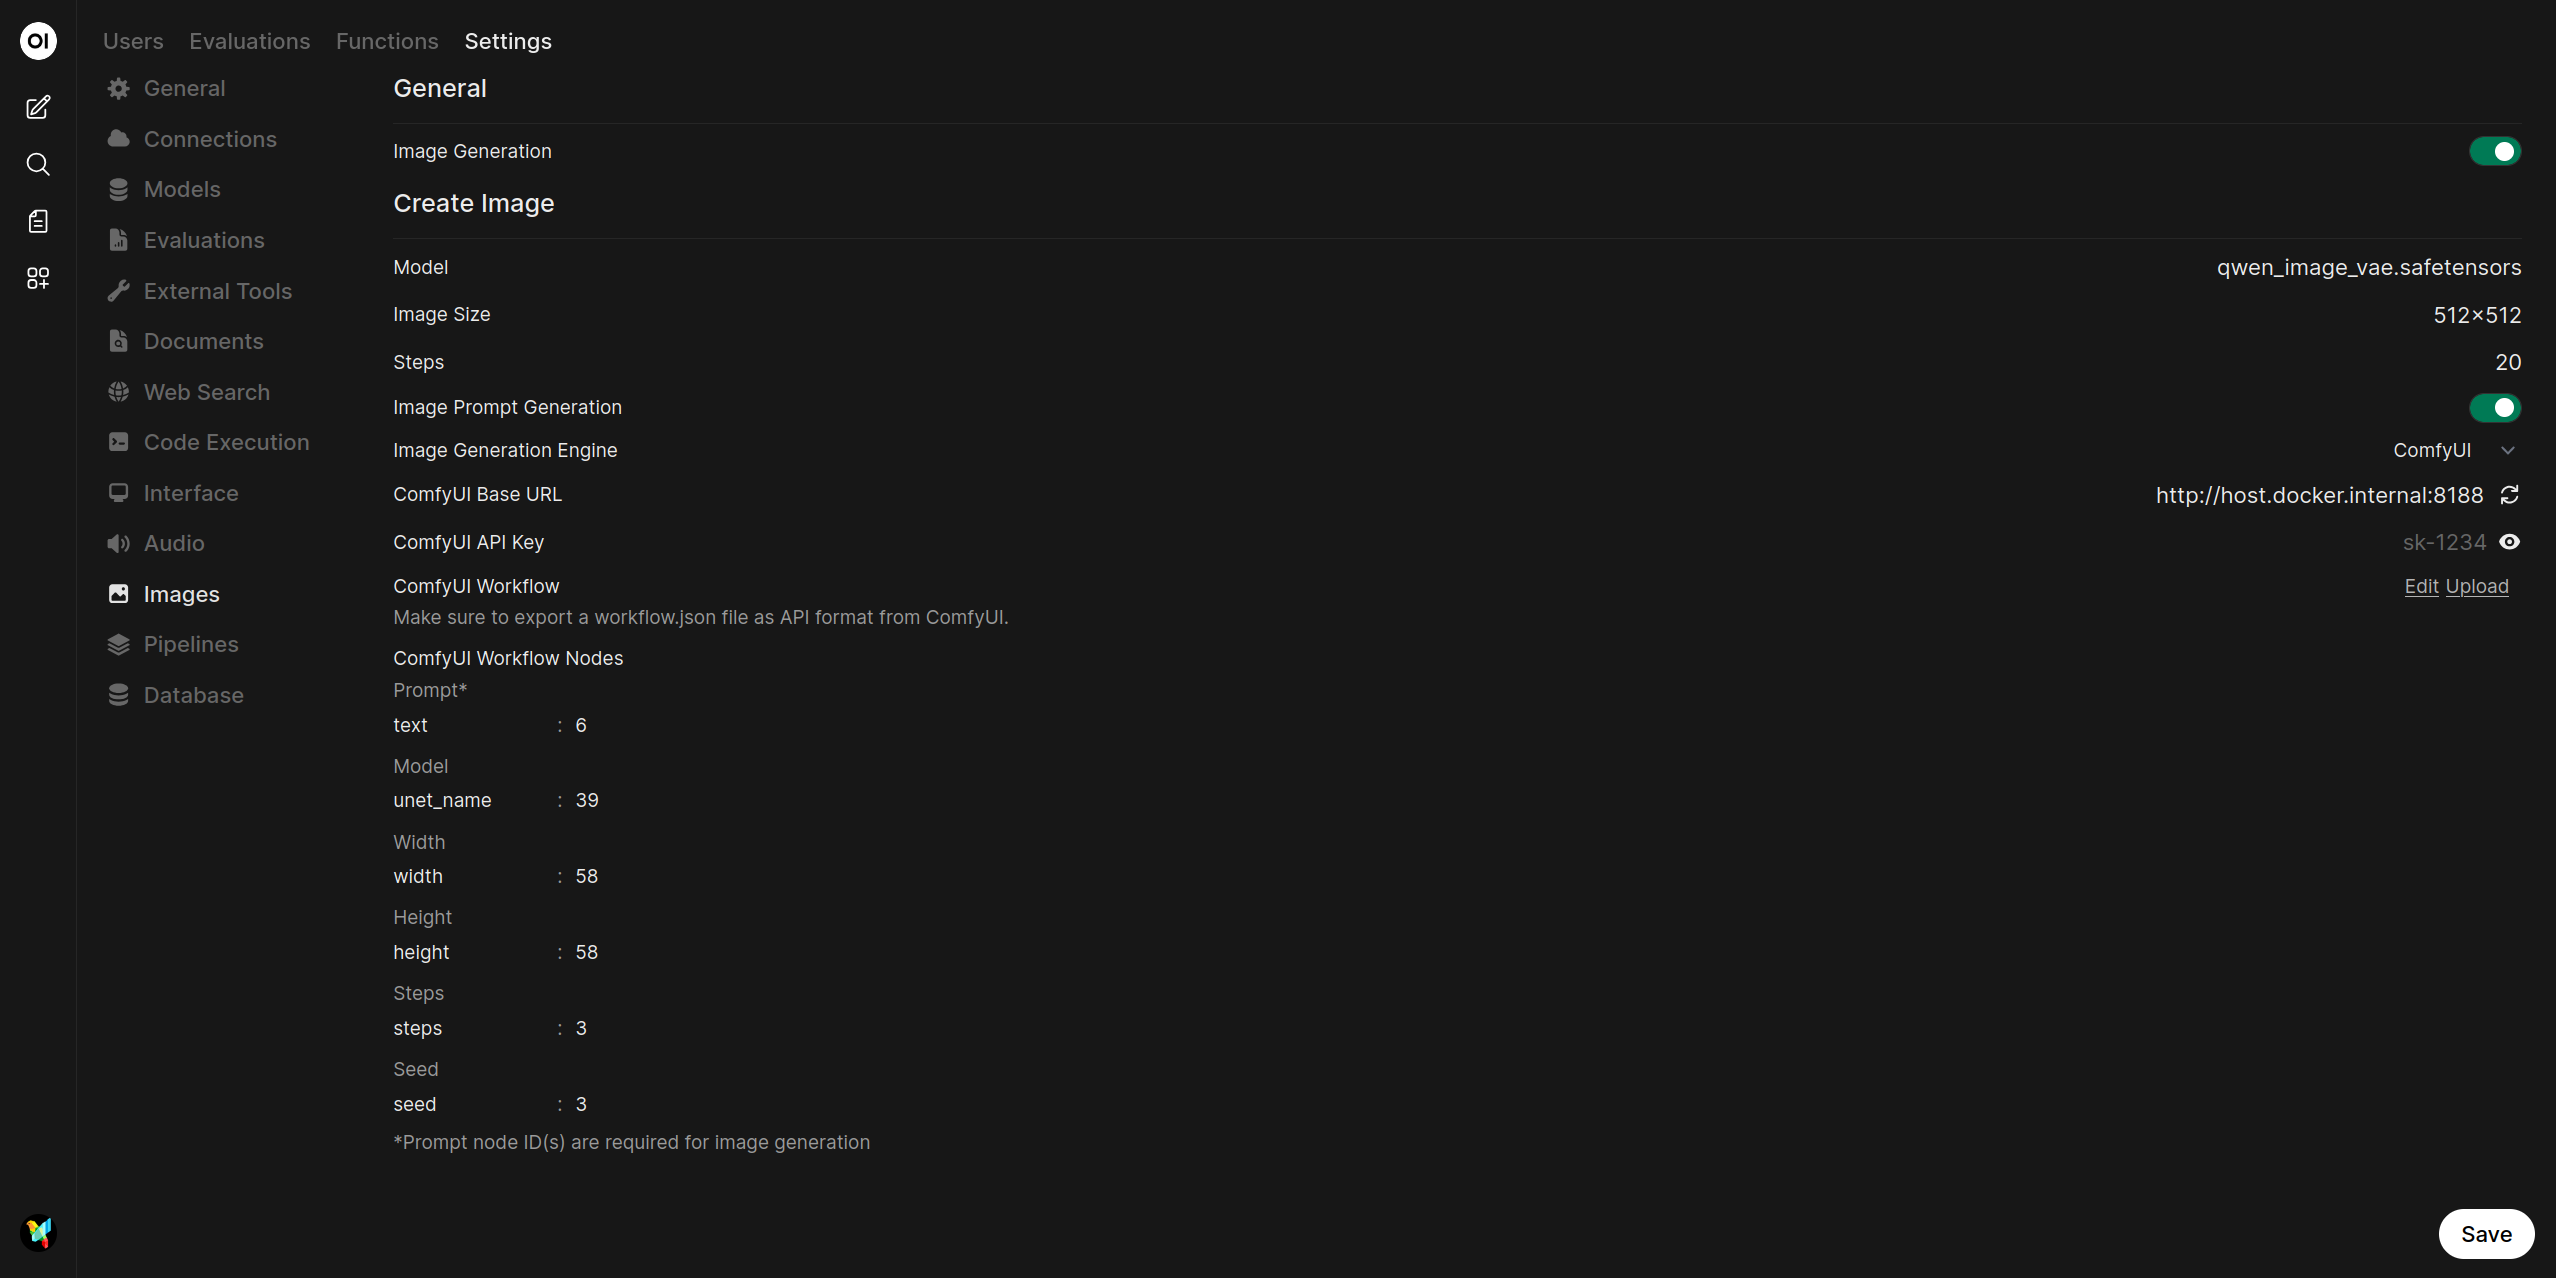
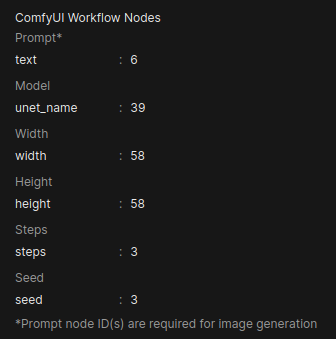
Map Workflow Nodes: After the workflow is imported, you must map the node IDs from your workflow to the corresponding fields in Open WebUI. Each parameter has two fields:
- Key (left field): The input parameter name in the workflow (e.g.,
text,ckpt_name,seed) - Node Ids (right field): The comma-separated node ID(s) that contain this input
The UI displays six configurable parameters for image generation:
Parameter Default Key Required Description Prompt* textYes Positive prompt text Model ckpt_nameNo Checkpoint model name Width widthNo Output image width Height heightNo Output image height Steps stepsNo Sampling steps Seed seedNo Random seed for reproducibility Note: Required parameters are marked with an asterisk (*). Only the prompt node ID is strictly required.
You can find the node ID by clicking on a node in ComfyUI and viewing its details.
 info
infoYou may need to adjust a
Keywithin Open WebUI'sComfyUI Workflow Nodessection to match a node in your workflow. For example, the defaultseedkey might need to be changed tonoise_seeddepending on your workflow's structure.tipSome workflows, such as ones that use any of the Flux models, may utilize multiple node IDs that are necessary to fill in for their node entry fields within Open WebUI. If a node entry field requires multiple IDs, the node IDs should be comma separated (e.g.,
1or1, 2). - Key (left field): The input parameter name in the workflow (e.g.,
-
Save Configuration:
- Click the Save button at the bottom of the page to finalize the configuration. You can now use ComfyUI for image generation in Open WebUI.
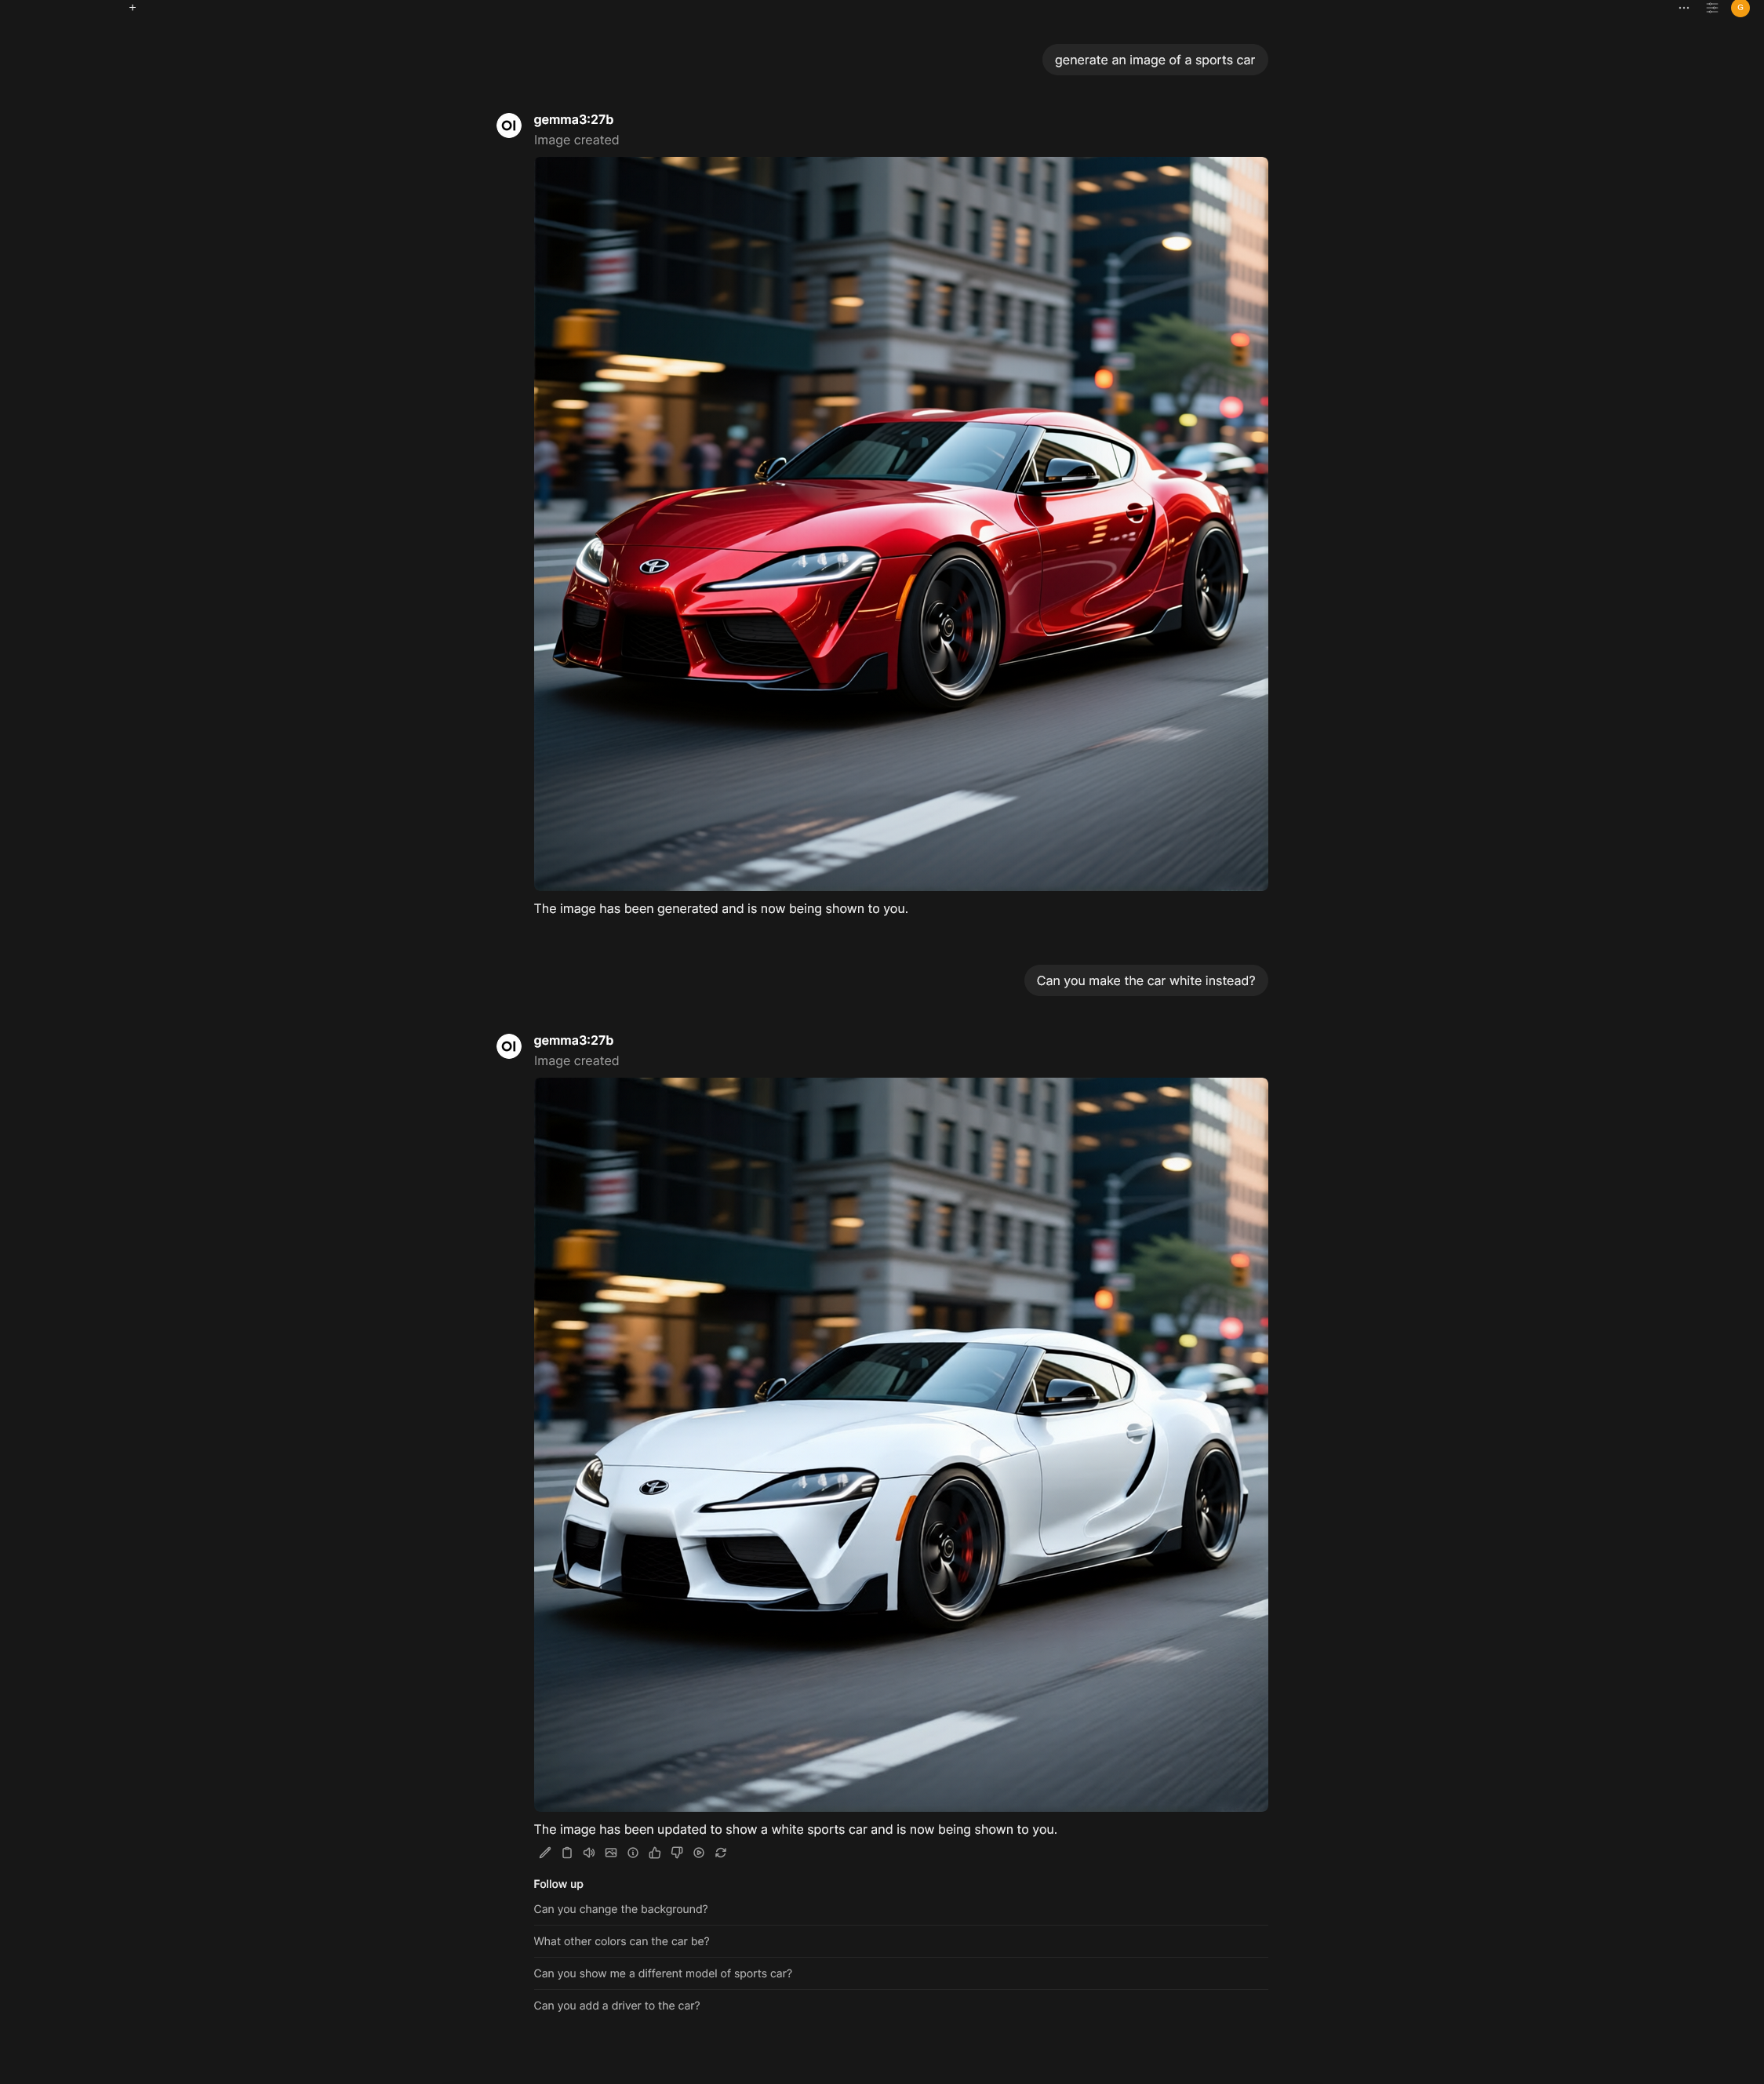
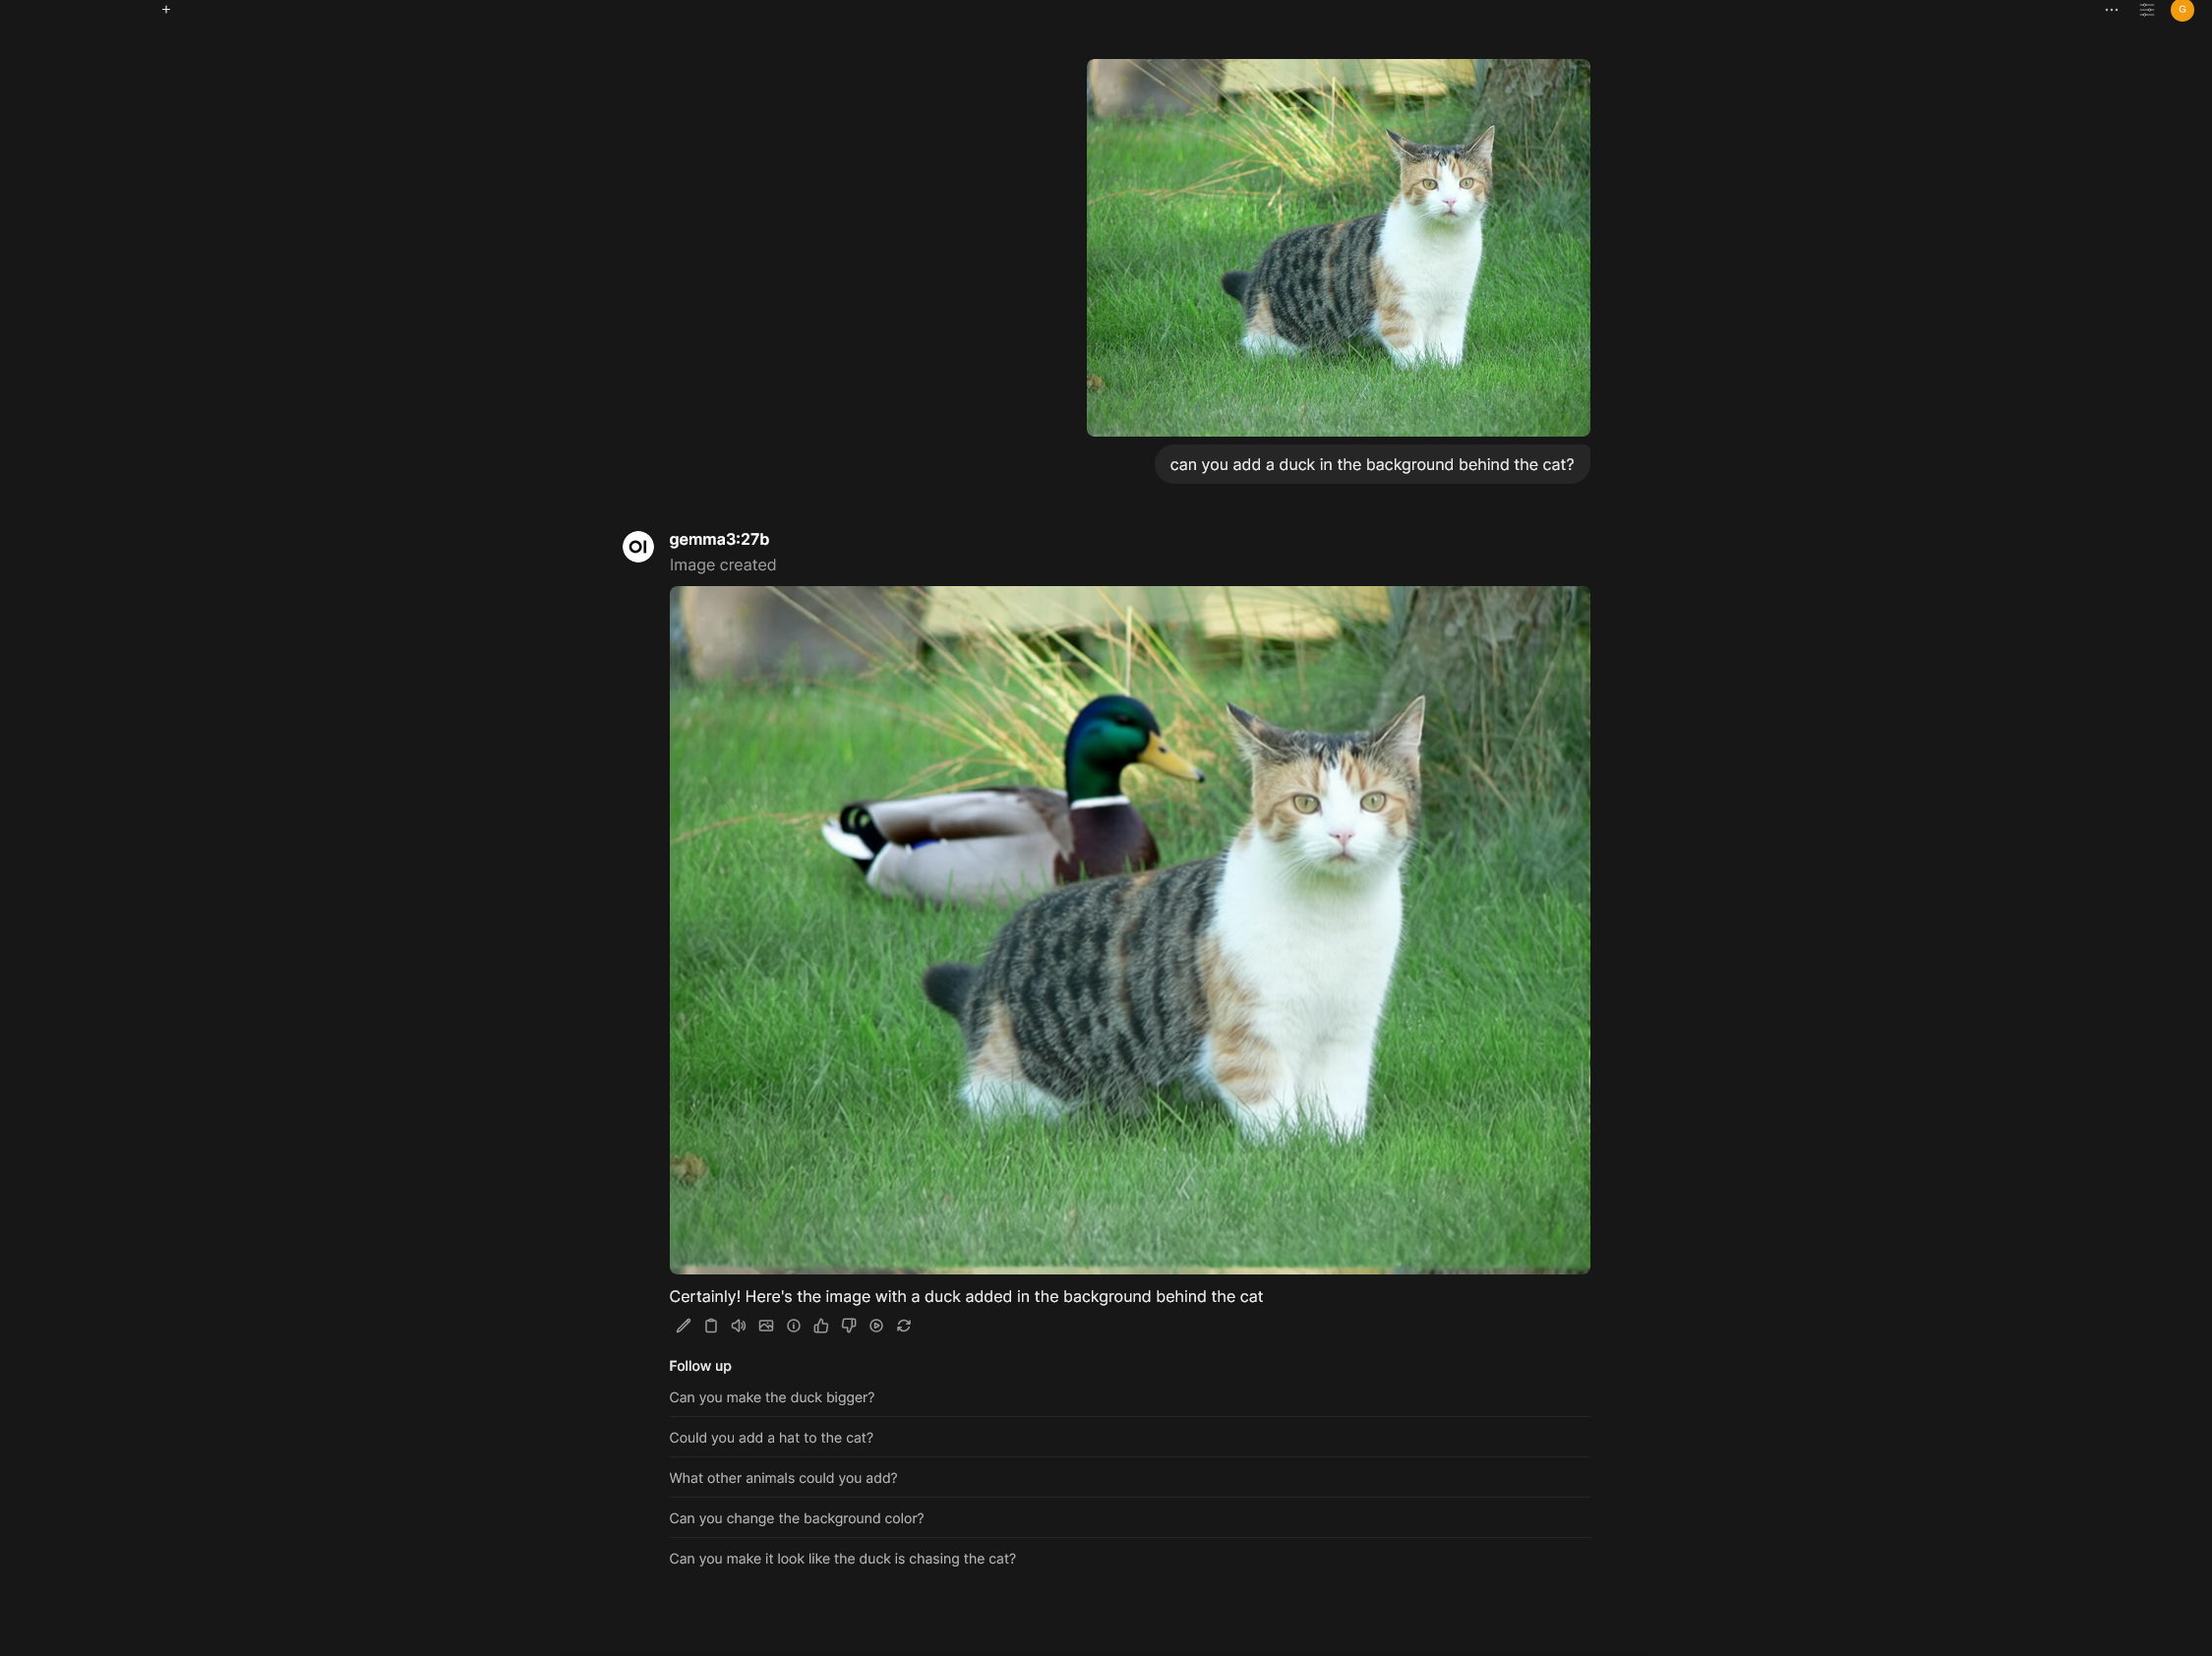
Edit Image
Open WebUI also supports image editing through ComfyUI, allowing you to modify existing images.
-
Navigate to Image Settings: In Open WebUI, go to the Admin Panel > Settings > Images.
-
Configure Image Editing:
- Under the Edit Image section, set the Image Edit Engine to
ComfyUI. - Model: Select the model to be used for the editing task.
- Image Size: Specify the desired resolution for the output image.
- ComfyUI Base URL and API Key: These fields are shared with the image generation settings.
- ComfyUI Workflow: Upload a separate workflow file specifically designed for image editing tasks. The process is the same as for image generation.
- Map Workflow Nodes: Image editing has five configurable parameters with different defaults than generation:
Parameter Default Key Required Description Image* imageYes Input image to edit Prompt* promptYes Edit prompt text Model unet_nameNo Diffusion model name Width widthNo Output image width Height heightNo Output image height Note: Unlike image generation, editing does not support negative prompts, steps, seed, or batch size parameters.

- Under the Edit Image section, set the Image Edit Engine to
Deeper Dive: Mapping ComfyUI Nodes to Open WebUI
Understanding the node ID mapping is often the biggest hurdle in integrating ComfyUI with an external service like Open WebUI. Integrating ComfyUI via API requires mapping Open WebUI's generic controls (e.g., "Model," "Width," "Prompt") to specific node inputs within your static ComfyUI workflow JSON.
Mapping Workflow Nodes to Open WebUI
Open WebUI's ComfyUI Workflow Nodes section lets you map generic controls to specific node inputs in your static ComfyUI workflow JSON. Each row has two fields:
| Field | Description | Example |
|---|---|---|
| Key (left) | The input parameter name from the node's inputs block | text, ckpt_name, seed |
| Node Ids (right) | Comma-separated node IDs to target | 6 or 1, 2, 3 |
Identifying Node IDs and Input Keys in ComfyUI
Before configuring Open WebUI, you must examine your exported workflow JSON files directly in a text editor. The Node ID is the unique number ComfyUI uses to identify the node in the JSON structure. The top-level keys in the JSON object are the node IDs.
Identify the Input Key (The Parameter Name)
The Key is the exact parameter name within that node's JSON structure that you need to change (e.g., seed, width, ckpt_name).
- Examine the JSON: Look at your API workflow JSON (
workflow_api.json). - Find the Node ID: Locate the section corresponding to the node's ID (e.g.,
"37"). - Identify the Key: Within the
"inputs"block, find the variable you want to control.
Example: CheckpointLoaderSimple Node (ID 37)
"37": {
  "inputs": {
      "ckpt_name": "qwen_image_fp8_e4m3fn.safetensors"
  },
  "class_type": "CheckpointLoaderSimple",
  "_meta": {
    "title": "Load Checkpoint"
  }
},
Example: KSampler Node (ID 3)
"3": {
  "inputs": {
      "seed": 42,
      "steps": 20,
      "cfg": 8.0,
      "sampler_name": "euler",
      "scheduler": "normal",
      "denoise": 1.0
  },
  "class_type": "KSampler",
  "_meta": {
    "title": "KSampler"
  }
},

Default Key Values by Task Type
Image Generation:
- Prompt:
text - Model:
ckpt_name - Width:
width - Height:
height - Steps:
steps - Seed:
seed
Image Editing:
- Image:
image - Prompt:
prompt - Model:
unet_name - Width:
width - Height:
height
Example: Mapping KSampler Seed
Let's say you want to control the seed in your KSampler node, which has an ID of 3. In the Seed section of the Open WebUI settings:
| Key | Node Ids |
|---|---|
seed | 3 |
Handling Multiple Node IDs
If multiple nodes need the same value (e.g., seed applied to multiple samplers), provide comma-separated IDs:
| Key | Node Ids |
|---|---|
seed | 3, 15, 22 |
Handling Complex/Multimodal Nodes (Qwen Example)
For specialized nodes, the Key may not be a simple text.
| Parameter | Key | Node Ids | Note |
|---|---|---|---|
| Prompt | text or prompt | 76 | Depends on node type (CLIPTextEncode vs TextEncodeQwen) |
| Model | ckpt_name | 37 | Used for CheckpointLoaderSimple |
| Model | unet_name | varies | Used for UNETLoader in some workflows |
| Image Input | image | 78 | The key passes the filename to the LoadImage node |
Troubleshooting Mismatch Errors
If ComfyUI stalls or gives a validation error, consult the log and the JSON structure:
| Error Type | Cause & Debugging | Solution |
|---|---|---|
Value not in list: ckpt_name: 'xyz.safetensors' | You mapped the correct node ID (e.g., 37), but the value being passed (e.g., xyz.safetensors) is not a valid model name for that node type (e.g., accidentally sending a VAE model to a checkpoint loader). | Correct the model name set in Open WebUI for either image generation or editing, ensuring both model names match the type of model the ComfyUI node is expecting. |
Missing input <key> | Your workflow requires an input (e.g., cfg or sampler_name), but Open WebUI did not send a value because the field was not mapped. | Either hardcode the value in the workflow JSON, or map the required input key to the correct node ID. |
By meticulously matching the Node ID and the specific Key, you ensure Open WebUI correctly overwrites the default values in your workflow JSON before submitting the prompt to ComfyUI.
Example Setup: Qwen Image Generation and Editing
This section provides a supplementary guide on setting up the Qwen models for both image generation and editing.
Qwen Image Generation
Model Download
- Diffusion Model: qwen_image_fp8_e4m3fn.safetensors
- Text Encoder: qwen_2.5_vl_7b_fp8_scaled.safetensors
- VAE: qwen_image_vae.safetensors
Model Storage Location
📂 ComfyUI/
├── 📂 models/
│   ├── 📂 diffusion_models/
│   │   └── qwen_image_fp8_e4m3fn.safetensors
│   ├── 📂 vae/
│   │   └── qwen_image_vae.safetensors
│   └── 📂 text_encoders/
│       └── qwen_2.5_vl_7b_fp8_scaled.safetensors
Workflow Node Mapping for Qwen Generation
| Parameter | Key | Node Ids |
|---|---|---|
| Prompt | prompt | (depends on your workflow) |
| Model | ckpt_name | (checkpoint loader node ID) |
Qwen Image Editing
Model Download
- Diffusion Model: qwen_image_edit_fp8_e4m3fn.safetensors
- Text Encoder: qwen_2.5_vl_7b_fp8_scaled.safetensors
- VAE: qwen_image_vae.safetensors
Model Storage Location
📂 ComfyUI/
├── 📂 models/
│   ├── 📂 diffusion_models/
│   │   └── qwen_image_edit_fp8_e4m3fn.safetensors
│   ├── 📂 vae/
│   │   └── qwen_image_vae.safetensors
│   └── 📂 text_encoders/
│       └── qwen_2.5_vl_7b_fp8_scaled.safetensors
Workflow Node Mapping for Qwen Editing
| Parameter | Key | Node Ids |
|---|---|---|
| Image | image | (load image node ID) |
| Prompt | prompt | (text encoder node ID) |
| Model | unet_name | (UNET loader node ID) |
Example Setup: FLUX.1 Image Generation
This section provides a supplementary guide on setting up the FLUX.1 models for image generation.
FLUX.1 Dev
Model Download
- Diffusion Model: flux1-dev.safetensors
- Text Encoder 1: clip_l.safetensors
- Text Encoder 2: t5xxl_fp16.safetensors (Recommended when your VRAM is greater than 32GB)
- VAE: ae.safetensors
Model Storage Location
📂 ComfyUI/
├── 📂 models/
│   ├── 📂 diffusion_models/
│   │   └── flux1-dev.safetensors
│   ├── 📂 vae/
│   │   └── ae.safetensors
│   └── 📂 text_encoders/
│       ├── clip_l.safetensors
│       └── t5xxl_fp16.safetensors
FLUX.1 Schnell
Model Download
- Diffusion Model: flux1-schnell.safetensors
- Text Encoder 1: clip_l.safetensors
- Text Encoder 2: t5xxl_fp8_e4m3fn.safetensors (Recommended when your VRAM is greater than 32GB)
- VAE: ae.safetensors
Model Storage Location
📂 ComfyUI/
├── 📂 models/
│ ├── 📂 diffusion_models/
│ │ └── flux1-schnell.safetensors
│ ├── 📂 vae/
�│ │ └── ae.safetensors
│ └── 📂 text_encoders/
│ ├── clip_l.safetensors
│ └── t5xxl_fp8_e4m3fn.safetensors
Configuring with SwarmUI
SwarmUI utilizes ComfyUI as its backend. In order to get Open WebUI to work with SwarmUI you will have to append ComfyBackendDirect to the ComfyUI Base URL. Additionally, you will want to setup SwarmUI with LAN access. After aforementioned adjustments, setting up SwarmUI to work with Open WebUI will be the same as the steps for ComfyUI image generation outlined above.
SwarmUI API URL
The address you will input as the ComfyUI Base URL will look like: http://<your_swarmui_address>:7801/ComfyBackendDirect