Connecting Open Terminal to Open WebUI
Open Terminal is installed and running. This guide covers connecting it to Open WebUI.
Recommended: Admin settings
Recommended for all deployments, including single-user. An admin connection keeps the API key server-side.
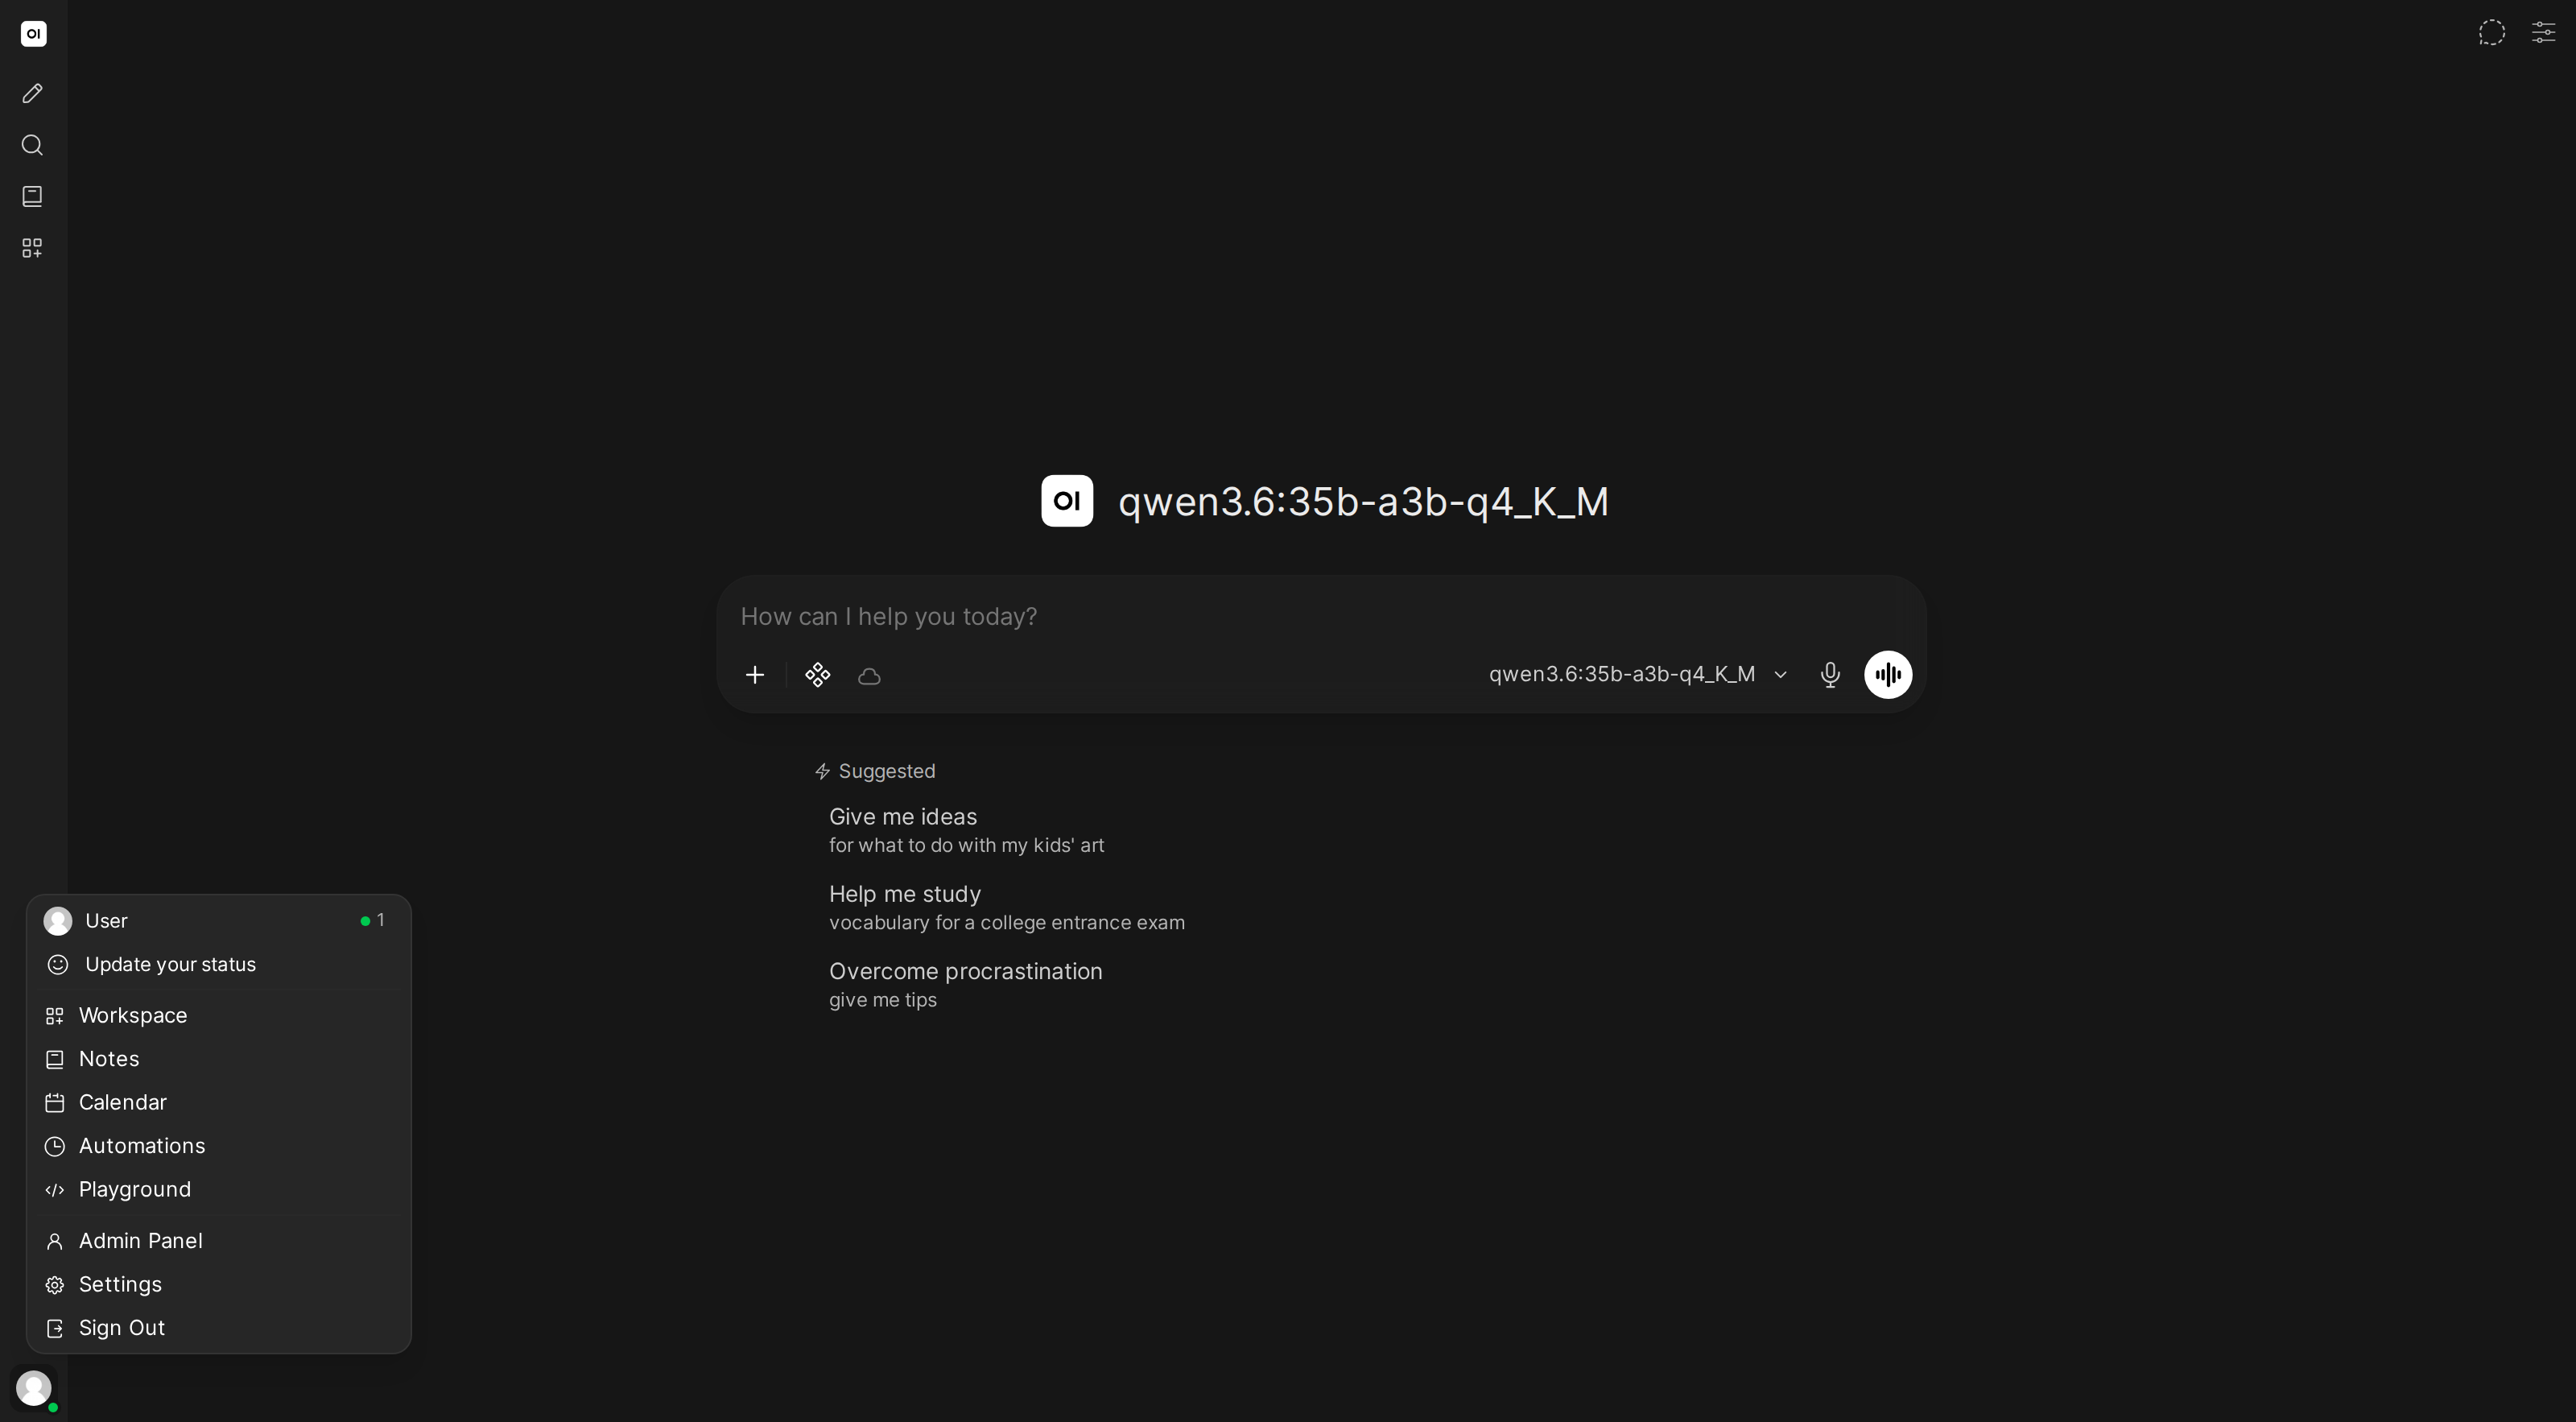
1. Open Settings
Click your name at the bottom of the left sidebar to open the user menu, then click Settings.
2. Go to Settings > Admin > Integrations
In the settings sidebar, find the Admin section and click Integrations.
The settings sidebar lists Integrations twice, once under Personal in the Services group and once under Admin in the Tools group. Open Terminal belongs in the Admin one. Configuring the personal entry connects the terminal to your account alone and the deployment will not work as described here.
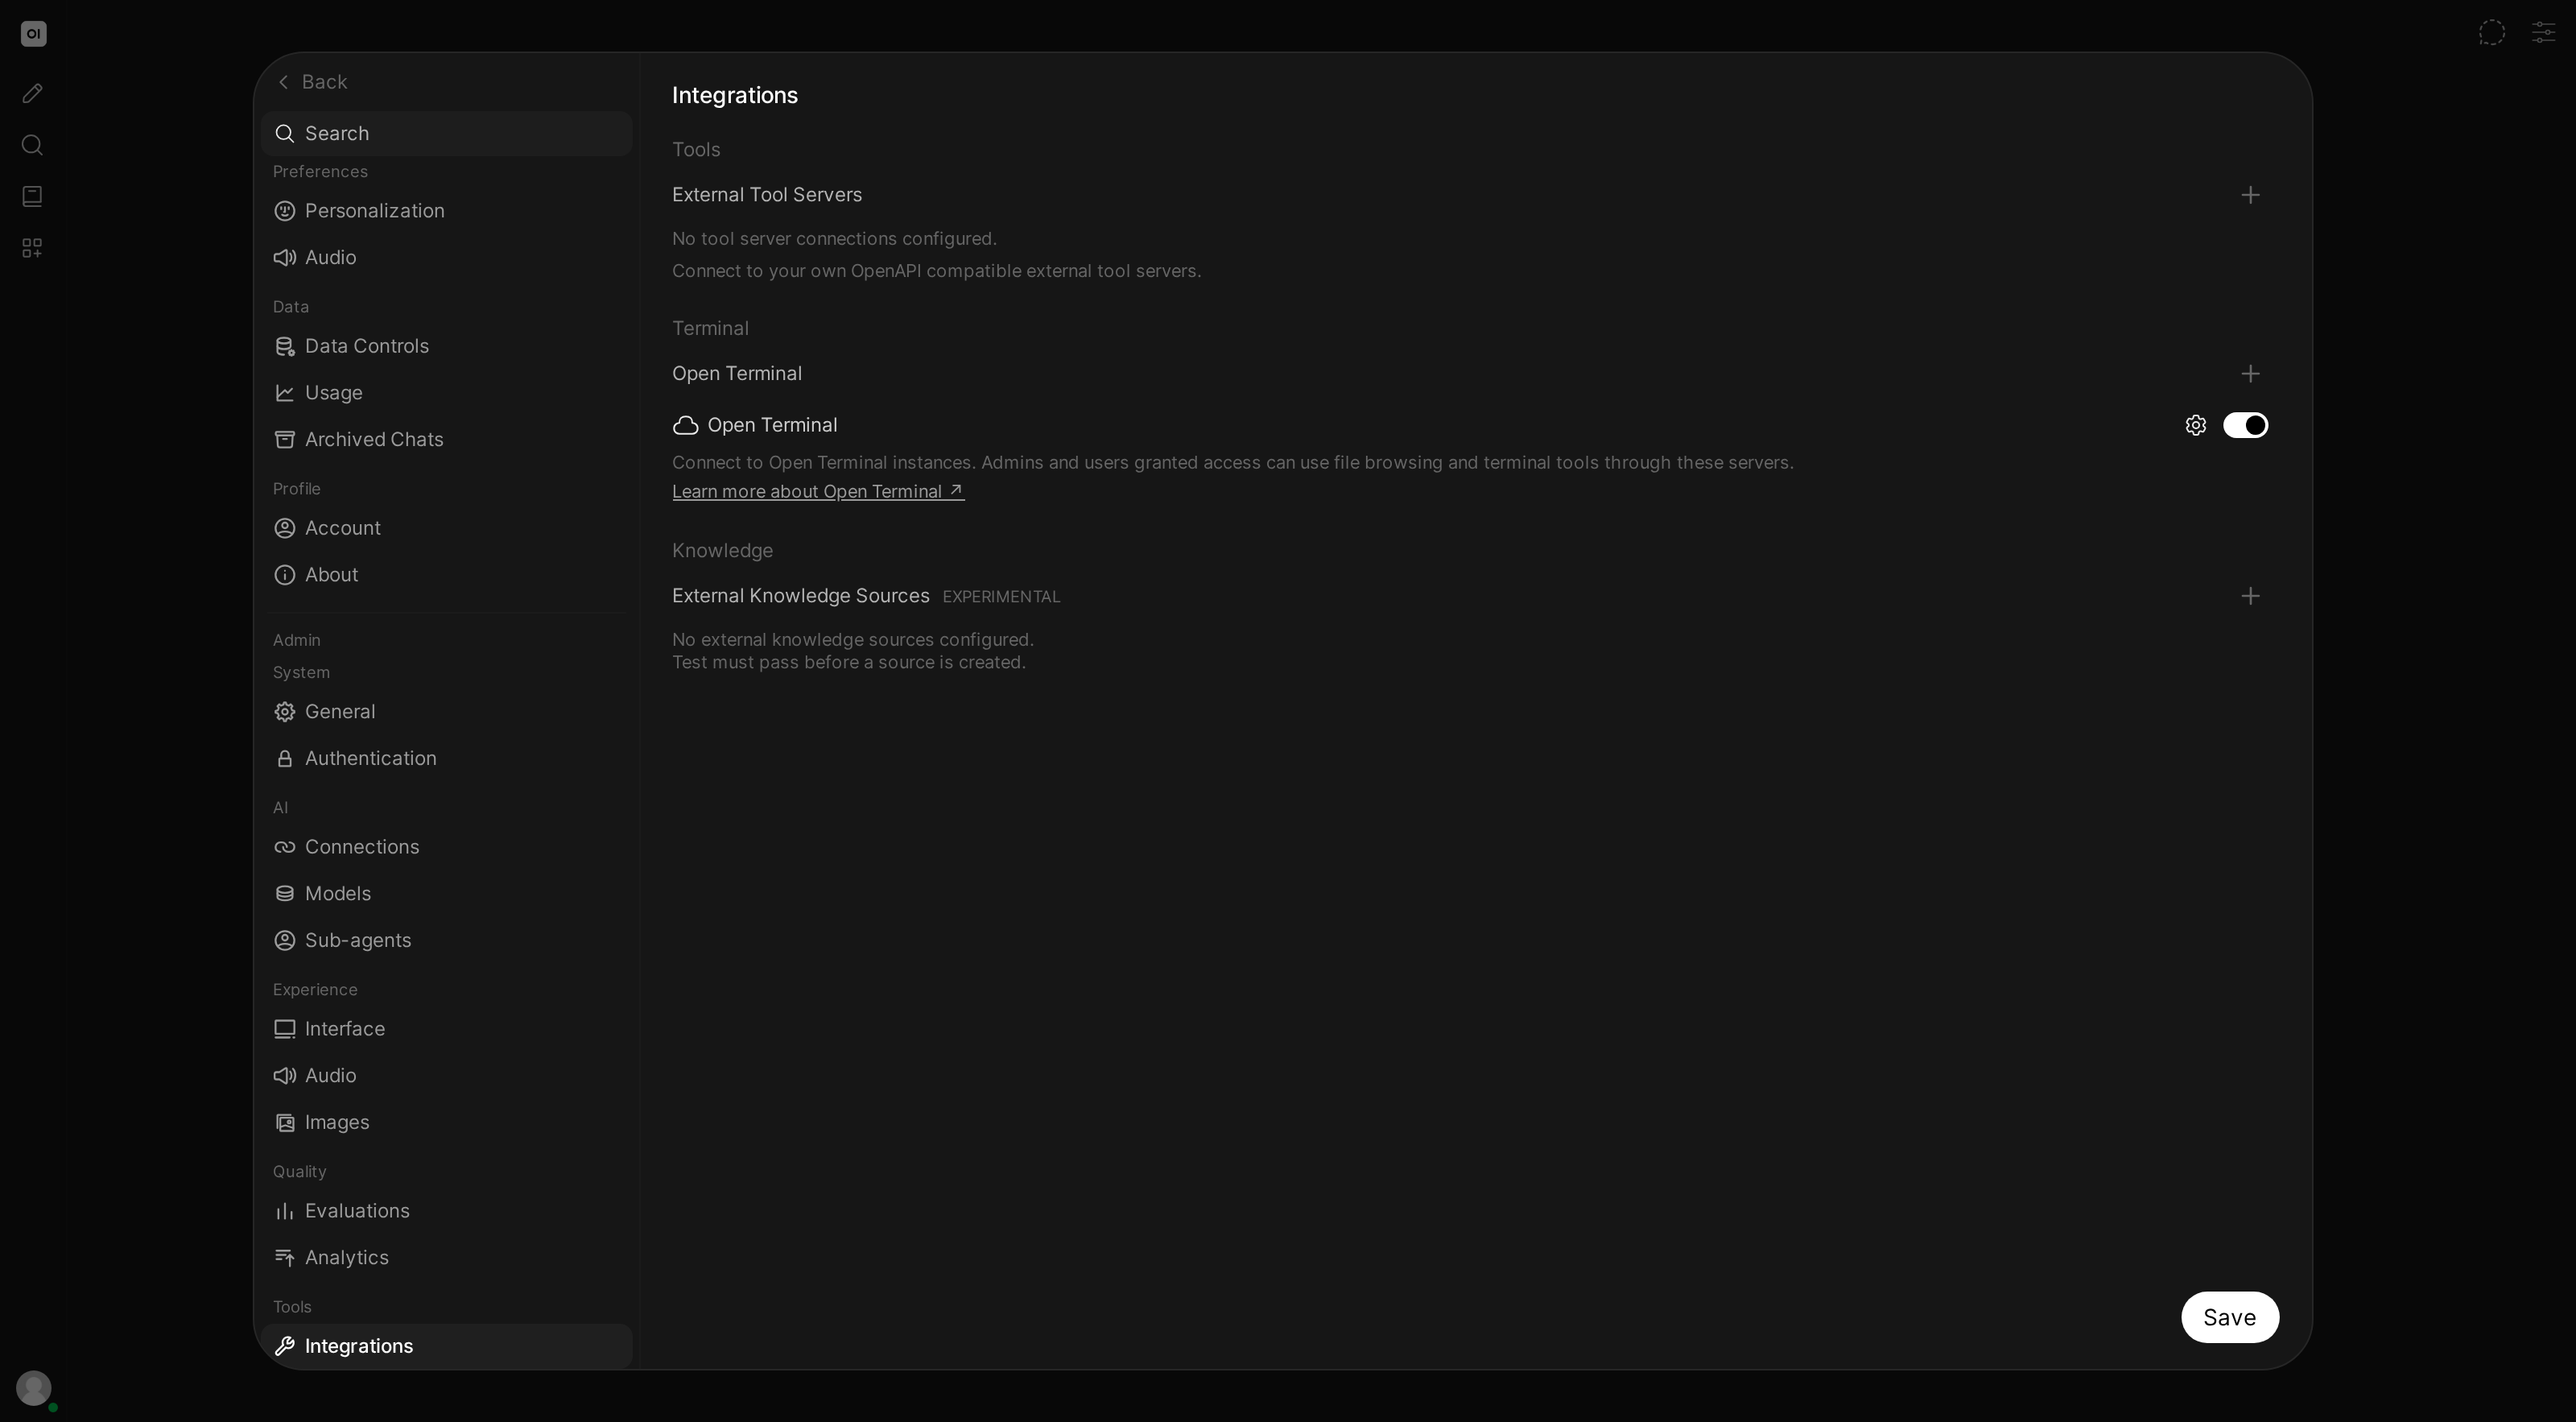
3. Find the "Open Terminal" section
Scroll down until you see the Open Terminal section. It is greyed out when ENABLE_TOOL_SERVERS is set to False.
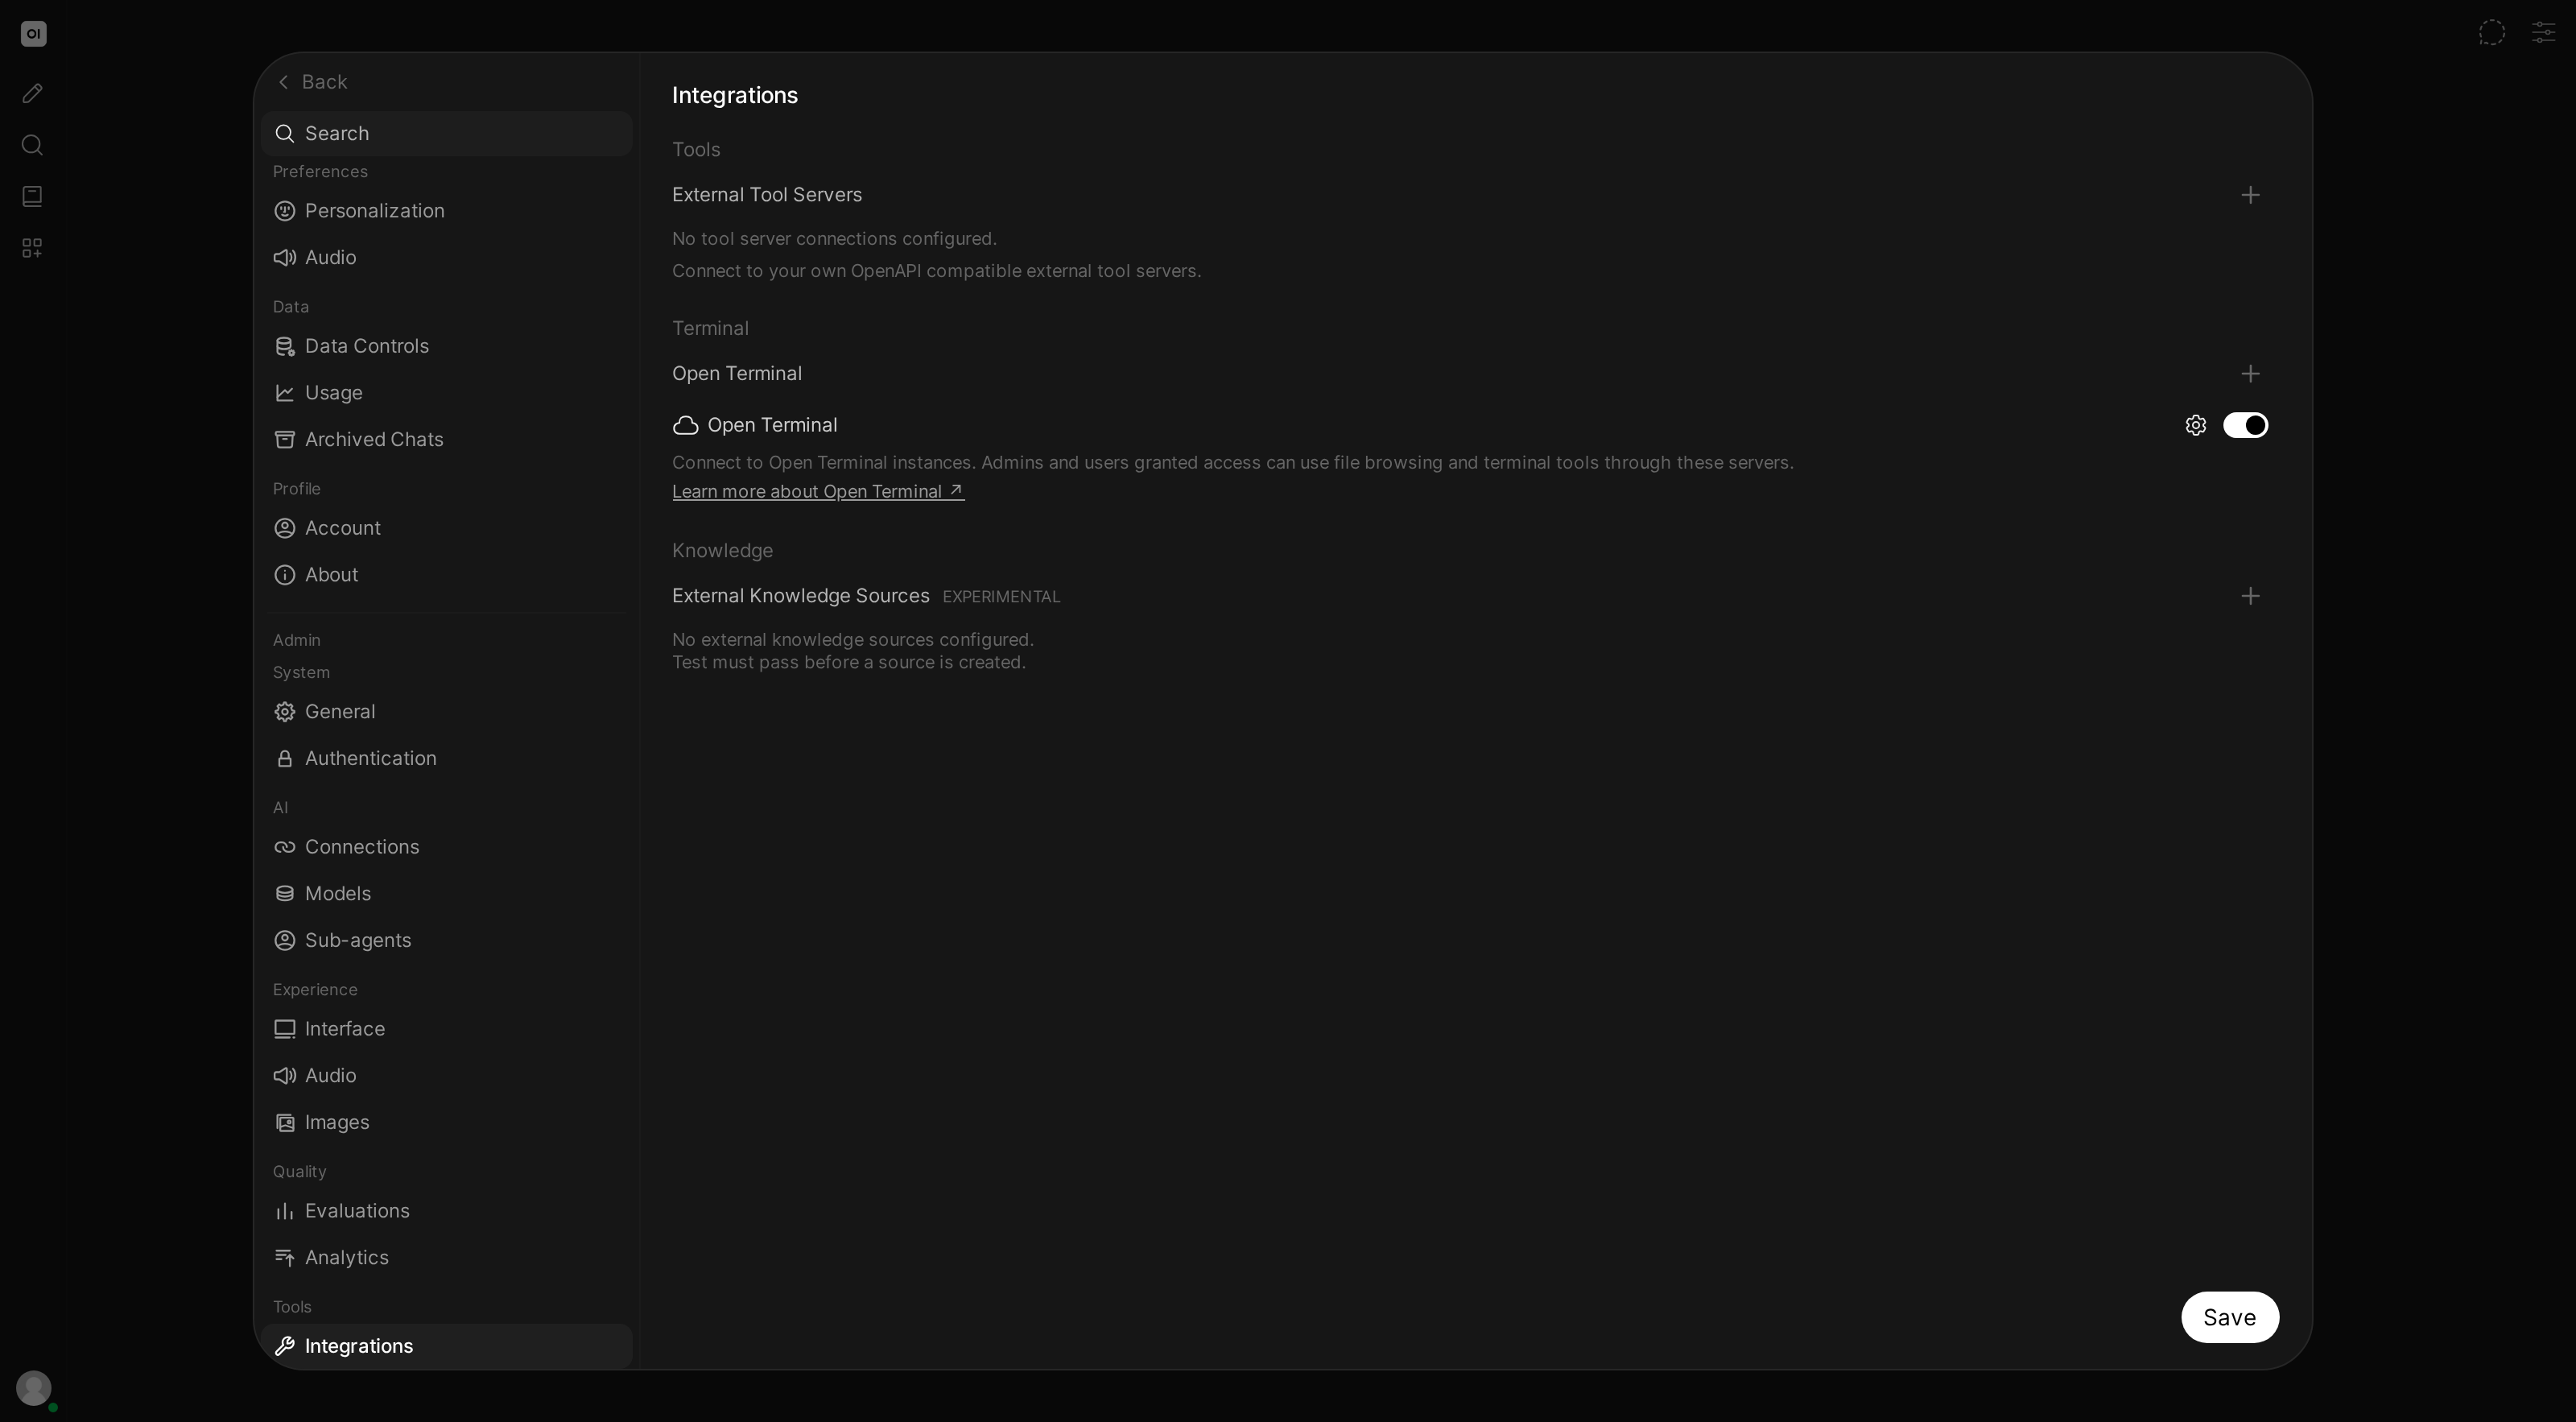
Open Terminal has its own section under Integrations. Don't add it under "External Tools" or "Tool Servers". Using the dedicated section gives you the built-in file browser and terminal sidebar.
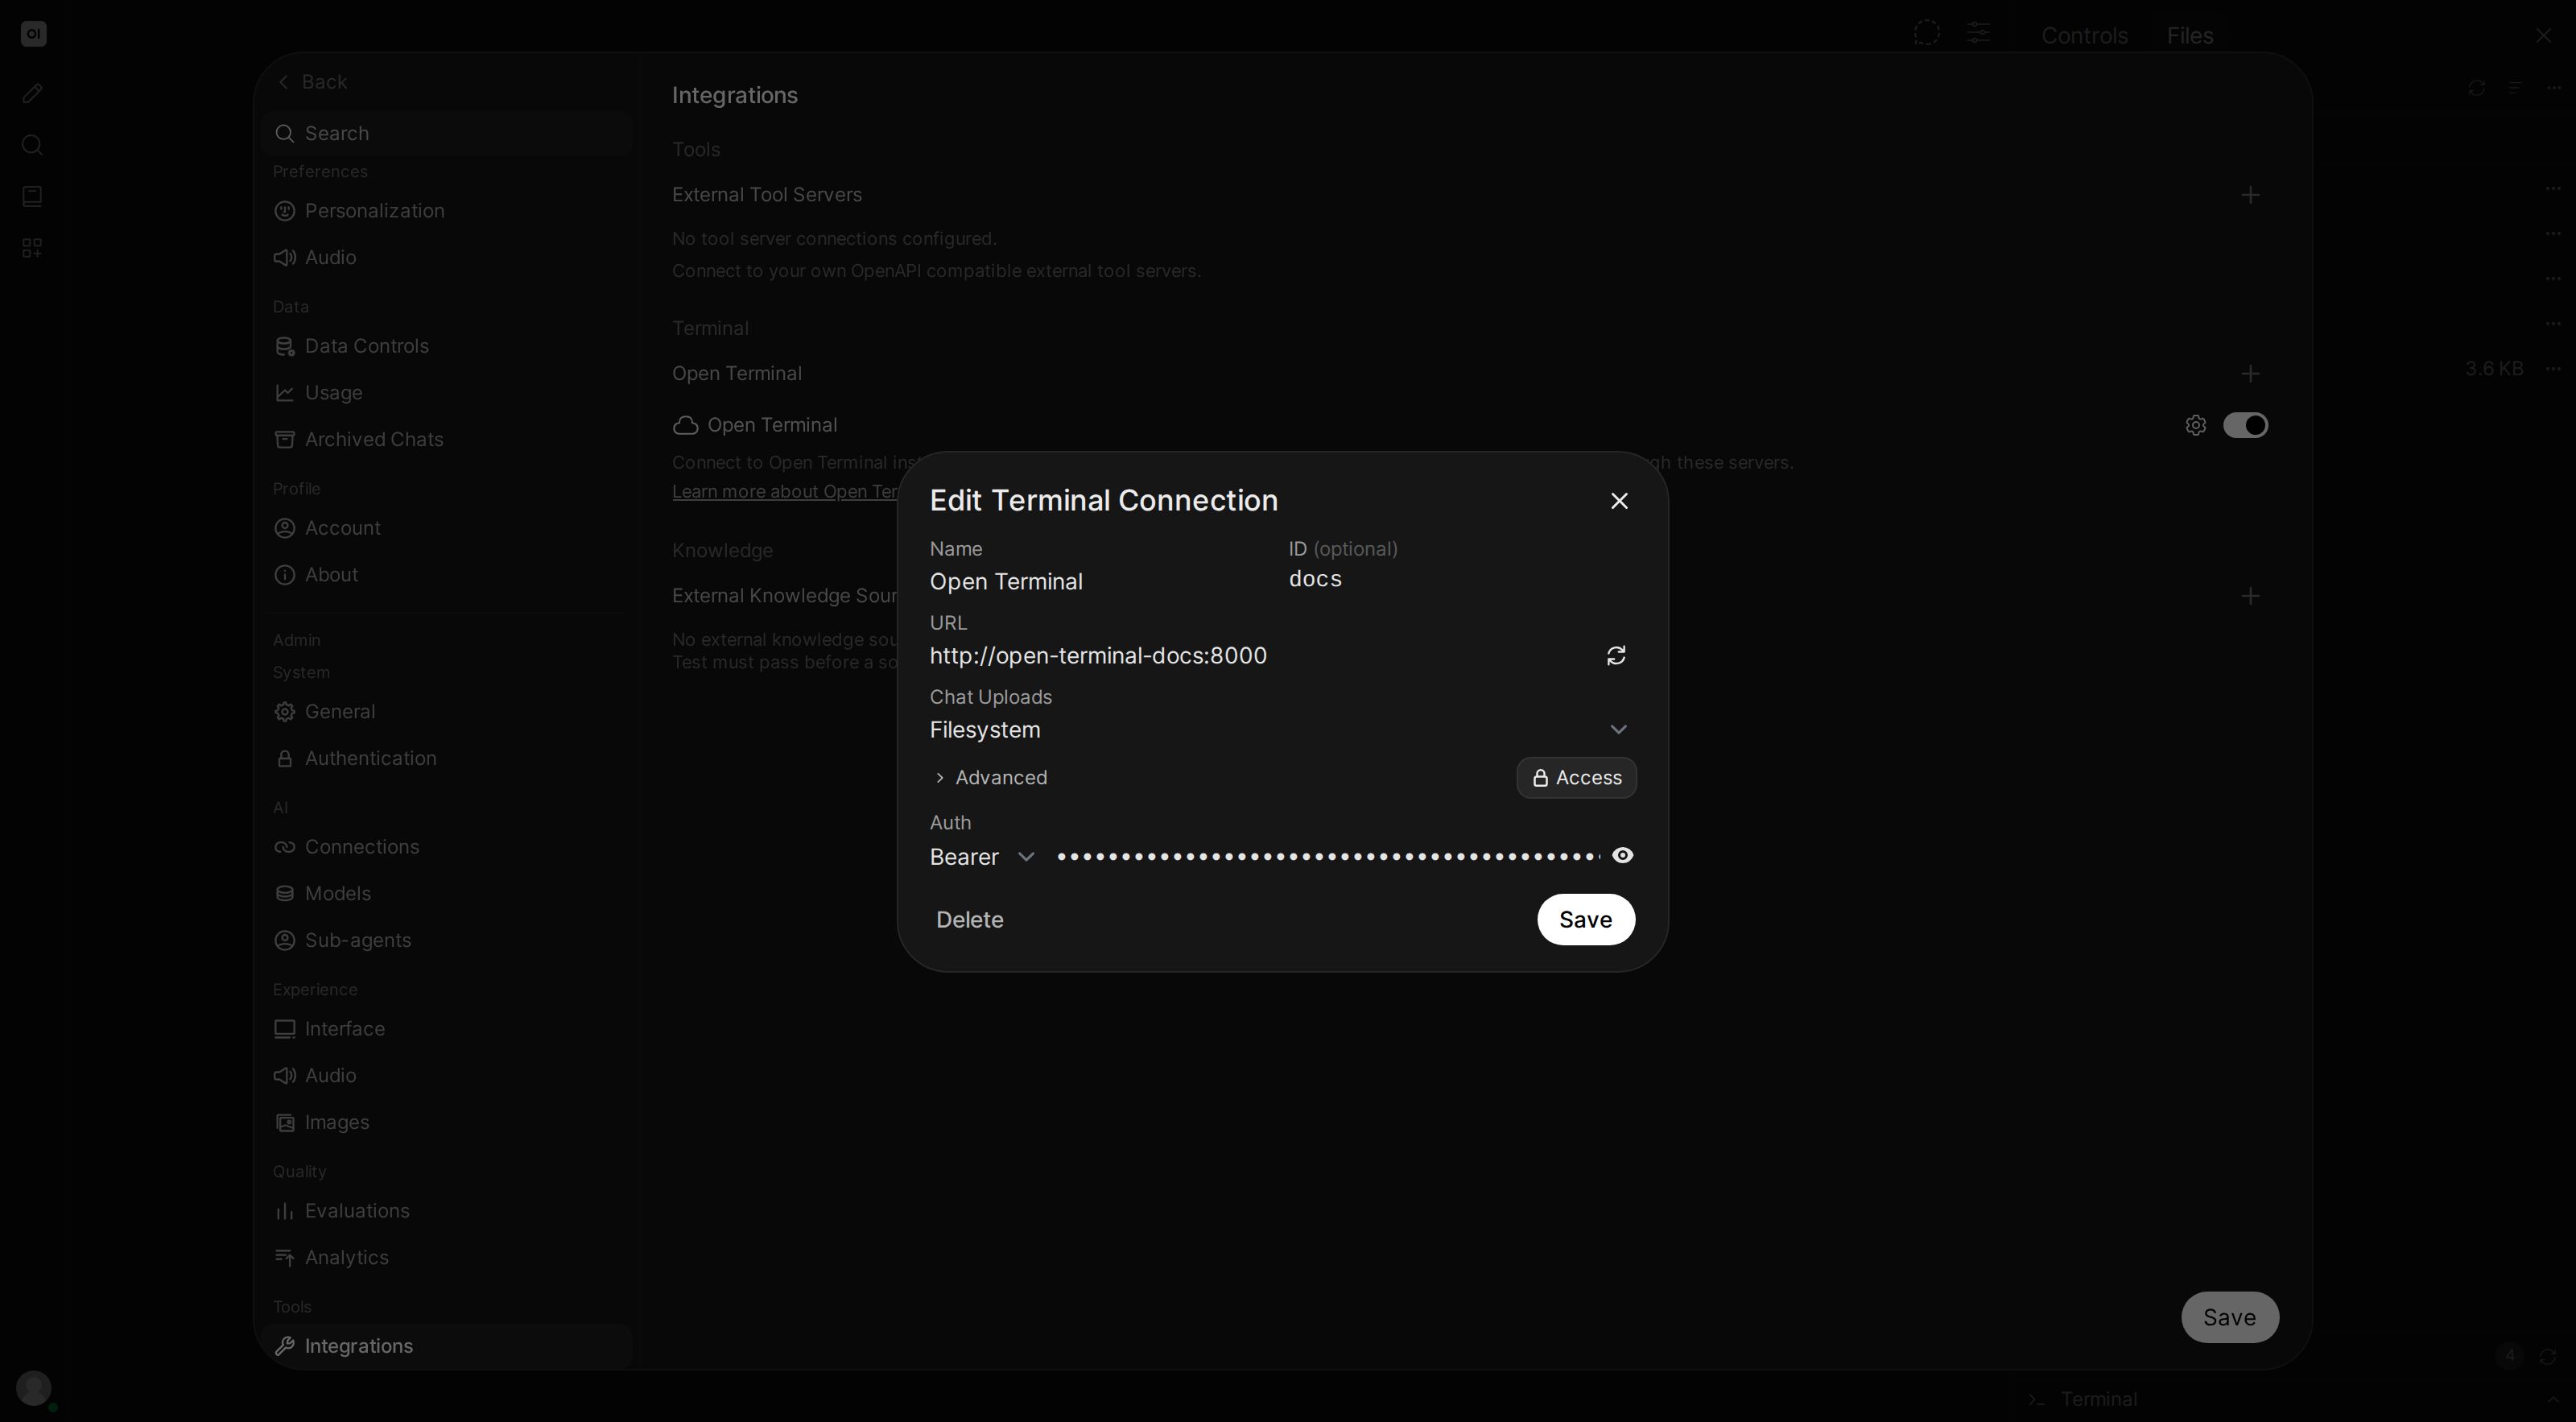
4. Click + and fill in the details
| Field | What to enter |
|---|---|
| URL | http://localhost:8000 (or http://open-terminal:8000 if using Docker Compose) |
| API Key | The password you chose during installation |
| Auth Type | Leave as Bearer (the default) |
| Chat Uploads | Leave as Default. Chat Uploads covers what Filesystem changes |
| Working Directory Context | Under Advanced, on by default. Working Directory Context covers when to turn it off |
| User Shell Tools | Under Advanced. Leave as Automatic. User Shell Tools covers what Always Include changes |
| Forward cookies | Under Advanced, off by default. Only turn it on for a terminal server that authenticates by cookie, since every cookie the browser holds for your Open WebUI domain travels with the request |
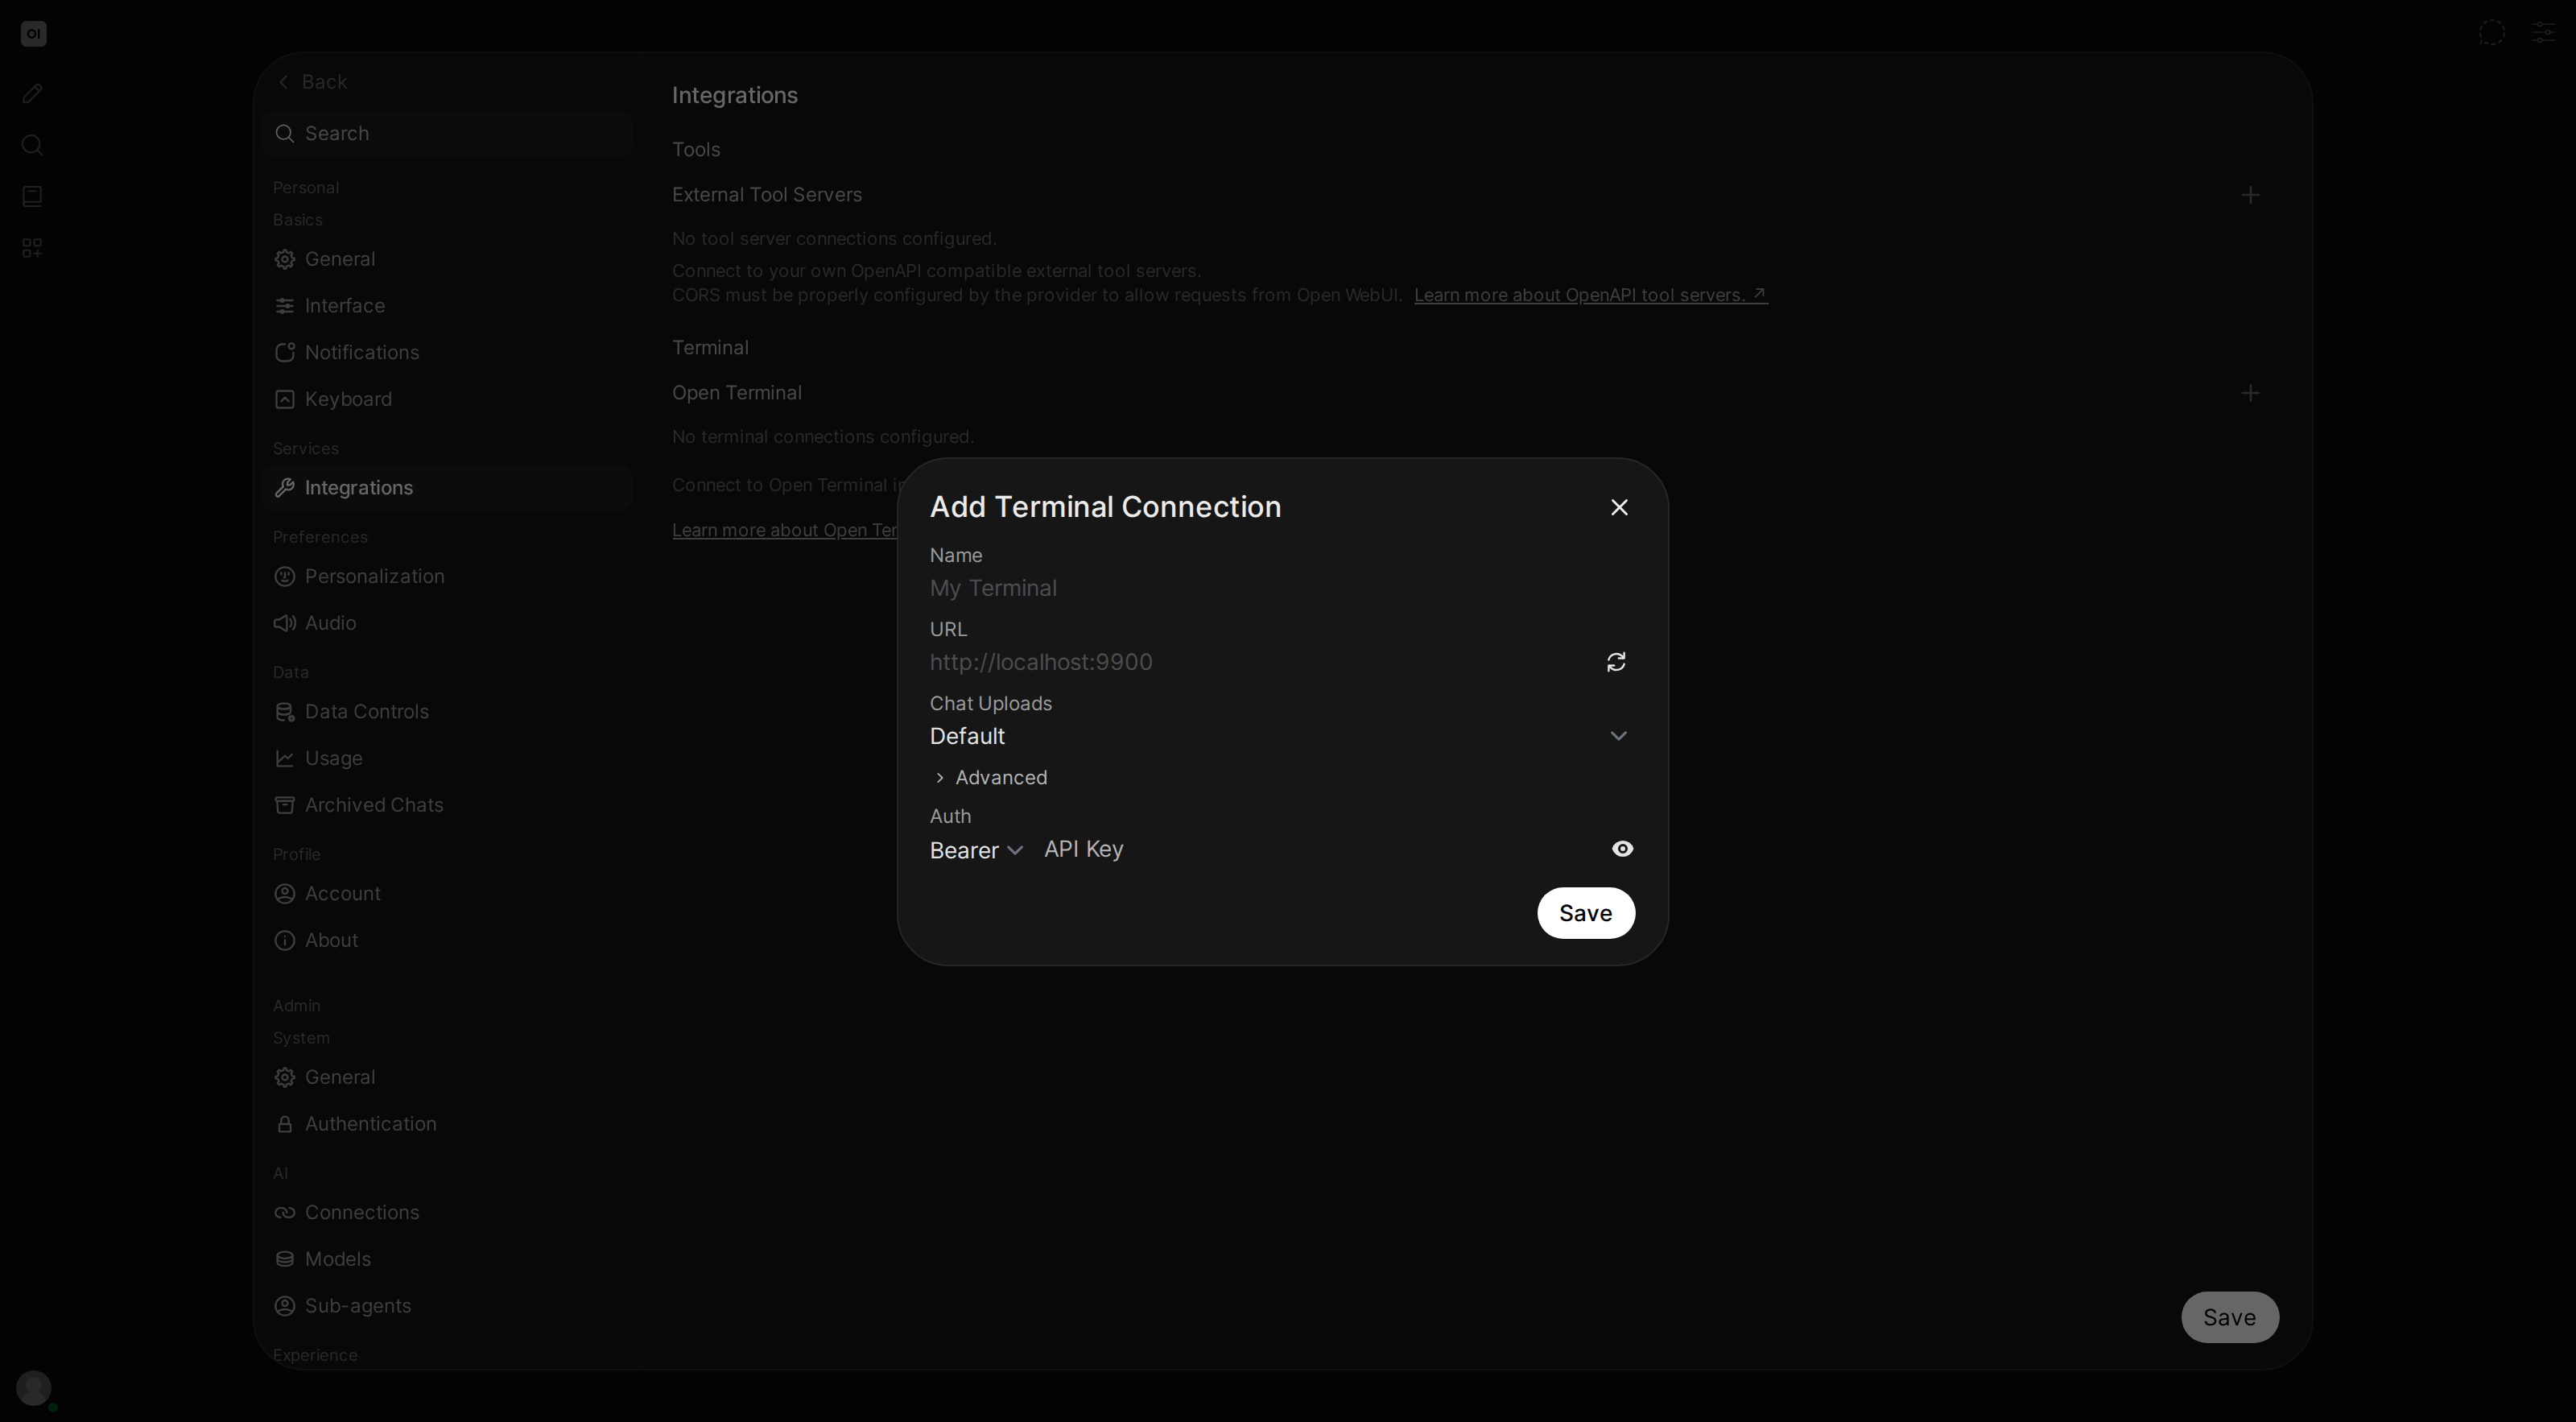
5. Save
Click Save. The connection appears under Open Terminal with its toggle switched on.
6. (Optional) Restrict access to specific groups
Limit terminal access to specific user groups via the access control button.
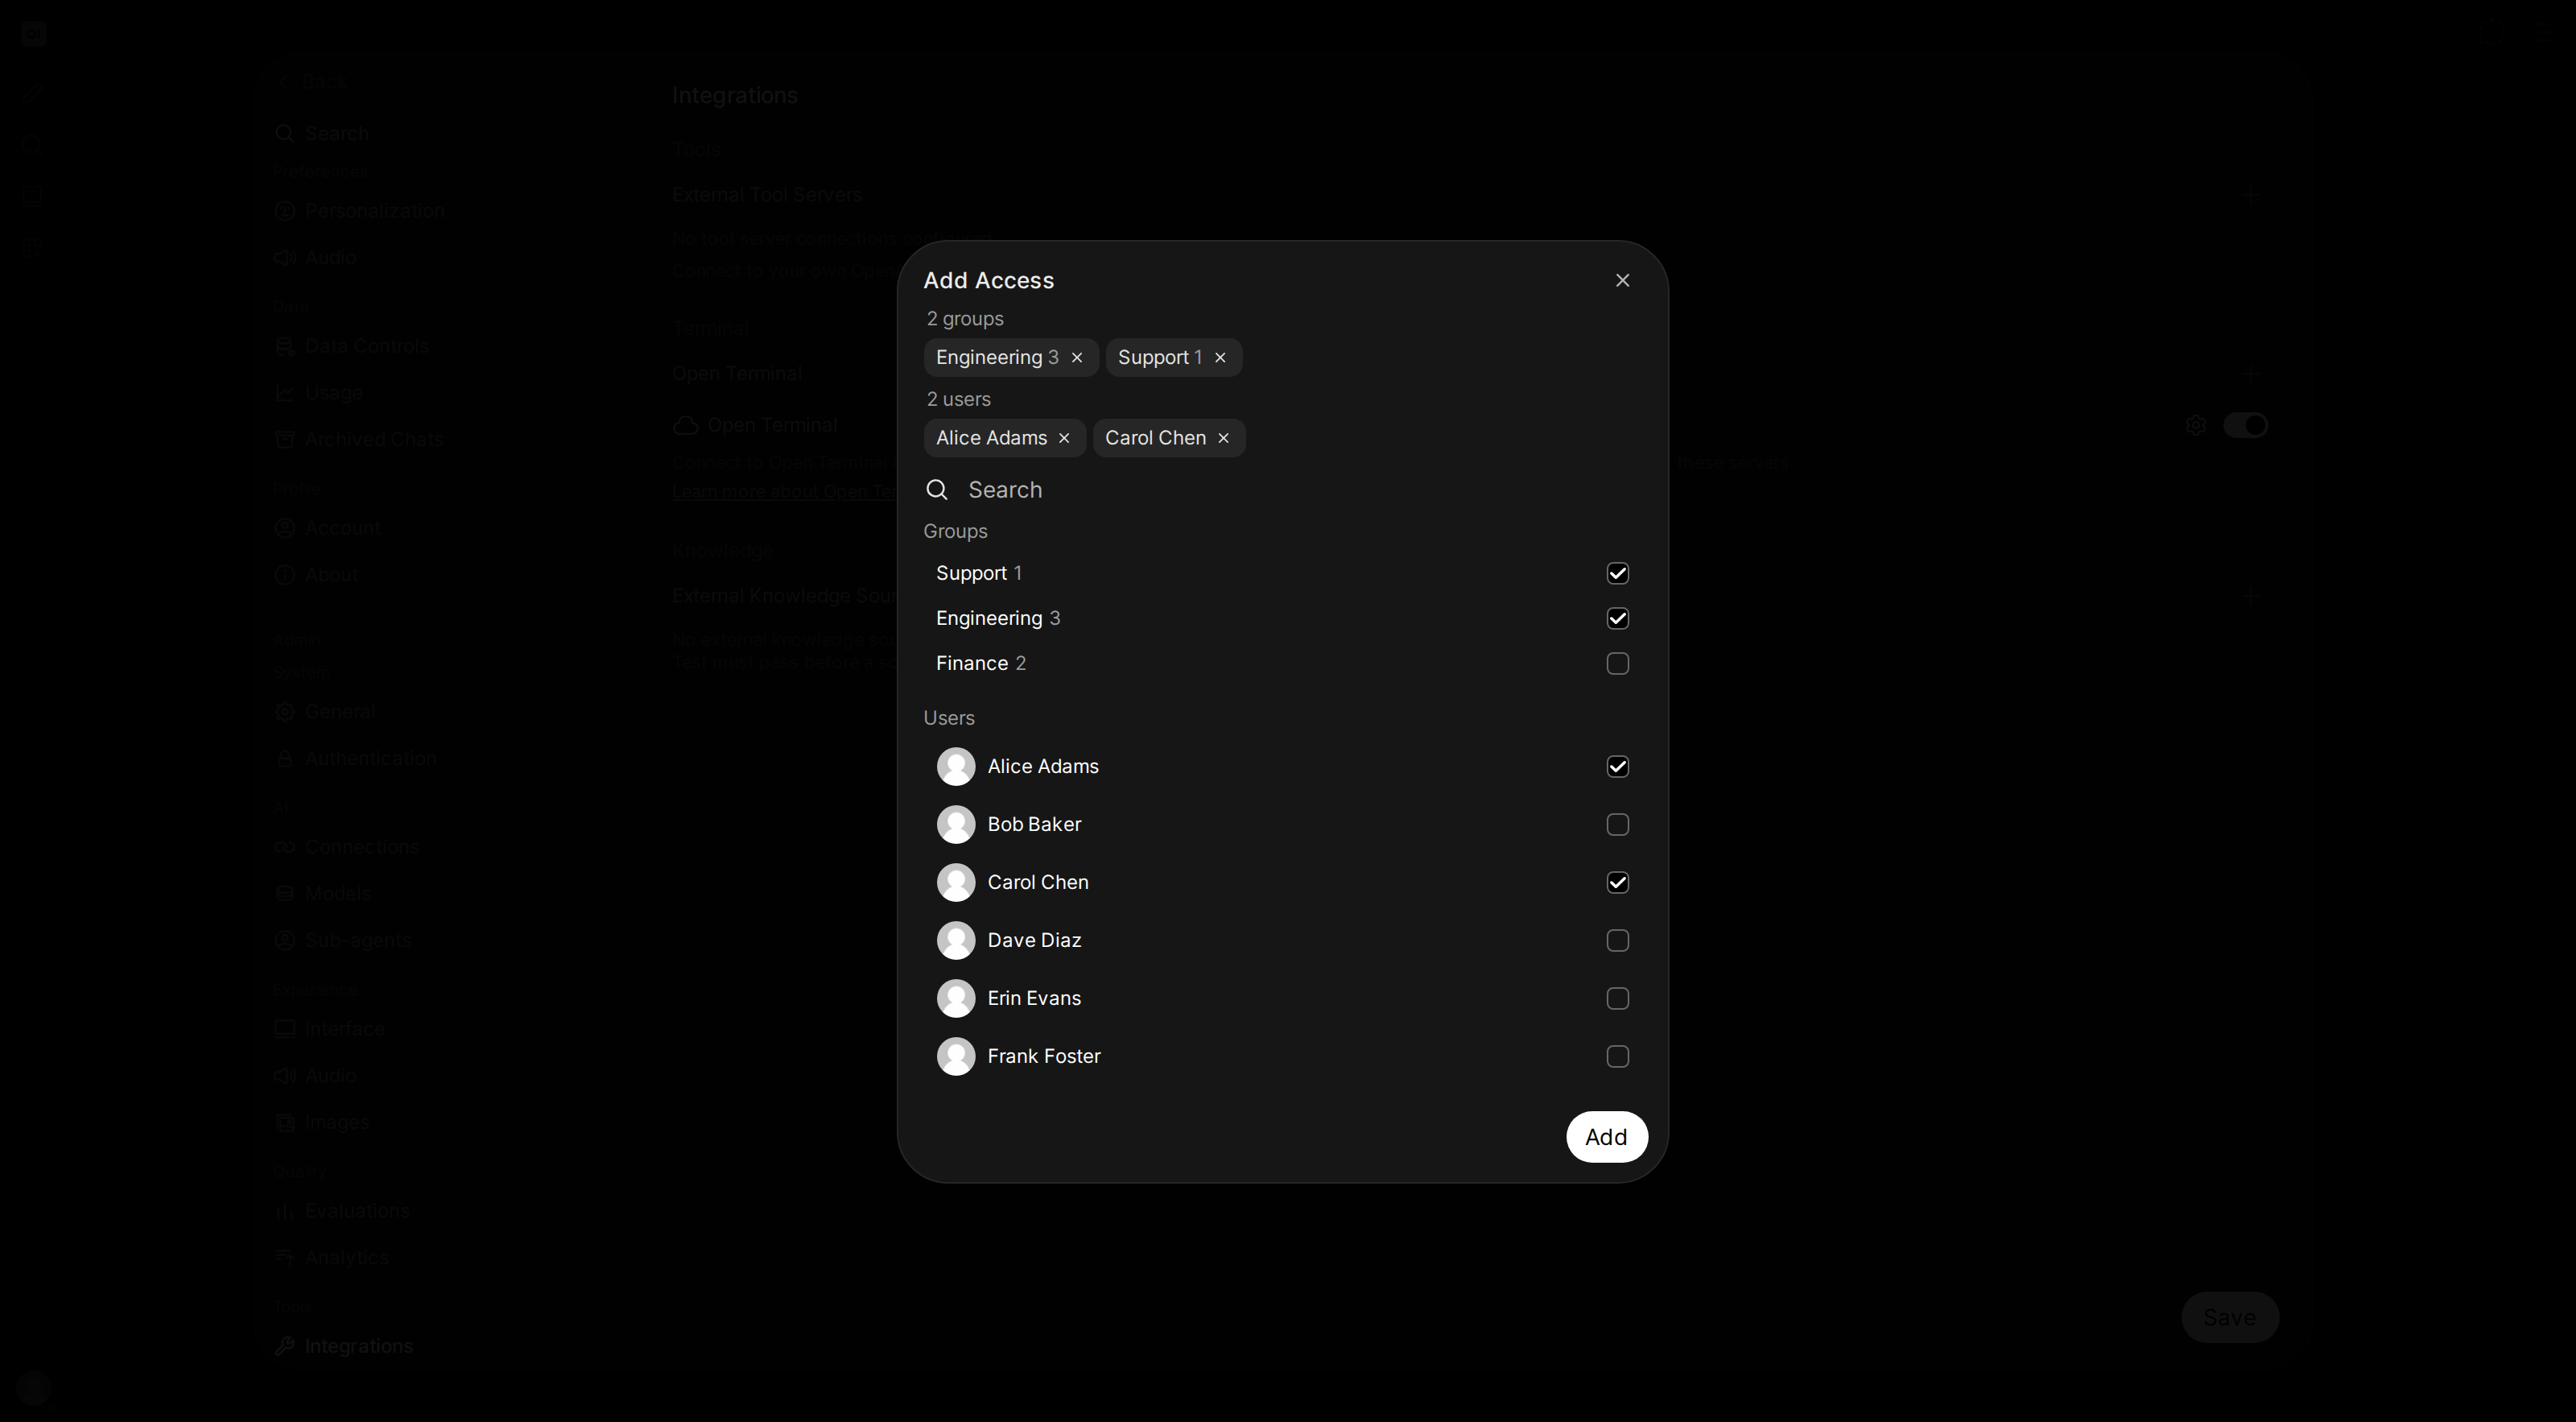
A connection Open WebUI has detected as a Terminals orchestrator gets an extra Orchestrator > Terminal Contexts section, where you decide whether the terminal is offered in chats and in automations, and whether everything shares one workspace or each saved chat or automation gets its own. See Terminal Contexts. A direct Open Terminal connection has no such setting and is always available in both.
The same section carries a Policy block that takes environment variables for the terminals the orchestrator starts. That is where you set OPEN_TERMINAL_SYSTEM_PROMPT to replace the generated system prompt with your own, along with any other environment variable those terminals should run with. See System Prompts for the template placeholders.
7. Select a terminal in chat
In the chat input area, click the terminal button (cloud icon ☁). Your admin-configured terminals appear under System. Select one to activate it for the conversation.
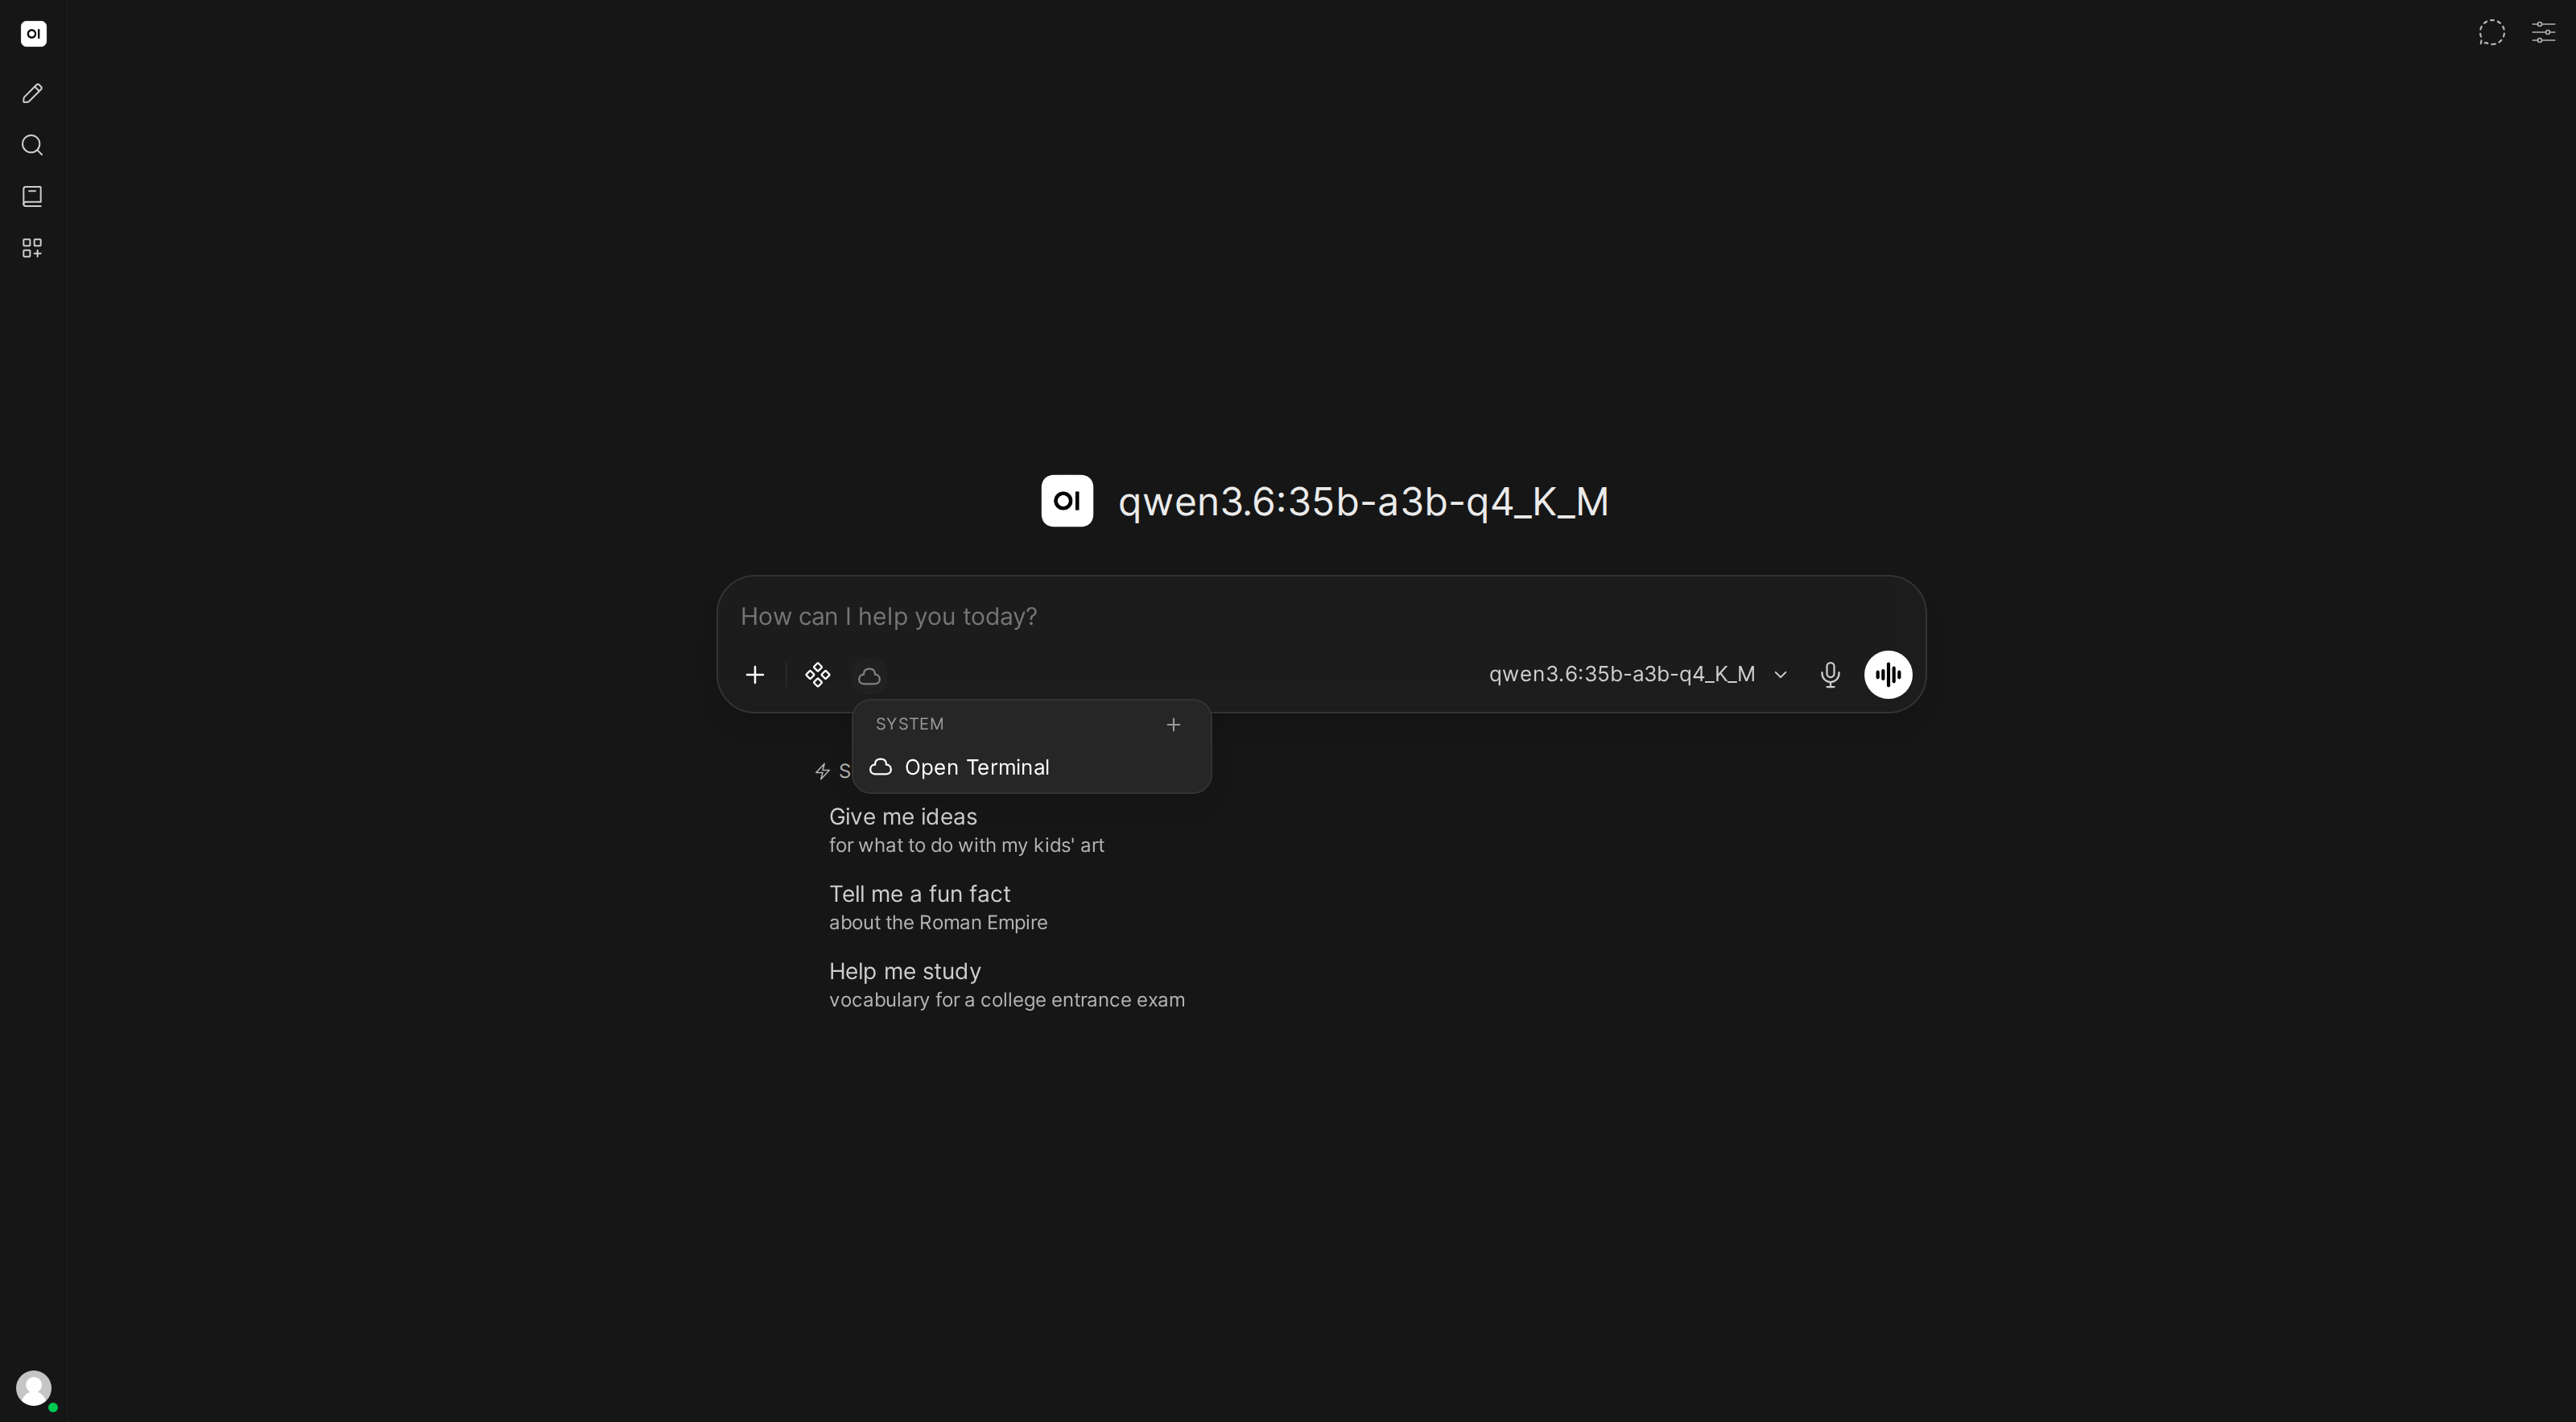
The selected terminal name appears next to the cloud icon. The AI can now execute commands, read files, and run code through it.
8. Enable native function calling
Native function calling is the default tool-calling mode as of v0.10.0, so it is already active for new models. The only thing to check is that the model was not switched to Legacy:
- Go to Workspace → Models
- Click the edit button on the model you're using
- Make sure Function Calling is set to Native (the default), not Legacy
- Save
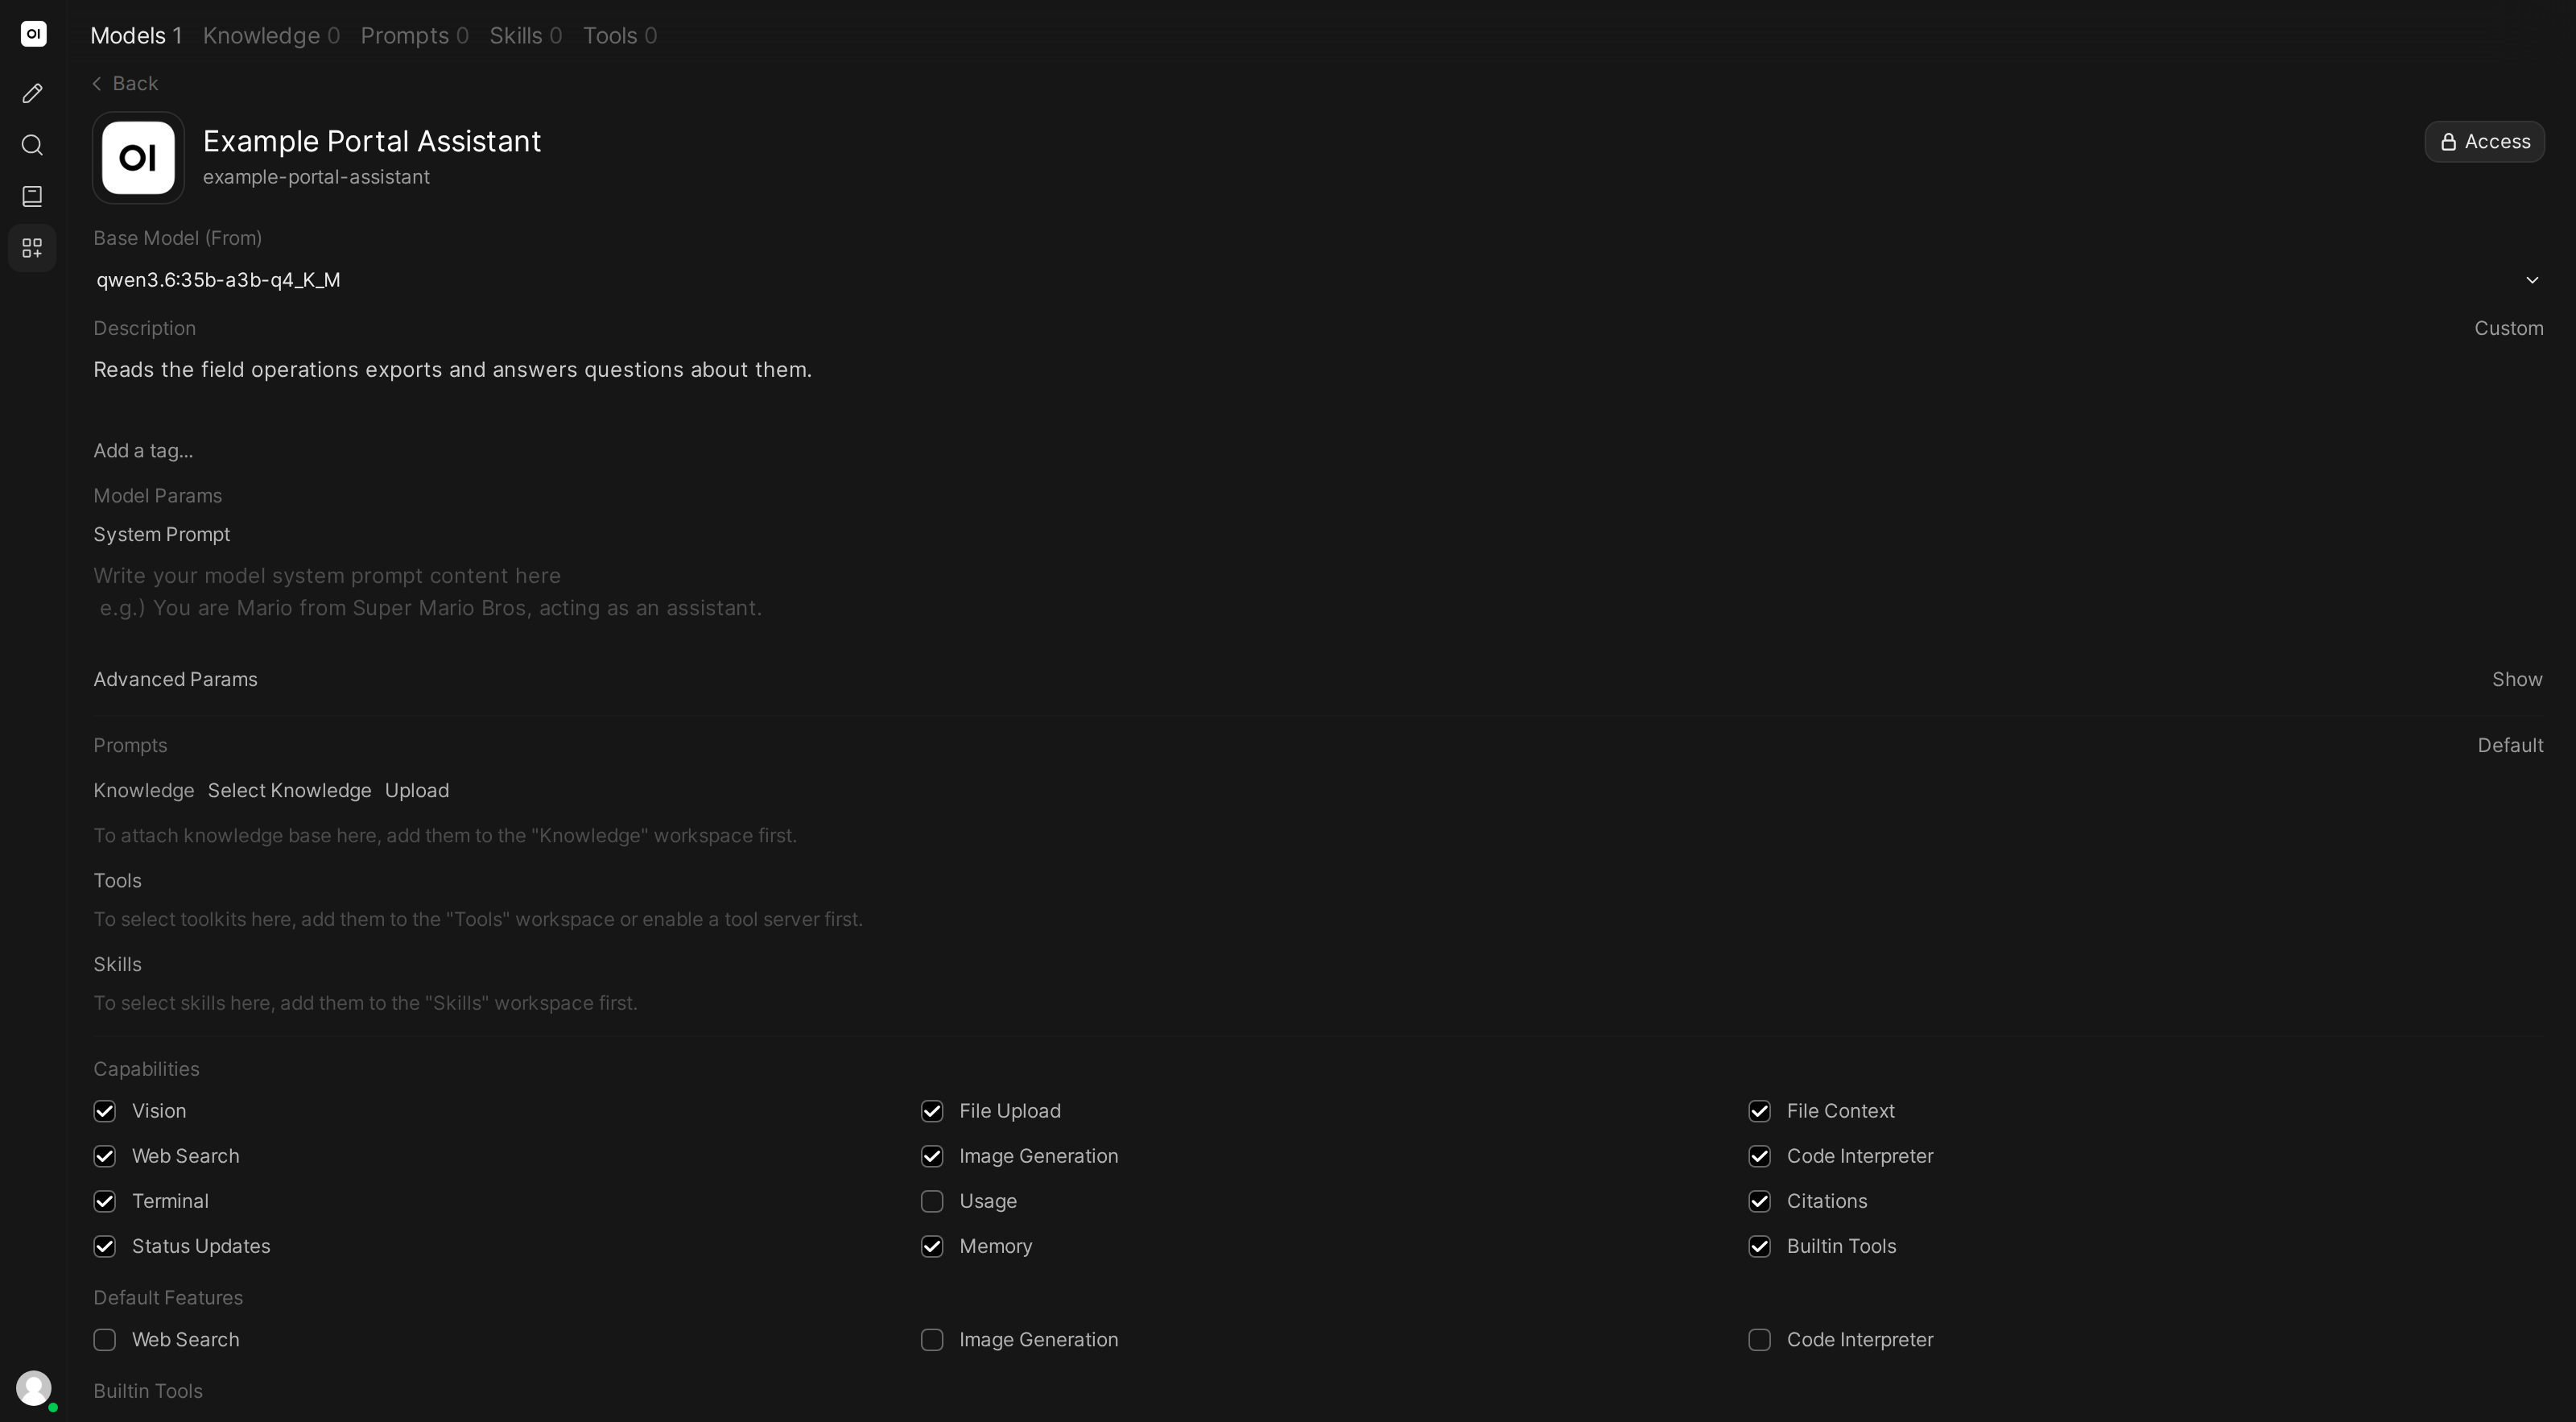
If the model is set to Legacy, Open WebUI falls back to prompt-based tool calling instead of the provider's structured tool-call format. That is less reliable and may not trigger terminal commands at all. Native (the default) is recommended.
Not all models are equally capable with tools. Multi-step terminal workflows are the most demanding agentic use case in Open WebUI, so this is one place where a top-tier model genuinely pays off — GPT-5.6 Sol, Claude Opus 5, or Gemini 3.5 Pro. A current mid-tier model (GPT-5.6 Terra, Claude Sonnet 5, Gemini 3.6 Flash, MiniMax M3) is the practical minimum. Older or very small models may fail to invoke tools or produce malformed tool calls. If results are poor, try a more capable model.
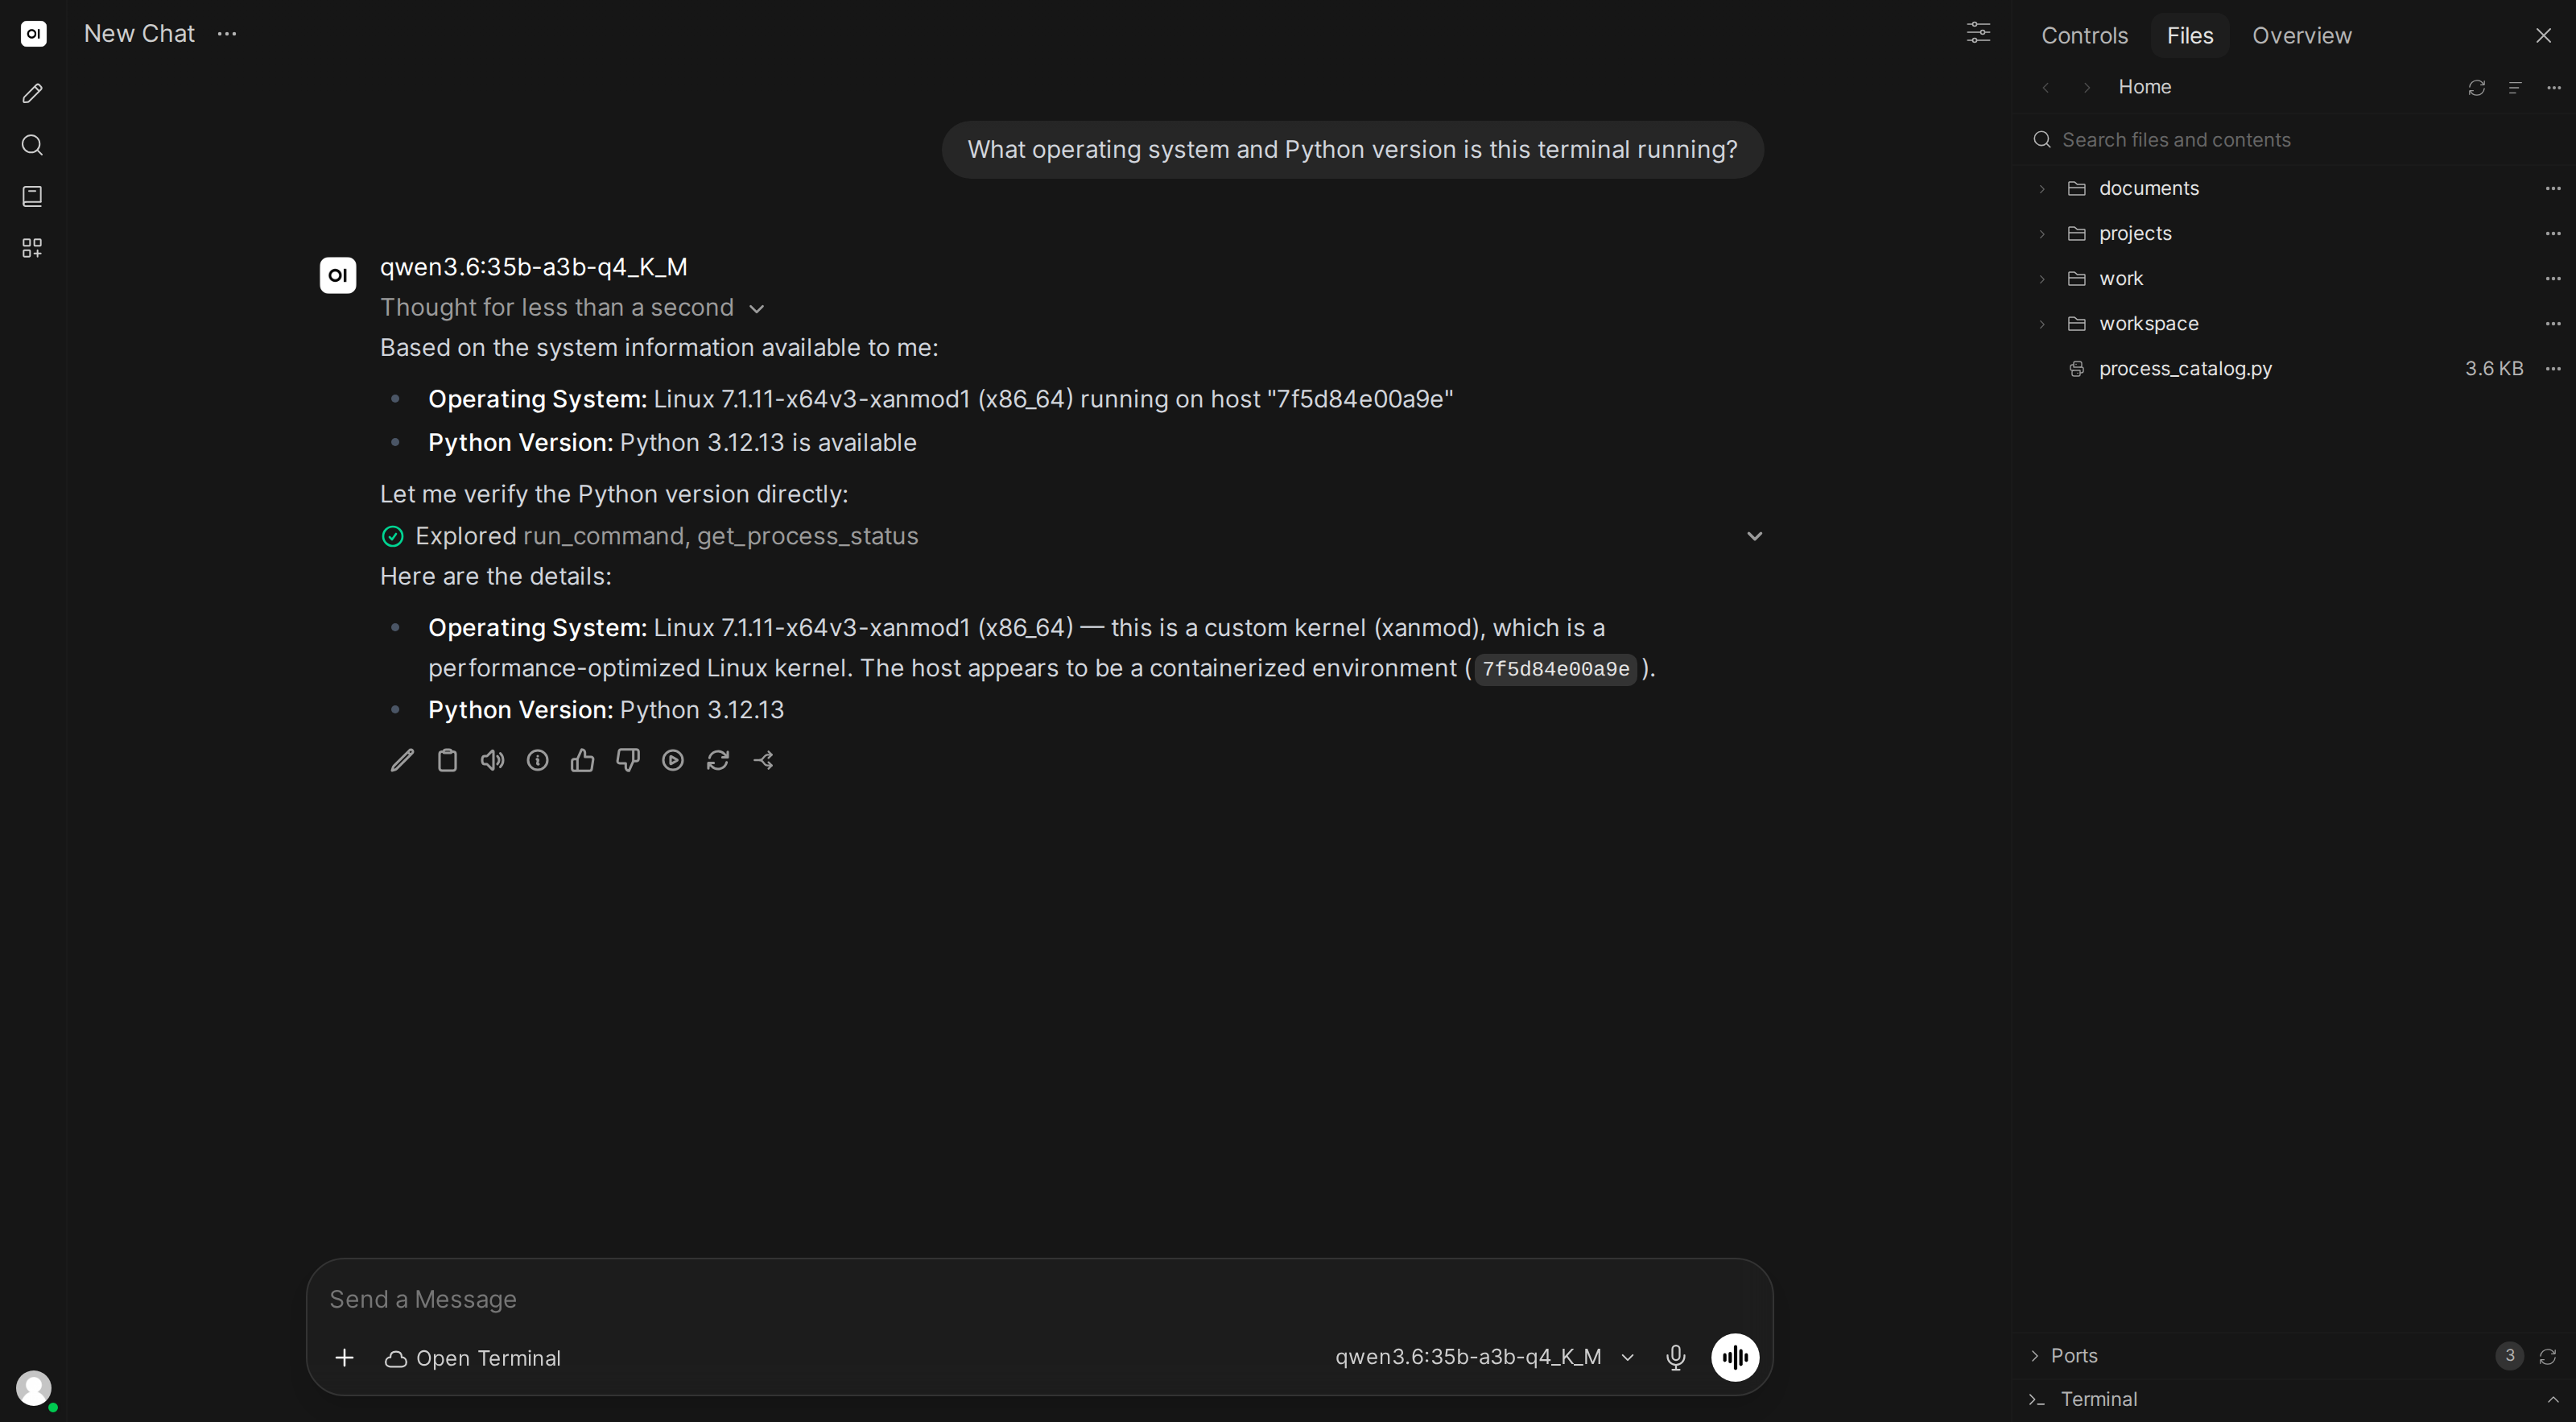
9. Try it out
Ask your AI something like:
"What operating system are you running on?"
The AI should use Open Terminal to run a command and tell you the answer.
For Docker deployments, you can configure terminal connections automatically using the TERMINAL_SERVER_CONNECTIONS environment variable, which is useful when you want everything set up at startup without manual steps.
Personal Settings (testing only)
Adding a terminal connection via personal Settings sends the API key to your browser and routes requests directly from it. This is fine for quick testing, but for anything beyond that, use Admin Settings instead. It's more secure and works for all users automatically.
If you need to test a connection without admin access, you can add one from the Personal part of settings, under Services, at Integrations → Open Terminal. The same URL and API key fields apply, and the connection is yours alone rather than the instance's.
Chat Uploads
Chat Uploads on the connection form decides where a file attached in the chat input goes while that terminal is selected.
Default uploads the file to Open WebUI, extracts its text and hands the model the contents to read, through retrieval or in full depending on the chat's settings. It is what a connection nobody has touched does, and what happens with no terminal selected at all.
Filesystem writes the file into the terminal. It lands in the terminal's current working directory, the same place the file browser is showing, and appears there straight away. Nothing is stored in Open WebUI, no text is extracted and no retrieval runs, so the model never receives the contents. It receives the path and opens the file with the terminal's own tools, the way it reads anything else in the workspace.
A zip archive, an SQLite database, a video file, an export far larger than a context window: text extraction has little to offer for any of them, and a shell handles all of them. Attaching one this way puts it where the commands the model runs can reach it.
Four things change with it:
- The model no longer needs to support file upload. With
Default, attaching a file while a model without that capability is selected reports "Model(s) do not support file upload" and nothing uploads. WithFilesystemthe file never reaches the model as an attachment, so that check does not run. - The model is told the path only when it can act on it. Open WebUI passes the paths of attached files to the model alongside the message when the model is using native function calling in a saved conversation. Set the model to Legacy function calling, or turn its Builtin Tools capability off, and the file still reaches the terminal while the model is left without its location.
- Images go the same way. An image attached to a saved conversation is written to the working directory rather than passed to the model as a picture. Open WebUI still checks it against the selected models' image support first, so a model with no vision support turns it away at the input.
- Upload limits still apply. The maximum file size and the maximum number of attachments configured for Open WebUI are both checked before anything is sent, so
Filesystemdoes not lift them.
The field is on every terminal connection, the ones an administrator adds and the ones you add under your own settings.
Working Directory Context
Working Directory Context is under Advanced on connections an administrator adds. It is on by default. While it is on, Open WebUI asks the terminal for its current working directory on every message and writes it into the instructions of the command tool, so the model knows where its commands run.
Tool instructions are part of the cached prefix of every request, so each change of directory starts the provider's prompt cache over. Turn the switch off to keep the instructions identical from message to message.
User Shell Tools
The Shell tab of the terminal pane is your own shell. Two tools let the model read that shell's recent output and send input to it. User Shell Tools, under Advanced, decides when the model gets them:
Automatic(default): only while your shell for that terminal is open in the chat you are sending from. Before each message, Open WebUI asks your browser whether it is.Always Include: on every message, open shell or not. The tool list stays the same from message to message, which keeps the prompt cache intact when you open and close the shell.
Automations and sub-agents never get the two tools. The field is on every terminal connection, the ones an administrator adds and the ones you add under your own settings.
AGENTS.md
When a terminal is selected in the chat, Open WebUI reads AGENTS.md from the home folder of the terminal's user on every message. Its content is added to the conversation as a user message just before the first user message, so the model gets your standing instructions for that workspace. Edits to the file apply from the next message. Windows home folders work too.
A file larger than 32 KiB is skipped, and so is a read that takes longer than 5 seconds. A terminal an admin configured is read by the Open WebUI server. A terminal a user added in their own settings is read through that user's browser, so the chat tab has to stay open.
Troubleshooting
"Connection failed" or timeout
This almost always means Open WebUI can't reach Open Terminal over the network. What URL to use depends on your setup:
| Your setup | URL to use |
|---|---|
| Docker Compose (recommended) | http://open-terminal:8000 |
| Separate Docker containers | http://host.docker.internal:8000 |
| Both on same machine, no Docker | http://localhost:8000 |
| Open Terminal on another machine | http://that-machines-ip:8000 |
Compose gives the containers a shared network and resolves the service name, so the service name is the address. Separate containers have no shared name to resolve, so the request goes back out through the host. A terminal on another machine is reached the way any other host is.
localhost only works when neither side is containerised, because inside a container localhost is that container rather than the machine it runs on. That is the most common cause of the timeout this section is about.
Run this command to see if Open WebUI can reach Open Terminal:
docker exec open-webui curl -s http://open-terminal:8000/healthIf it prints {"status": "ok"}, the connection works. If it errors, the containers can't see each other.
Nothing happens when you save a new connection
Adding a connection works whether you reach Open WebUI over https:// or over plain http://. On older versions the Add Terminal Connection dialog stayed open and saved nothing when the interface was reached over plain http:// at a network address, a LAN IP for example, rather than on localhost. Browsers withhold the identifier generator a new connection needs on origins they do not treat as secure, and a new connection gets its identifier automatically when you leave the optional ID field blank. Typing an ID of your own works around it, because then there is nothing to generate.
Only creating a connection from Settings > Admin > Integrations was affected. Editing, enabling, disabling or deleting an existing one, adding one under your own Settings > Integrations and connections shipped in TERMINAL_SERVER_CONNECTIONS all worked regardless.
Terminal shows up but AI doesn't use it
Make sure:
- The toggle switch next to the connection is turned on. Turning it off takes the terminal server out of service completely: the model is not given its tools, the terminal and file browser refuse to connect, and any proxied request to it is rejected. It is a working off switch, not just a hint to the model, so use it to retire a server without deleting the connection.
- You've refreshed the page after adding the connection
- Your model supports tool calling (most modern models do)
Terminal is missing from the picker
Only terminals the user is allowed to use are listed, so check the connection's access grants and that the connection is enabled.
For an orchestrator connection, Terminal Contexts also decides this. A terminal whose Chat context is Off never appears in a chat, and one set to Per chat is hidden in temporary chats because it needs a saved conversation to attach to.
Wrong API key
If you see "unauthorized" or "invalid key":
- Double-check the key matches what you set during installation
- If you forgot it, run
docker logs open-terminaland look for theAPI key:line