Lumenfall
warning
This tutorial is a community contribution and is not supported by the Open WebUI team. It serves only as a demonstration on how to customize Open WebUI for your specific use case. Want to contribute? Check out the contributing tutorial.
Open WebUI also supports image generation through Lumenfall, an AI media gateway that unifies all popular image models on many different providers into an OpenAI-compatible API. Free models are available.
Initial Setup
- Create a free account at lumenfall.ai.
- Generate an API key from your dashboard.
Configuring Image Generation
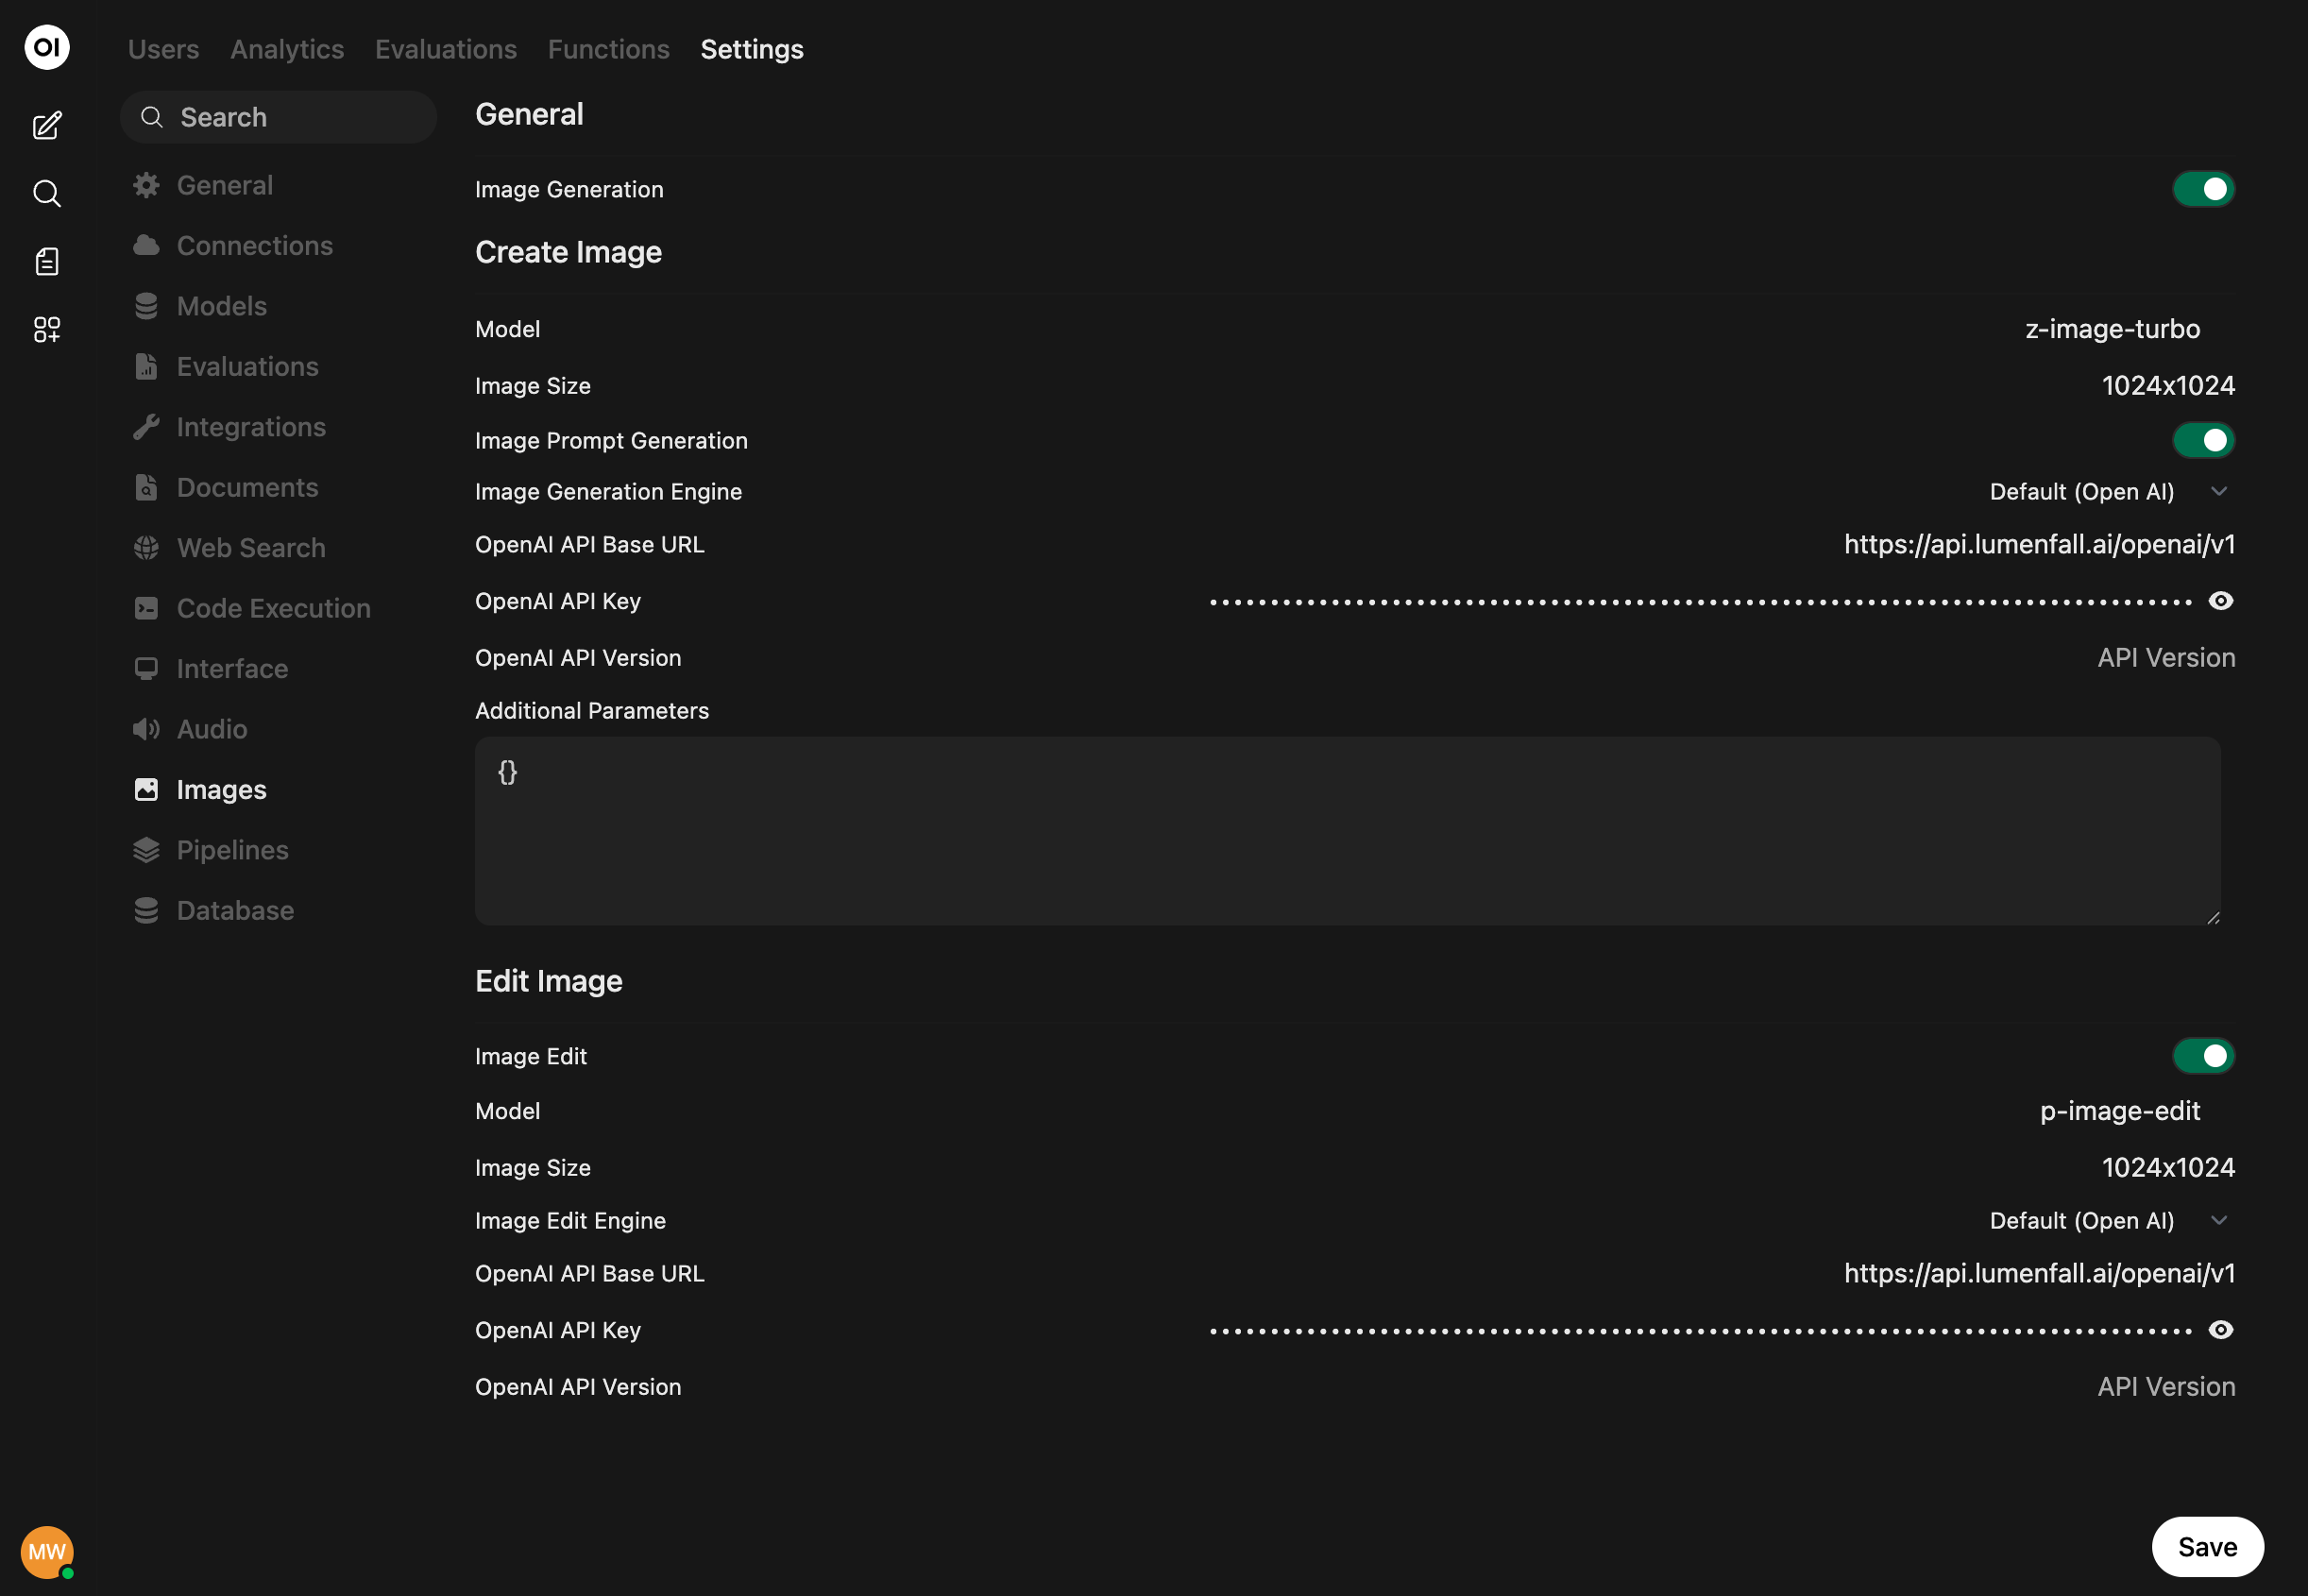
- In Open WebUI, navigate to the Settings > Admin > Images menu.
- Set the
Image Generation Enginefield toDefault (Open AI)(Lumenfall uses the same syntax as OpenAI). - Change the
API Base URLtohttps://api.lumenfall.ai/openai/v1. - Enter your Lumenfall API key.
- The API version can be left blank.
- Enter the model you wish to use. For example:
gemini-3.1-flash-image,gpt-image-2, orflux.2-max. See all available models at lumenfall.ai/models. - Set the image size (e.g.
1024x1024). Supported sizes depend on the model - if unsure,1024x1024works with most models.
Configuring Image Editing
Lumenfall also supports image editing through the same API:
- On the same Images settings page, scroll to the Edit Image section.
- Toggle Image Edit to on.
- Set the
Image Edit EnginetoDefault (Open AI). - Enter the same
API Base URL:https://api.lumenfall.ai/openai/v1. - Enter your Lumenfall API key.
- Choose a model that supports editing (e.g.
gpt-image-2).
For more details, see the Lumenfall documentation.